本文介绍如何在Linux系统中利用Swagger提升API开发效率。通过以下步骤,您可以快速搭建并使用Swagger:
第一步:安装Swagger及Swagger UI
首先,需要在您的Linux系统上安装Swagger和Swagger UI。您可以使用以下命令:
# 安装Swagger
git clone https://github.com/go-swagger/go-swagger.git
cd go-swagger
go install ./cmd/swagger/

# 安装Swagger UI
cd ..
git clone https://github.com/swagger-api/swagger-ui.git
cd swagger-ui
npm install
npm run start
第二步:创建OpenAPI规范文件
接下来,创建一个OpenAPI规范文件(通常为YAML或JSON格式),用于描述您的API。例如,一个名为swagger.yaml的文件:
swagger: '2.0'
info:
  version: 1.0.0
  title: 测试Swagger API文档
  description: 此文档用于测试Swagger API
  contact:
    name: 行百里er
    url: https://mp.weixin.qq.com/mp/profile_ext?action=home&__biz=MzI1MDU1MjkxOQ==
  license:
    name: MIT
    url: http://opensource.org/licenses/MIT
schemes:
  - http
host: traveler100.com
basePath: /api/v1
paths:
  /user/{mobile}:
    get:
      summary: 获取用户信息 (根据手机号)
      description: 根据提供的手机号获取用户信息
      parameters:
        - name: mobile
          in: path
          required: true
          description: 用户手机号
          type: string
      responses:
        '200':
          description: 成功
          schema:
            type: object
            properties:
              username:
                type: string
              password:
type: string第三步:生成API文档
使用Swagger工具生成API文档:

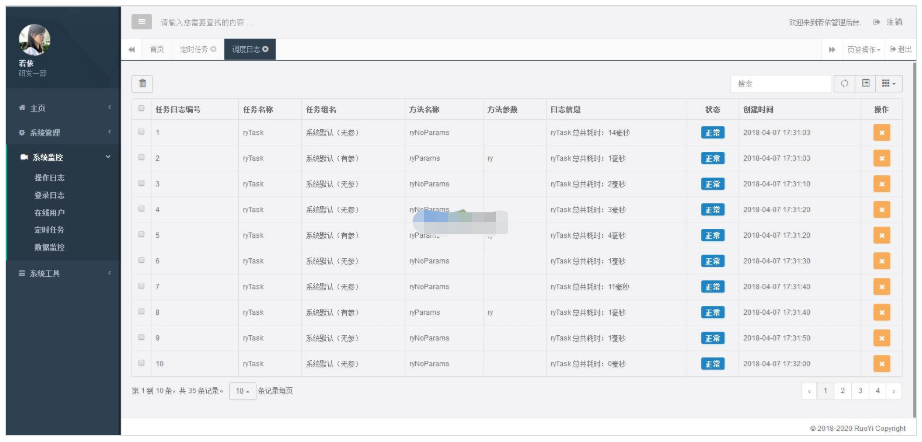
一直想做一款后台管理系统,看了很多优秀的开源项目但是发现没有合适自己的。于是利用空闲休息时间开始自己写一套后台系统。如此有了若依管理系统。她可以用于所有的Web应用程序,如网站管理后台,网站会员中心,CMS,CRM,OA。所有前端后台代码封装过后十分精简易上手,出错效率低。同时支持移动客户端访问。系统会陆续更新一些实用功能。 您是否在找一套合适后台管理系统。 您是否在找一套代码易读易懂后台
 885
885

# 生成规范文件
swagger generate spec -o ./swagger.json

# 启动Swagger服务
swagger serve --no-open ./swagger.json
第四步:Spring Boot项目集成 (可选)
如果您使用Spring Boot框架,可以方便地集成Swagger。在pom.xml中添加依赖:
<dependency>
  <groupId>io.springfox</groupId>
  <artifactId>springfox-swagger2</artifactId>
  <version>2.9.2</version>
</dependency>
<dependency>
  <groupId>io.springfox</groupId>
  <artifactId>springfox-swagger-ui</artifactId>
  <version>2.9.2</version>
</dependency>
并在Spring Boot配置类中启用Swagger:
import springfox.documentation.builders.PathSelectors;
import springfox.documentation.builders.RequestHandlerSelectors;
import springfox.documentation.spi.DocumentationType;
import springfox.documentation.spring.web.plugins.Docket;
import springfox.documentation.swagger2.annotations.EnableSwagger2;
import org.springframework.context.annotation.Bean;
import org.springframework.context.annotation.Configuration;

@Configuration
@EnableSwagger2
public class SwaggerConfig {
    @Bean
    public Docket api() {
        return new Docket(DocumentationType.SWAGGER_2)
                .select()
                .apis(RequestHandlerSelectors.basePackage("com.example.demo.controller"))
                .paths(PathSelectors.any())
                .build();
    }
}第五步:实时更新与Swagger UI
通过在代码中添加Swagger注释,实现API文档的实时更新。修改注释后,重新生成规范文件并启动Swagger服务即可。访问http://localhost:8080/swagger-ui.html (端口号可能因环境而异) 使用Swagger UI管理API文档。
通过以上步骤,您可以高效地利用Swagger管理和维护您的API文档。
以上就是如何在Linux系统中利用Swagger优化API开发流程的详细内容,更多请关注php中文网其它相关文章!

每个人都需要一台速度更快、更稳定的 PC。随着时间的推移,垃圾文件、旧注册表数据和不必要的后台进程会占用资源并降低性能。幸运的是,许多工具可以让 Windows 保持平稳运行。

Copyright 2014-2025 https://www.php.cn/ All Rights Reserved | php.cn | 湘ICP备2023035733号