以下是关于 quartz 定时任务(scheduler)的三种实现方式的伪原创文章内容:
Quartz 定时任务(Scheduler)的三种实现方式
一、引入依赖包
首先,需要在项目中引入必要的 JAR 包。这些包包括 Spring 框架和 Quartz 调度器的相关依赖。
<dependency>
    <groupId>org.springframework</groupId>
    <artifactId>spring-context-support</artifactId>
</dependency>
<dependency>
    <groupId>org.quartz-scheduler</groupId>
    <artifactId>quartz</artifactId>
    <version>2.2.1</version>
</dependency>
<dependency>
    <groupId>org.quartz-scheduler</groupId>
    <artifactId>quartz-jobs</artifactId>
    <version>2.2.1</version>
</dependency>二、实现方式一
首先,定义一个实现了 Job 接口的类,用于执行定时任务的具体业务逻辑。
package gentle.test;
<p>import org.quartz.Job;
import org.quartz.JobExecutionContext;
import org.quartz.JobExecutionException;
import org.slf4j.Logger;
import org.slf4j.LoggerFactory;
import org.springframework.stereotype.Service;
import java.util.Date;</p><p>/**</p><ul><li><p>@author silence</p>
                    <div class="aritcle_card">
                        <a class="aritcle_card_img" href="/ai/863">
                            <img src="https://img.php.cn/upload/ai_manual/001/246/273/68b6ce0cd568b995.png" alt="办公小浣熊">
                        </a>
                        <div class="aritcle_card_info">
                            <a href="/ai/863">办公小浣熊</a>
                            <p>办公小浣熊是基于商汤大语言模型的原生数据分析产品,</p>
                            <div class="">
                                <img src="/static/images/card_xiazai.png" alt="办公小浣熊">
                                <span>460</span>
                            </div>
                        </div>
                        <a href="/ai/863" class="aritcle_card_btn">
                            <span>查看详情</span>
                            <img src="/static/images/cardxiayige-3.png" alt="办公小浣熊">
                        </a>
                    </div>
                </li><li><p>@date 2018/7/17 11:37
*/
@Service("show")
public class Show implements Job {
private static Logger _log = LoggerFactory.getLogger(Show.class);</p><p>@Override
public void execute(JobExecutionContext arg0) throws JobExecutionException {
_log.info("\n\n-------------------------------\n " +
"It is running and the time is : " + new Date() +
"\n-------------------------------\n");
}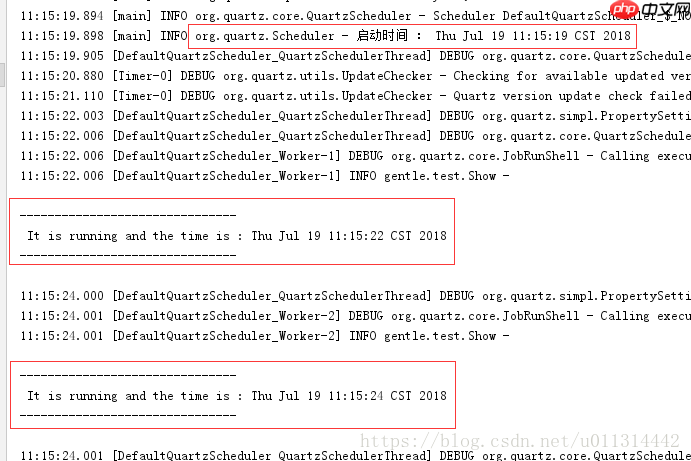
}在 JobDetail jb = JobBuilder.newJob(Show.class) 中,关联业务类。
package gentle.test;</p></li></ul><p>import org.quartz.*;
import org.quartz.impl.StdSchedulerFactory;
import org.slf4j.Logger;
import org.slf4j.LoggerFactory;
import org.springframework.stereotype.Service;
import java.util.Date;</p><p>/**</p><ul><li><p>@author silence</p></li><li><p>@date 2018/7/17 11:36
*/
@Service("schedulerTest")
public class SchedulerTest {
private static Logger _log = LoggerFactory.getLogger(Scheduler.class);</p><p>public static void main(String[] args) {
try {
// 1. 创建 Scheduler 的工厂
SchedulerFactory sf = new StdSchedulerFactory();
// 2. 从工厂中获取调度器实例
Scheduler scheduler = sf.getScheduler();
// 3. 创建 JobDetail
JobDetail jb = JobBuilder.newJob(Show.class) // Show 为一个 job,是要执行的一个任务。
.withDescription("这是我的测试定时任务。") // job 的描述
.withIdentity("jy2Job", "jy2Group") // job 的 name 和 group
.build();
// 任务运行的时间,SimpleSchedle 类型触发器有效
long time = System.currentTimeMillis() + 3 <em> 1000L; // 3 秒后启动任务
Date statTime = new Date(time);
// 4. 创建 Trigger
// 使用 SimpleScheduleBuilder 或者 CronScheduleBuilder
Trigger t = TriggerBuilder.newTrigger()
.withDescription("")
.withIdentity("jyTrigger", "jyTriggerGroup")
//.withSchedule(SimpleScheduleBuilder.simpleSchedule())
.startAt(statTime)  // 默认当前时间启动 , 也可以写为:.startNow();
.withSchedule(CronScheduleBuilder.cronSchedule("0/2 </em> <em> </em> * ?")) // 每两秒执行一次
.build();
// 5. 注册任务和定时器
scheduler.scheduleJob(jb, t);
// 6. 启动调度器
scheduler.start();
_log.info("启动时间 : " + new Date());
} catch (Exception e) {
_log.info("定时任务出现异常 : " + e);
}
}
}
三、实现方式二
与实现方式一相同,定义一个实现了 Job 接口的类,用于执行定时任务的具体业务逻辑。
package gentle.test;</p></li></ul><p>import org.quartz.Job;
import org.quartz.JobExecutionContext;
import org.quartz.JobExecutionException;
import org.slf4j.Logger;
import org.slf4j.LoggerFactory;
import org.springframework.stereotype.Service;
import java.util.Date;</p><p>/**</p><ul><li><p>@author silence</p></li><li><p>@date 2018/7/17 11:37
*/
@Service("show")
public class Show implements Job {
private static Logger _log = LoggerFactory.getLogger(Show.class);</p><p>@Override
public void execute(JobExecutionContext arg0) throws JobExecutionException {
_log.info("\n\n-------------------------------\n " +
"It is running and the time is : " + new Date() +
"\n-------------------------------\n");
}
}创建一个触发类,用于调用业务类中的实现。
package gentle.test;</p></li></ul><p>import org.quartz.JobExecutionException;
import org.slf4j.Logger;
import org.slf4j.LoggerFactory;
import javax.annotation.Resource;
import java.text.SimpleDateFormat;
import java.util.Date;</p><p>public class UserSyncTask {
private final Logger logger = LoggerFactory.getLogger(this.getClass());</p><pre class="brush:php;toolbar:false;">@Resource
Show show;
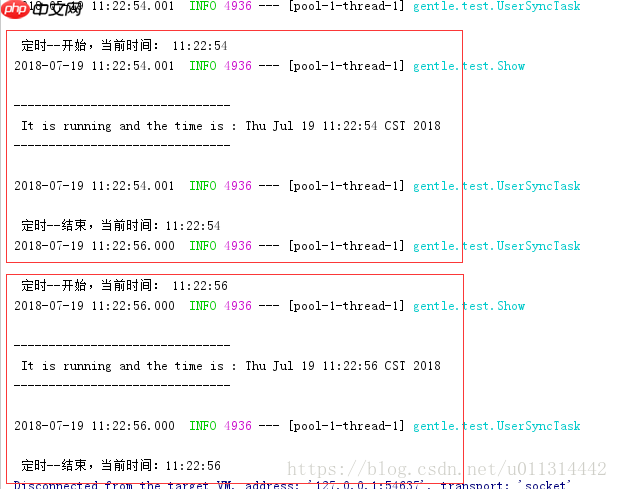
public void cronDepartmentsAndUsersJob() {
logger.info("\n\n 定时--开始,当前时间: " + dateFormat().format(new Date()));
try {
show.execute(null);
} catch (JobExecutionException e) {
e.printStackTrace();
}
logger.info("\n\n 定时--结束,当前时间:" + dateFormat().format(new Date()));
}
private SimpleDateFormat dateFormat() {
return new SimpleDateFormat("HH:mm:ss");
}}
在配置文件中设置触发类和任务的执行频率。
<?xml version="1.0" encoding="UTF-8"?> <beans xmlns="<a href="https://www.php.cn/link/383d86008edae3a3a7e68c59c0da6dbe">https://www.php.cn/link/383d86008edae3a3a7e68c59c0da6dbe</a>" xmlns:task="<a href="https://www.php.cn/link/5de6755473dc988fe6c7db81f26a53ac">https://www.php.cn/link/5de6755473dc988fe6c7db81f26a53ac</a>" xmlns:util="<a href="https://www.php.cn/link/8474b8609e772af467ac0fc4acad4dd4">https://www.php.cn/link/8474b8609e772af467ac0fc4acad4dd4</a>" xmlns:xsi="<a href="https://www.php.cn/link/1fb425070298bc615c24b69845387662">https://www.php.cn/link/1fb425070298bc615c24b69845387662</a>" xsi:schemaLocation="<a href="https://www.php.cn/link/383d86008edae3a3a7e68c59c0da6dbe">https://www.php.cn/link/383d86008edae3a3a7e68c59c0da6dbe</a><a href="https://www.php.cn/link/383d86008edae3a3a7e68c59c0da6dbe/spring-beans.xsd">https://www.php.cn/link/383d86008edae3a3a7e68c59c0da6dbe/spring-beans.xsd</a><a href="https://www.php.cn/link/8474b8609e772af467ac0fc4acad4dd4">https://www.php.cn/link/8474b8609e772af467ac0fc4acad4dd4</a><a href="https://www.php.cn/link/8474b8609e772af467ac0fc4acad4dd4/spring-util.xsd">https://www.php.cn/link/8474b8609e772af467ac0fc4acad4dd4/spring-util.xsd</a><a href="https://www.php.cn/link/5de6755473dc988fe6c7db81f26a53ac">https://www.php.cn/link/5de6755473dc988fe6c7db81f26a53ac</a><a href="https://www.php.cn/link/5de6755473dc988fe6c7db81f26a53ac/spring-task.xsd">">https://www.php.cn/link/5de6755473dc988fe6c7db81f26a53ac/spring-task.xsd"></a>; <bean class="gentle.test.UserSyncTask" id="userSyncTask"></bean> <scheduled-tasks> <scheduled cron="0/2 <em> </em> <em> </em> ?" method="cronDepartmentsAndUsersJob" ref="userSyncTask"></scheduled> </scheduled-tasks> </beans>
四、实现方式三
与实现方式一相同,引入必要的 JAR 包。
在运行类中添加 @EnableScheduling 和 @Scheduled 注解。
package gentle.test;</p><p>import gentle.util.DateUtil;
import org.slf4j.LoggerFactory;
import org.springframework.scheduling.annotation.EnableScheduling;
import org.springframework.scheduling.annotation.Scheduled;
import org.springframework.stereotype.Component;
import java.util.Date;</p><p>/**</p><ul><li><p>定时任务 -- 简版</p></li><li><p>@author silence</p></li><li><p>@date 2018/7/31 16:03
*/
@Component // 注册为一个 bean
@EnableScheduling // 开启定时器
public class Sender {
private final org.slf4j.Logger logger = LoggerFactory.getLogger(this.getClass());</p><p>@Scheduled(fixedDelay = 2000) // 每 2s 执行一次。
public void send() {
logger.info(" \n------------------------\n " +
"定时任务内容 :" + DateUtil.dateFormat().format(new Date()) +
"\n------------------------\n");
}
}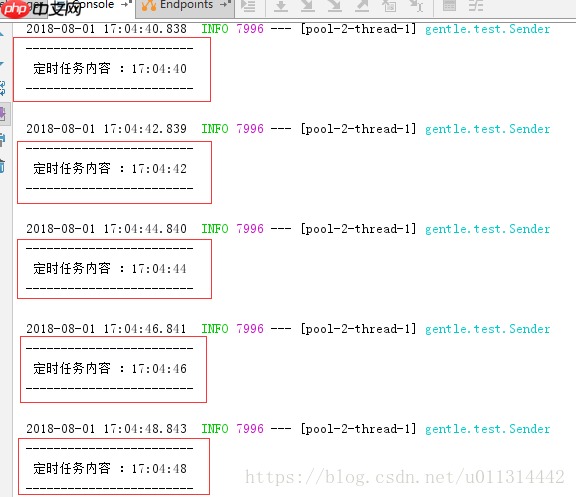
PS:第三种实现方式最为简单。
源码地址:定时任务demo
以上就是Quartz 定时任务(Scheduler)的 3 种实现方式的详细内容,更多请关注php中文网其它相关文章!

每个人都需要一台速度更快、更稳定的 PC。随着时间的推移,垃圾文件、旧注册表数据和不必要的后台进程会占用资源并降低性能。幸运的是,许多工具可以让 Windows 保持平稳运行。

Copyright 2014-2025 https://www.php.cn/ All Rights Reserved | php.cn | 湘ICP备2023035733号


 833
833