要将xxl-job集成到spring boot项目中,可以按照以下步骤进行操作:
首先,从Gitee拉取xxl-job的源码,并将其配置为Docker镜像部署到服务器上。
# 执行Maven打包
mvn clean install
<h1>构建Docker镜像,镜像名称中不允许使用下划线</h1><p>docker build -t xxl-job:latest .
接下来,在自己的Spring Boot项目中创建一个新的任务执行器,首先需要在项目的pom.xml文件中引入xxl-job的Maven依赖。
<dependency>
<groupId>com.xuxueli</groupId>
<artifactId>xxl-job-core</artifactId>
<version>${project.parent.version}</version>
</dependency>然后,在项目的配置文件(如application.yml或application.properties)中添加xxl-job的配置信息。
xxl:
job:
admin:
addresses: <a href="https://www.php.cn/link/7ece221bf3f5dbddbe3c2770ac19b419">https://www.php.cn/link/7ece221bf3f5dbddbe3c2770ac19b419</a>
accessToken:
executor:
appname: xxl-job-executor-sample
address:
ip:
port: 8082
logpath: /data/applogs/xxl-job/jobhandler
logretentiondays: 30
在项目的resources目录下添加logback.xml文件,用于配置日志输出。
<?xml version="1.0" encoding="UTF-8"?>
<configuration debug="false" scan="true" scanPeriod="1 seconds">
<contextName>logback</contextName>
<property name="log.path" value="/data/applogs/xxl-job/xxl-job-executor-sample-springboot.log"/>
<appender class="ch.qos.logback.core.ConsoleAppender" name="console">
<encoder>
<pattern>%d{HH:mm:ss.SSS} %contextName [%thread] %-5level %logger{36} - %msg%n</pattern>
</encoder>
</appender>
<appender class="ch.qos.logback.core.rolling.RollingFileAppender" name="file">
<file>${log.path}</file>
<rollingPolicy class="ch.qos.logback.core.rolling.TimeBasedRollingPolicy">
<fileNamePattern>${log.path}.%d{yyyy-MM-dd}.zip</fileNamePattern>
</rollingPolicy>
<encoder>
<pattern>%date %level [%thread] %logger{36} [%file : %line] %msg%n</pattern>
</encoder>
</appender>
<root level="info">
<appender-ref ref="console"/>
<appender-ref ref="file"/>
</root>
</configuration>创建一个名为XxlJobConfig的配置类,用于初始化xxl-job执行器。
package com.cgd.xxljobexecutor.config;</p><p>import com.xxl.job.core.executor.impl.XxlJobSpringExecutor;
import org.slf4j.Logger;
import org.slf4j.LoggerFactory;
import org.springframework.beans.factory.annotation.Value;
import org.springframework.context.annotation.Bean;
import org.springframework.context.annotation.Configuration;</p><p>/**</p><ul><li><p>xxl-job config</p></li><li></li><li><p>@author xuxueli 2017-04-28
*/
@Configuration
public class XxlJobConfig {
private Logger logger = LoggerFactory.getLogger(XxlJobConfig.class);</p><p>@Value("${xxl.job.admin.addresses}")
private String adminAddresses;</p><p>@Value("${xxl.job.accessToken}")
private String accessToken;</p><p>@Value("${xxl.job.executor.appname}")
private String appname;</p><p>@Value("${xxl.job.executor.address}")
private String address;</p><p>@Value("${xxl.job.executor.ip}")
private String ip;</p><p>@Value("${xxl.job.executor.port}")
private int port;</p><p>@Value("${xxl.job.executor.logpath}")
private String logPath;</p><p>@Value("${xxl.job.executor.logretentiondays}")
private int logRetentionDays;</p><p>@Bean
public XxlJobSpringExecutor xxlJobExecutor() {
logger.info(">>>>>>>>>>> xxl-job config init.");
XxlJobSpringExecutor xxlJobSpringExecutor = new XxlJobSpringExecutor();
xxlJobSpringExecutor.setAdminAddresses(adminAddresses);
xxlJobSpringExecutor.setAppname(appname);
xxlJobSpringExecutor.setAddress(address);
xxlJobSpringExecutor.setIp(ip);
xxlJobSpringExecutor.setPort(port);
xxlJobSpringExecutor.setAccessToken(accessToken);
xxlJobSpringExecutor.setLogPath(logPath);
xxlJobSpringExecutor.setLogRetentionDays(logRetentionDays);
return xxlJobSpringExecutor;
}</p><p>/**</p><ul><li>针对多网卡、容器内部署等情况,可借助 "spring-cloud-commons" 提供的 "InetUtils" 组件灵活定制注册IP;</li><li></li><li>1、引入依赖:</li><li><dependency></li><li><groupId>org.springframework.cloud</groupId></li><li><artifactId>spring-cloud-commons</artifactId></li><li><version>${version}</version></li><li></dependency></li><li></li><li>2、配置文件,或者容器启动变量</li><li>spring.cloud.inetutils.preferred-networks: 'xxx.xxx.xxx.'</li><li></li><li>3、获取IP</li><li>String ip_ = inetUtils.findFirstNonLoopbackHostInfo().getIpAddress();
*/
}最后,编写一个简单的定时任务示例。

mallcloud商城基于SpringBoot2.x、SpringCloud和SpringCloudAlibaba并采用前后端分离vue的企业级微服务敏捷开发系统架构。并引入组件化的思想实现高内聚低耦合,项目代码简洁注释丰富上手容易,适合学习和企业中使用。真正实现了基于RBAC、jwt和oauth2的无状态统一权限认证的解决方案,面向互联网设计同时适合B端和C端用户,支持CI/CD多环境部署,并提
 0
0

package com.cgd.xxljobexecutor.xxlJob;</li></ul></li></ul><p>import com.xxl.job.core.biz.model.ReturnT;
import com.xxl.job.core.handler.annotation.XxlJob;
import org.springframework.stereotype.Component;</p><p>/**</p><ul><li>@author chengd</li><li>@version 1.0</li><li>@date 2021/5/19 15:24
*/
@Component
public class PushJob {
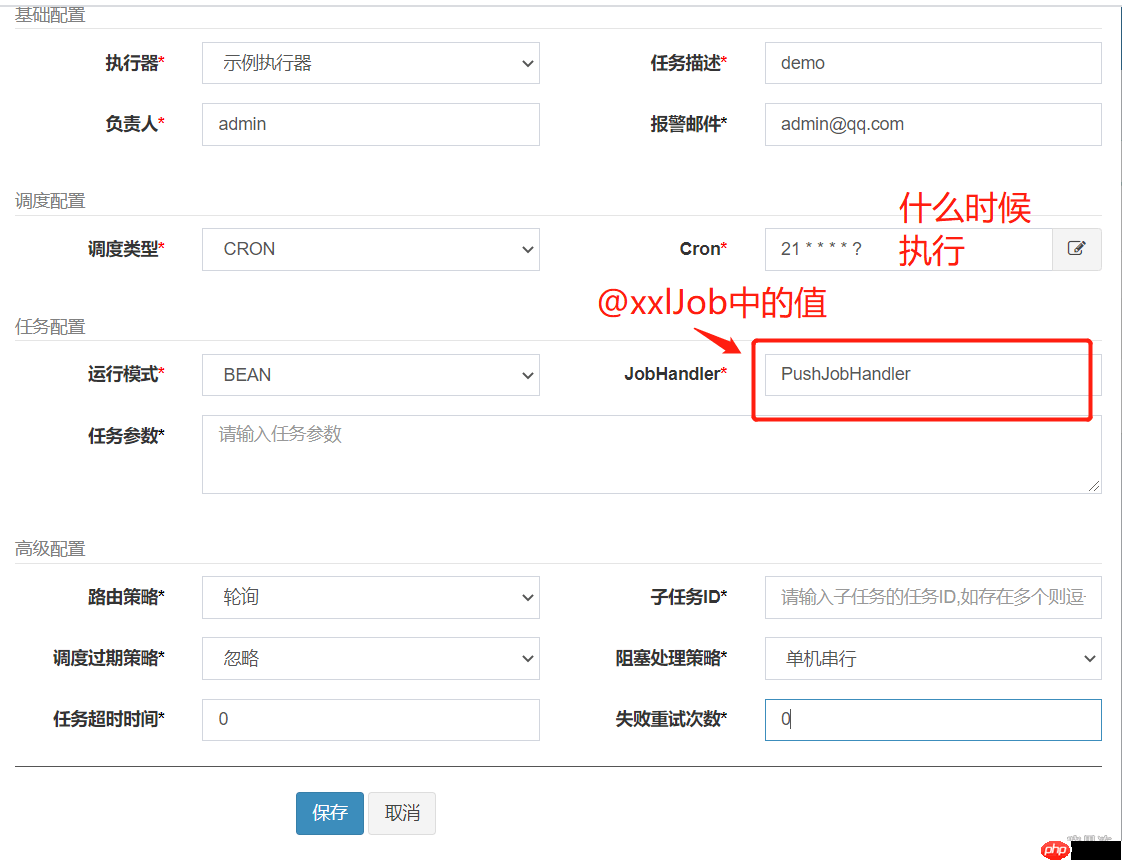
@XxlJob("PushJobHandler")
public ReturnT<String> PushJobHandler(String param){
ReturnT<String> returnT = new ReturnT<>();
returnT.setCode(ReturnT.SUCCESS_CODE);
returnT.setContent("test");
returnT.setMsg("<p style=\"color:red\">test</p>");
return returnT;
}
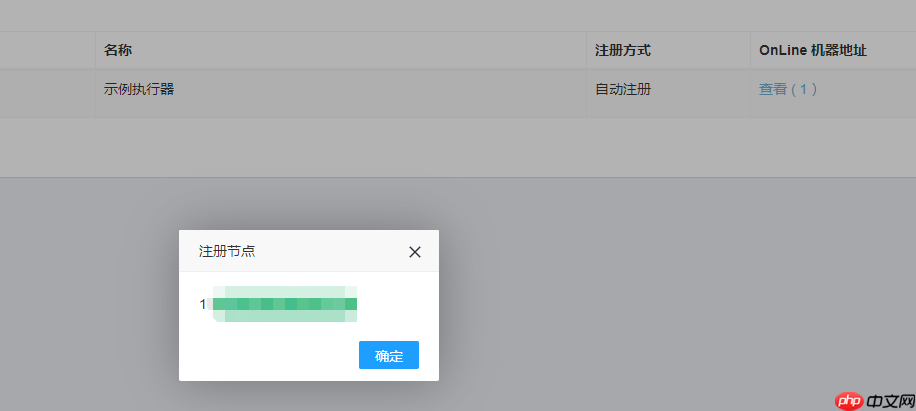
}完成上述步骤后,启动Spring Boot应用,并登录到xxl-job管理后台(ip:8082/xxl-job-admin)查看是否已自动注入执行器的IP。
然后,创建并执行上述代码中的任务,查看执行日志。
执行任务后查看日志:

代码存放在Gitee仓库中,使用了Nacos和xxl-job。如果需要执行新的定时任务,请创建新分支,完成后提交pull request。
以上就是Springboot项目引入xxl-job的详细内容,更多请关注php中文网其它相关文章!

每个人都需要一台速度更快、更稳定的 PC。随着时间的推移,垃圾文件、旧注册表数据和不必要的后台进程会占用资源并降低性能。幸运的是,许多工具可以让 Windows 保持平稳运行。

Copyright 2014-2025 https://www.php.cn/ All Rights Reserved | php.cn | 湘ICP备2023035733号


 403
403