

本教程详细指导如何在jmeter中模拟动态表单数据提交。通过捕获http请求骨架,并结合csv数据文件配置,实现productname、productdescription、productid、quantity等字段的自动化填充与编辑。文章涵盖请求录制、http请求采样器配置以及csv数据参数化等关键步骤,确保性能测试中数据的多样性和真实性。
JMeter作为一款强大的性能测试工具,其核心功能在于模拟用户发送HTTP请求并测量响应时间。它并非直接操作网页界面来“填充”或“编辑”字段,而是通过构造包含相应参数的HTTP请求来实现数据提交。因此,要在JMeter中实现动态数据填充与编辑,关键在于正确捕获这些HTTP请求,并对其中的数据进行参数化。
在JMeter中模拟动态数据提交的第一步是获取网站在提交数据时所发送的HTTP请求的“骨架”。这可以通过以下几种方式实现:
手动配置HTTP请求采样器: 如果对网站的HTTP请求结构非常了解,可以直接在JMeter的测试计划中添加HTTP请求采样器,并手动填写请求方法(GET/POST)、协议、服务器名称或IP、端口、路径以及请求参数。例如,一个提交产品信息的POST请求可能包含productName、productDescription、productId和Quantity等参数。
<!-- 示例:HTTP请求采样器配置 -->
<HTTPSamplerProxy guiclass="HttpTestSampleGui" testclass="HTTPSamplerProxy" testname="提交产品信息" enabled="true">
  <elementProp name="HTTPsampler.Arguments" elementType="Arguments" guiclass="HTTPArgumentsPanel" testclass="Arguments" testname="用户定义的变量" enabled="true">
    <collectionProp name="Arguments.arguments">
      <elementProp name="productName" elementType="HTTPArgument">
        <boolProp name="HTTPArgument.always_encode">false</boolProp>
        <stringProp name="Argument.value">TestProduct</stringProp>
        <stringProp name="Argument.metadata">=</stringProp>
        <boolProp name="HTTPArgument.use_equals">true</boolProp>
        <stringProp name="Argument.name">productName</stringProp>
      </elementProp>
      <elementProp name="productDescription" elementType="HTTPArgument">
        <boolProp name="HTTPArgument.always_encode">false</boolProp>
        <stringProp name="Argument.value">This is a test product.</stringProp>
        <stringProp name="Argument.metadata">=</stringProp>
        <boolProp name="HTTPArgument.use_equals">true</boolProp>
        <stringProp name="Argument.name">productDescription</stringProp>
      </elementProp>
      <!-- 更多参数... -->
    </collectionProp>
  </elementProp>
  <stringProp name="HTTPSampler.method">POST</stringProp>
  <stringProp name="HTTPSampler.path">/submitProduct</stringProp>
  <!-- 其他HTTP请求配置 -->
</HTTPSamplerProxy>使用JMeter HTTP(S)测试脚本录制器: 这是最常用且推荐的方法。通过配置JMeter的HTTP(S)测试脚本录制器作为浏览器代理,可以捕获浏览器在执行用户操作(如填写表单并提交)时发送的所有HTTP/HTTPS请求。录制器会自动生成相应的HTTP请求采样器,其中包含了请求头、请求体和参数等信息。
操作步骤简述:
使用JMeter Chrome扩展: BlazeMeter提供的JMeter Chrome扩展是一个便捷的工具,可以直接在浏览器中录制用户操作,并将其导出为JMeter JMX脚本。这省去了手动配置代理的步骤,对于快速获取请求骨架非常有效。
通过上述方法,我们可以得到一个包含硬编码值的HTTP请求集合。
获取到请求骨架后,下一步是将请求中的硬编码数据替换为动态数据,以模拟不同的用户或在每次迭代中使用不同的输入。JMeter提供了多种参数化机制,其中CSV数据文件设置是最常用且高效的方法之一。
CSV数据文件设置元件允许JMeter从外部CSV文件中读取数据,并将这些数据作为变量供测试计划中的其他元件使用。这非常适合用于提供ProductName、productDescription、productId、Quantity等动态值。
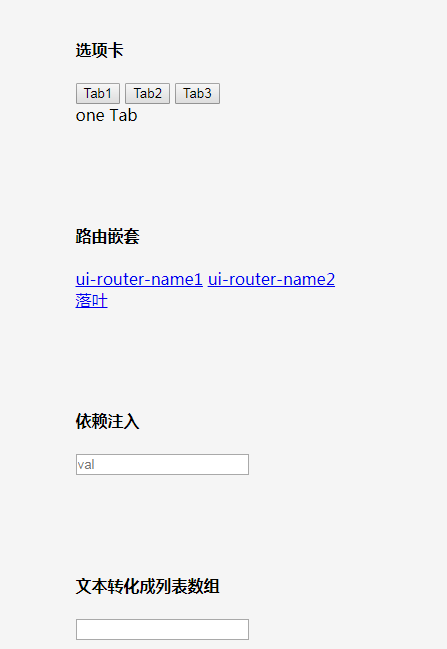
本组件封装了Angular1.0版本,组件实现了以下功能: 路由,子路由,轮播,cookie读写,加密,表单提交验证,拦截器,白名单,搜索过滤与排序(等级划分), 大小写转换,Map数组循环遍历动态修改后台数据等功能。
 21
21

操作步骤:
准备CSV数据文件: 创建一个CSV文件(例如product_data.csv),其中包含需要动态填充的数据。每行代表一组数据,列名可以作为JMeter中的变量名。
productName,productDescription,productId,quantity
Laptop Pro,Powerful and sleek laptop,P001,10
Smartphone X,Next-gen mobile device,P002,25
Headphones Z,Immersive audio experience,P003,50
添加CSV数据文件设置: 在需要使用动态数据的HTTP请求采样器所在的线程组下,添加配置元件 -> CSV数据文件设置。
配置CSV数据文件设置:
<!-- 示例:CSV数据文件设置配置 -->
<CSVDataSet guiclass="TestBeanGUI" testclass="CSVDataSet" testname="产品数据" enabled="true">
  <stringProp name="filename">product_data.csv</stringProp>
  <stringProp name="fileEncoding">UTF-8</stringProp>
  <stringProp name="variableNames">productName,productDescription,productId,quantity</stringProp>
  <boolProp name="ignoreFirstLine">true</boolProp>
  <stringProp name="delimiter">,</stringProp>
  <boolProp name="quotedData">false</boolProp>
  <boolProp name="recycle">true</boolProp>
  <boolProp name="stopThread">false</boolProp>
  <stringProp name="shareMode">shareMode.all</stringProp>
</CSVDataSet>
在HTTP请求中使用变量: 在HTTP请求采样器的参数中,将硬编码的值替换为${变量名}的形式。
<!-- 示例:HTTP请求采样器中使用CSV变量 -->
<HTTPSamplerProxy guiclass="HttpTestSampleGui" testclass="HTTPSamplerProxy" testname="提交产品信息" enabled="true">
  <elementProp name="HTTPsampler.Arguments" elementType="Arguments" guiclass="HTTPArgumentsPanel" testclass="Arguments" testname="用户定义的变量" enabled="true">
    <collectionProp name="Arguments.arguments">
      <elementProp name="productName" elementType="HTTPArgument">
        <boolProp name="HTTPArgument.always_encode">false</boolProp>
        <stringProp name="Argument.value">${productName}</stringProp>
        <stringProp name="Argument.metadata">=</stringProp>
        <boolProp name="HTTPArgument.use_equals">true</boolProp>
        <stringProp name="Argument.name">productName</stringProp>
      </elementProp>
      <elementProp name="productDescription" elementType="HTTPArgument">
        <boolProp name="HTTPArgument.always_encode">false</boolProp>
        <stringProp name="Argument.value">${productDescription}</stringProp>
        <stringProp name="Argument.metadata">=</stringProp>
        <boolProp name="HTTPArgument.use_equals">true</boolProp>
        <stringProp name="Argument.name">productDescription</stringProp>
      </elementProp>
      <elementProp name="productId" elementType="HTTPArgument">
        <boolProp name="HTTPArgument.always_encode">false</boolProp>
        <stringProp name="Argument.value">${productId}</stringProp>
        <stringProp name="Argument.metadata">=</stringProp>
        <boolProp name="HTTPArgument.use_equals">true</boolProp>
        <stringProp name="Argument.name">productId</stringProp>
      </elementProp>
      <elementProp name="quantity" elementType="HTTPArgument">
        <boolProp name="HTTPArgument.always_encode">false</boolProp>
        <stringProp name="Argument.value">${quantity}</stringProp>
        <stringProp name="Argument.metadata">=</stringProp>
        <boolProp name="HTTPArgument.use_equals">true</boolProp>
        <stringProp name="Argument.name">quantity</stringProp>
      </elementProp>
    </collectionProp>
  </elementProp>
  <stringProp name="HTTPSampler.method">POST</stringProp>
  <stringProp name="HTTPSampler.path">/submitProduct</stringProp>
  <!-- 其他HTTP请求配置 -->
</HTTPSamplerProxy>这样,每次HTTP请求采样器运行时,JMeter都会从product_data.csv文件中读取一行数据,并将其赋值给相应的变量,从而实现动态数据的填充。
除了CSV数据文件设置,JMeter还支持其他参数化方法:
通过上述步骤,结合捕获HTTP请求和灵活运用CSV数据文件设置等参数化机制,您就可以在JMeter中高效地实现网站字段的动态数据填充与编辑,从而进行真实有效的性能测试。
以上就是JMeter动态表单数据提交与参数化指南的详细内容,更多请关注php中文网其它相关文章!

每个人都需要一台速度更快、更稳定的 PC。随着时间的推移,垃圾文件、旧注册表数据和不必要的后台进程会占用资源并降低性能。幸运的是,许多工具可以让 Windows 保持平稳运行。

 广告
广告Copyright 2014-2025 https://www.php.cn/ All Rights Reserved | php.cn | 湘ICP备2023035733号


 250
250


