
今天复习了一下面向对象编程,下面是我的效果图
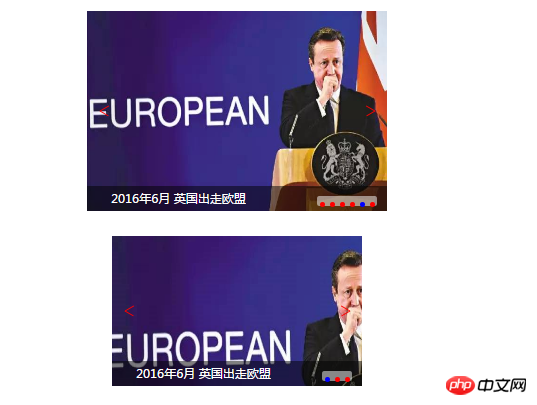
看着这个图片你会觉得这没有什么,那么上代码:
html部分:
1 <!DOCTYPE html> 2 <html lang="en"> 3 <head> 4 <meta charset="UTF-8"> 5 <title>Document</title> 6 <style> 7 ul,ol,li{padding:0;margin:0;list-style: none;} 8 .container1{ 9 width: 600px;10 height: 400px;11 margin:50px auto;12 position: relative;13 }14 15 .container2{16 width: 500px;17 height: 300px;18 margin:50px auto;19 position: relative;20 }21 22 </style>23 <link rel="stylesheet" href="slider.css?1.1.11">24 <script src="Tq.js?1.1.11"></script>25 <script src="sliderIIFE.js?1.1.11"></script>26 </head>27 <body>28 <div class="container1 slider" id="slide1">29 <ul>30 <li><a href=""><img src="img/1.jpg" alt="2016年6月 英国出走欧盟"></a></li>31 <li><a href=""><img src="img/2.jpg" alt="2016年11月 特朗普当选美国总统"></a></li>32 <li><a href=""><img src="img/1.jpg" alt="2016年6月 英国出走欧盟"></a></li>33 34 <li><a href=""><img src="img/3.jpg" alt="双11"></a></li>35 <li><a href=""><img src="img/1.jpg" alt="2016年6月 英国出走欧盟"></a></li>36 37 <li><a href=""><img src="img/4.jpg" alt="G20峰会"></a></li>38 </ul>39 </div>40 41 42 <div class="container2 slider" id="slide2">43 <ul>44 <li><a href=""><img src="images/1.png" alt="2016年6月 英国出走欧盟"></a></li>45 <li><a href=""><img src="images/2.png" alt="2016年11月 特朗普当选美国总统"></a></li>46 <li><a href=""><img src="images/3.png" alt="双11"></a></li>47 48 </ul>49 </div>50 51 52 <script>53 54 var s1 = new Slider("slide1",{startIndex:0,speed:50});55 var s2 = new Slider("slide2",{startIndex:2});56 console.info(s1);57 console.info(s2);58 59 </script>60 </body>61 </html>必要的css代码
.slider ul li a{display: block;width: 100%;height: 100%;}
.slider ul,.slider ul li,.slider ul img{width: 100%;height: 100%;}


.slider ol{position: absolute;bottom:10px;background: rgba(255,255,255,.5);height: 20px;border-radius: 5px;right:20px;z-index:999;}
.slider ol li{margin:0 5px;width:10px;height:10px;border-radius:5px;display: inline-block;line-height:10px;background: red;font-size:0;vertical-align: middle;position:relative;top:-3px;}
.slider .mask{
	position: absolute;
	bottom:10px;
	width: 100%;
	height: 50px;
	line-height: 50px;
	text-align: center;
	background: rgba(0,0,0,.5);
	color:#fff;
}
.slider span{
	width:50px;
	height:50px;
	border-radius : 25px;
	position : absolute;
	top : 50%;
	transform: translateY(-50%);
	transition: background-color .5s;
	background-color: rgba(255,255,255,0);
}
.slider span.btnright{
	right:10px;
}
.slider span.btnleft{
	left:10px;
}
.slider span:hover{
	background-color: rgba(255,255,255,1);
}
.slider span.btnleft:after,span.btnright:after{
	transition: transform .5s;
	position: absolute;
	top:24px;
	left:15px;
	transform-origin: left top;
	transform: rotate(30deg);
	content: "";display: block;width: 20px;height: 2px;background-color: red;
}
.slider span.btnright:after{
	left:auto;
	right:15px;
	transform-origin: right top;

}
.slider .btnleft:before,.btnright:before{
	transition: transform .5s;
	position: absolute;
	top:24px;
	left:15px;
	transform-origin: left top;
	transform: rotate(-30deg);
	content: "";display: block;width: 20px;height: 2px;background-color: red;
}
.slider .btnright:before{
	transform-origin: right top;

	left: auto;
	right:15px;
	transform: rotate(-30deg);
}
.slider .btnleft:hover:after{
	transform: rotate(45deg);
}
.slider .btnleft:hover:before{
	transform: rotate(-45deg);
}
.slider .mask{
	position:absolute;
	bottom:0;
	height:50px;
	line-height:50px;
	color:#fff;
	text-align: left;
	text-indent: 2em;
	background-color:rgba(0,0,0,.5);
}js部分:
function $(id){
	return document.getElementById(id);
}

/**
 * 2.0
 * 在指定的容器中去找某一个TagName的html标签集合
 * containerId 可以是一个字符串,也可以是一个 dom对象。
 * @param  {[type]} containerId [description]
 * @param  {[type]} tagName     [description]
 * @return {[type]}             [description]
 *
 */
function $get(containerId,tagName){
	if(typeof containerId =="string" && $(containerId)){
		return $(containerId).getElementsByTagName(tagName);
	}
	else if(typeof containerId=="object")
	{
		return containerId.getElementsByTagName(tagName);
	}
	else{
		throw ("你写的第一个参数不是一个ID");
	}
}

//<span id="span" className="leftBtn" stlye="width:100px;height:100px;">按钮</span>
function $create(tagName,attr,style){
	var dom = document.createElement(tagName);
	for(var pName in attr){
		dom[pName] = attr[pName];
	}

	for(var pName in style){
		dom.style[pName] = style[pName];
	}
	return dom;
}
function info(obj){
	console.info(obj);
}

function getH(obj){
	//debugger;
	if(obj.currentStyle){
		getH = function(obj){
			return parseInt ( obj.currentStyle.height );
		}
	}else{
		getH=function(obj){
			return parseInt ( window.getComputedStyle(obj, null).height );
		}
	}
	getH(obj) ;


}

//对对象进行拓展
function extend(defaultConf,userConf){
	//对于在defaultConf这个对象中的每一个属性,
	//如果这个属性名在userConf中的也存在,则使用userConf中的那个属性值

	for(var pName in defaultConf){
		if(userConf.hasOwnProperty(pName)){
			defaultConf[pName] = userConf[pName];
		}
	}
}轮播的js
  1 ;(function(window){  2   3     //有问题,请自行改正!!!! 参考slider.js  4     var defaultConf = {  5         "isAuto":true,  6         "speed":"normal",  7         "startIndex":0,  8         "isClickable":true  9     }; 10  11     var speedList={ 12         "faster":2000, 13         "slower":4000, 14         "normal":3000 15     }; 16  17     function Slider(containerId,conf){ 18          19         // if(conf) 20         //     extend(defaultConf,conf); //这一句后,defaultConf这个对象中就会包含用户的设置 21  22         conf && extend(defaultConf,conf); 23  24         this.container = $(containerId); 25         this.slideList = $get($get(this.container,"ul")[0],"li");// 26         //this.indexList = $get($get(this.container,"ol")[0],"li");//数字指示条 27         this.num = this.slideList.length; 28         this.indexList = createIndexList.call(this);//数字指示条 29  30         this.leftBtn = createLinkBtn.call(this,"left"); //创建按钮 31         this.rightBtn = createLinkBtn.call(this,"right"); //创建按钮 32      33         this.txtDiv = createTxtDiv.call(this);//创建文字说明的区域 34          35         this.currentIndex = defaultConf.startIndex;        //当前整个轮播图中显示的 第几 张 36  37         init.call(this,this.currentIndex);                //初始化 把其它的li都隐藏,把第一个显示出来 38  39         this.timer ;
 40  41         if(typeof defaultConf.speed =="string") 42             this.speed = speedList[defaultConf.speed] || 2000; 43         else if (typeof defaultConf.speed =="number") { 44             this.speed = defaultConf.speed; 45         } 46         if( defaultConf.isAuto ) 47             this.auto(); 48  49         bindEvent.call(this);           //绑定事件 50     } 51  52     var createTxtDiv = function (){ 53  54         console.info(this); 55  56         //1.创建div,设置基本属性及样式 57         var div = $create("div",{className:"mask"},{}) 58         div.innerHTML = ""; 59         //2.添加到容器中 60         this.container.appendChild(div); 61         //3.返回 62         return div; 63     } 64  65     Slider.prototype.auto = function(){ 66         var that = this; 67         this.timer = setInterval(function(){ 68             that.rightBtn.onclick(); 69             //that.rightBtn.click(); 70  71         },that.speed); 72  73         console.info("定时器"+this.timer+"开动"); 74     } 75     var createLinkBtn = function(dir){ 76         //1.创建一个dom元素 设置基本的属性,同时设置样式。 77         var span = $create("span",{className:"btn"+dir},{ 78              79         }); 80          81         //3.把它添加到容器中 82         this.container.appendChild(span); 83         //4.返回 84          85         return span; 86     } 87     var createIndexList = function(){    //创建ol li结构 88         //ol>li 89         var ol = $create("ol"); //创建ol 90  91         var lis=[];                //保存所有的ol中的li 92         for (var i = 0; i < this.num; i++) { 93             var li = $create("li"); 94             ol.appendChild(li); 95             lis.push(li);        //加到数组中 96         } 97         this.container.appendChild(ol); 98         return lis; 99     }100 101     Slider.prototype.moveto = function(indexabc){102         for(var i = 0; i< this.num; i++){103             this.slideList[i].style.display = "none";104             this.indexList[i].style.backgroundColor="red";105         }106         this.slideList[indexabc].style.display = "block";107         this.indexList[indexabc].style.backgroundColor="blue";108 109         //更新当前的索引110         this.currentIndex = indexabc;111 112         //更新文字说明113         var txt = $get(this.slideList[indexabc],"img")[0].alt ;114         this.txtDiv.innerHTML = txt;115     //    console.info("当前是:"+this.currentIndex);116     }117     var bindEvent = function(){118         var that = this; /*var 能不能省*/119         //绑定指示条的事件120         121         if( defaultConf.isClickable){122             for (var i = 0; i < this.num; i++) {123                 this.indexList[i].index = i;124                 this.indexList[i].onmouseenter = function(){125                     that.moveto(this.index);126                 }127             }
128 }129 130 this.rightBtn.onclick = function(){131 //向右,显示下一张 当前的索引值要+1132 var i = that.currentIndex + 1;133 // i = (i== that.num) ? 0 : i; 134 i = i % that.num;135 that.moveto(i);136 }137 138 //绑定按钮的事件139 this.leftBtn.onclick = function(){140 //btnLeft 向左,显示上一张141 var i = that.currentIndex - 1; //上一张的编号142 //如果它等于-1,应该要显示最后一张,最后一张的索引值是that.num-1。143 //i = (i==-1) ? that.num-1 : i;144 i = (i+that.num) % that.num;145 //i = i < 0 ? that.num+i : i;146 that.moveto(i);147 }148 if(defaultConf.isAuto) {149 this.container.onmouseenter = function(){150 // console.info("stop");151 clearInterval(that.timer);152 153 }154 this.container.onmouseleave = function(){155 // console.info("go on");156 157 that.auto();158 }159 }160 }161 var init = function(yourlikeIndex){162 if( yourlikeIndex)163 this.moveto(yourlikeIndex);164 else165 this.moveto(0);166 }167 168 window.Slider = Slider;169 170 })(window);希望能帮到大家,还有就是这个不是基于jQuery的,我自己封装了一个简单的方法。
以后我们图片轮播可以使用
1 <div class="container1 slider" id="slide1"> 2 <ul> 3 <li><a href=""><img src="img/1.jpg" alt="2016年6月 英国出走欧盟"></a></li> 4 <li><a href=""><img src="img/2.jpg" alt="2016年11月 特朗普当选美国总统"></a></li> 5 <li><a href=""><img src="img/1.jpg" alt="2016年6月 英国出走欧盟"></a></li> 6 7 <li><a href=""><img src="img/3.jpg" alt="双11"></a></li> 8 <li><a href=""><img src="img/1.jpg" alt="2016年6月 英国出走欧盟"></a></li> 9 10 <li><a href=""><img src="img/4.jpg" alt="G20峰会"></a></li>11 </ul>12 </div>13 <script>14 15 var s1 = new Slider("slide1",{startIndex:0,speed:50});16 17 18 </script>这样使用于比较多的轮播组件的网站,当然我们这个方法的js可以进一步去封装的,使它更强大,如果这里你最后再压缩一下,变量名再简单。那么效果会更好的。
以上就是详解图片轮播怎么实现?的详细内容,更多请关注php中文网其它相关文章!

每个人都需要一台速度更快、更稳定的 PC。随着时间的推移,垃圾文件、旧注册表数据和不必要的后台进程会占用资源并降低性能。幸运的是,许多工具可以让 Windows 保持平稳运行。

 广告
广告


Copyright 2014-2025 https://www.php.cn/ All Rights Reserved | php.cn | 湘ICP备2023035733号


 186
186


