
这篇文章主要介绍了ionic 自定义弹框效果,非常不错,具有参考借鉴价值,需要的朋友可以参考下
在工作过程中往往需要自定义的弹框。因此,将内容整理如下,以方便学习。若有不当之处,敬请斧正!
思路
利用ionic自带的弹框$ionicPopup。
隐藏头部和尾部,只保留body部分
在利用templateUrl或者template,引入需要的模板
代码
$ionicPopup.show({
    cssClass:'team-popup',
    template: "<p class='list popup-form'>" +
    "<p class = 'form-title'>{{tempItem.name}}</p>" +
    "<p class='form-content'>" +
     "<p class='input-name'>input1:</p>" +
     "<p class='input-area'><input type='number' placeholder='10.00' ng-model='tempItem.input1'></p>" +
    "</p>" +
    "<p class='form-content'>" +
     "<p class='input-name'>input2:</p>" +
     "<p class='input-area'><input type='number' ng-model='tempItem.input2'></p>" +
    "</p>" +
    "<p class='form-button'>" +
     "<button class='button wyl-left-button' ng-click='fnClosePopup()' >cancel</button>" +
     "<button class='button wyl-right-button' ng-click='fnExchangeGoods()' >submit</button>" +
    "</p>" +
    "</p>",
    scope: $scope
});/**弹出窗popup 无titlecss*/
.team-popup .popup-head{
display: none;
}
.team-popup .popup{
padding: 0;
-moz-border-radius: 5px;
-webkit-border-radius: 5px;
border-radius:5px;
}
.team-popup .popup-body{
padding: 0;
/*overflow-y:scroll;*/
}
/*自定义表单*/
.popup-form{
font-size:15px
}
.form-title{
margin: 10px;
text-align:center
}
.form-content{
width: 90%;
height: 36px;
background-color: white;
padding-left: 10px;
margin:10px auto;
position: relative;
border-radius: 5px;
}
.form-content input{
line-height: 36px;
padding-left:10px
}
.input-name{
float: left;
line-height: 36px;
}
.input-area{
width: 50%;
float: left;
height: 36px;
}
.form-button{
width: 90%;
height: 36px;
margin:10px auto;
position: relative;
}
.form-button button{
width: 50%;
border-radius: 5px;
min-height: 10px;
height: 100%;
line-height: 100%;
}效果
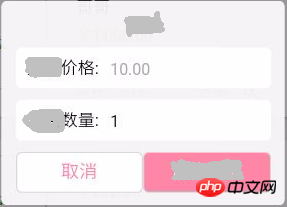
以上所述是小编给大家介绍的ionic 自定义弹框效果,希望对大家有所帮助,如果大家有任何疑问请给我留言,小编会及时回复大家的。在此也非常感谢大家对本站网站的支持!
以上就是ionic 自定义弹框效果的详细内容,更多请关注php中文网其它相关文章!

每个人都需要一台速度更快、更稳定的 PC。随着时间的推移,垃圾文件、旧注册表数据和不必要的后台进程会占用资源并降低性能。幸运的是,许多工具可以让 Windows 保持平稳运行。

Copyright 2014-2025 https://www.php.cn/ All Rights Reserved | php.cn | 湘ICP备2023035733号


 147
147