最近在使用spring boot搭建网站的过程之中遇到了这样一个问题:用户注册时需要上传一个属于自己的头像,注册成功之后跳转到个人中心,在个人中心中显示用户信息.其中在显示头像的时候遇到了问题:上传头像的时候,我把头像存放到了项目文件下的static文件夹中,将其地址存放到了数据库对应的用户中,并且在idea中添加了热部署,但是在注册跳转到个人中心后还是无法显示头像,只有在下一次启动项目进入到个人中心时才可以。
被这个问题困扰了许久,最后是这样的解决的:在main目录下新建了一个webapp文件夹,并且对其路径进行了配置。下面是一个解决方案的小demo,做的比较简单,请见谅~~核心代码如下:
注册界面:
<!DOCTYPE html>
<html lang="en" xmlns:th="http://www.thymeleaf.org">
<head>
 <meta charset="UTF-8"/>
 <title>Title</title>
</head>
<body>
<form action="/zhuce" th:action="@{/zhuce}" method="post" enctype="multipart/form-data" >
 <label>姓名</label><input type="text" name="name"/>
 <label>密码</label><input type="password" name="password"/>
 <label>上传图片</label>
 <input type="file" name="file"/>
 <input type="submit" value="上传"/>
</form>
</body>
</html>control如下:
package com.example.demo.control;
import com.example.demo.dao.UserRepository;
import com.example.demo.domain.User;
import org.springframework.beans.factory.annotation.Autowired;
import org.springframework.stereotype.Controller;
import org.springframework.ui.Model;
import org.springframework.web.bind.annotation.GetMapping;
import org.springframework.web.bind.annotation.PostMapping;
import org.springframework.web.bind.annotation.RequestParam;
import org.springframework.web.multipart.MultipartFile;
import java.io.*;
/**
 * Created by 18274 on 2017/8/9.
 */
@Controller
public class Control {
 @Autowired
 UserRepository userRepository;
 @GetMapping(value="/zhuce")
 public String zhuce(){
 return "zhuce";
 }
 @PostMapping(value="/zhuce")
 public String tijiao(@RequestParam(value="name") String name,
    @RequestParam(value="password") String password,
    @RequestParam(value="file")MultipartFile file,
    Model model) {
 User user = new User();
 user.setUsername(name);
 user.setPassword(password);
 if (!file.isEmpty()) {
  try {
  BufferedOutputStream out = new BufferedOutputStream(
   new FileOutputStream(new File("f:\旗杯\demo5\src\main\webapp\"+name+".jpg")));//保存图片到目录下
  out.write(file.getBytes());
  out.flush();
  out.close();
  String filename="f:\旗杯\demo5\src\main\webapp\"+name+".jpg";
  user.setTupian(filename);
  userRepository.save(user);//增加用户
  } catch (FileNotFoundException e) {
  e.printStackTrace();
  return "上传失败," + e.getMessage();
  } catch (IOException e) {
  e.printStackTrace();
  return "上传失败," + e.getMessage();
  }
  model.addAttribute(user);
  return "permanager";
 } else {
  return "上传失败,因为文件是空的.";
 }
 }
}个人中心:
<!DOCTYPE html>
<html lang="en" xmlns:th="http://www.thymeleaf.org">
<head>
 <meta charset="UTF-8"/>
 <title>Title</title>
</head>
<body>
<p>用户名:</p>
<p th:text="${user.username}"></p>
<p>图片:</p>
<img  th:src="@{${user.username}+'.jpg'}"/ alt="spring boot实现上传图片遇到的问题小结" >
</body>
</html>对webapp路径的配置
package com.example.demo.config;
import org.springframework.context.annotation.Configuration;
import org.springframework.web.servlet.config.annotation.ResourceHandlerRegistry;
import org.springframework.web.servlet.config.annotation.WebMvcConfigurerAdapter;
/**
 * Created by 18274 on 2017/8/9.
 */
@Configuration
public class MyWebAppConfigurer extends WebMvcConfigurerAdapter{
 @Override
 public void addResourceHandlers(ResourceHandlerRegistry registry) {
 registry.addResourceHandler("/src/main/webapp/**").addResourceLocations("classpath:/webapp/");
 super.addResourceHandlers(registry);
 }
}对应的用户实体类:
package com.example.demo.domain;
import javax.persistence.Entity;
import javax.persistence.GeneratedValue;
import javax.persistence.Id;
/**
 * Created by 18274 on 2017/8/9.
 */
@Entity
public class User {
 @Id
 @GeneratedValue
 private Long id;
 private String username;
 private String password;
 private String tupian;//图片地址
 public User(){}
 public Long getId() {
 return id;
 }
 public String getUsername() {
 return username;
 }
 public String getPassword() {
 return password;
 }
 public String getTupian() {
 return tupian;
 }
 public void setId(Long id) {
 this.id = id;
 }
 public void setUsername(String username) {
 this.username = username;
 }
 public void setPassword(String password) {
 this.password = password;
 }
 public void setTupian(String tupian) {
 this.tupian = tupian;
 }
}用户实体类的接口:
package com.example.demo.dao;
import com.example.demo.domain.User;
import org.springframework.data.jpa.repository.JpaRepository;
/**
 * Created by 18274 on 2017/8/9.
 */
public interface UserRepository extends JpaRepository<User,Long>{
}最后运行如下:
注册上传头像:

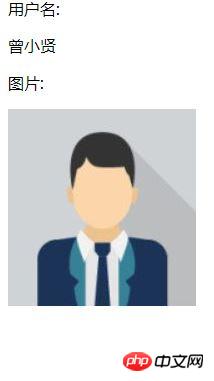
个人中心:
ps:如果在结合spring security的话,只需要从session.SPRING_SECURITY_CONTEXT.authentication.principal.XXX中取得信息即可。
以上内容就是spring boot实现上传图片遇到的问题小结,希望能帮助到大家。
相关推荐:
以上就是spring boot实现上传图片遇到的问题小结的详细内容,更多请关注php中文网其它相关文章!

每个人都需要一台速度更快、更稳定的 PC。随着时间的推移,垃圾文件、旧注册表数据和不必要的后台进程会占用资源并降低性能。幸运的是,许多工具可以让 Windows 保持平稳运行。

Copyright 2014-2025 https://www.php.cn/ All Rights Reserved | php.cn | 湘ICP备2023035733号


 948
948