这次给大家带来Vue2x图片预览插件使用步骤详解,Vue2x图片预览插件使用的注意事项有哪些,下面就是实战案例,一起来看一下。
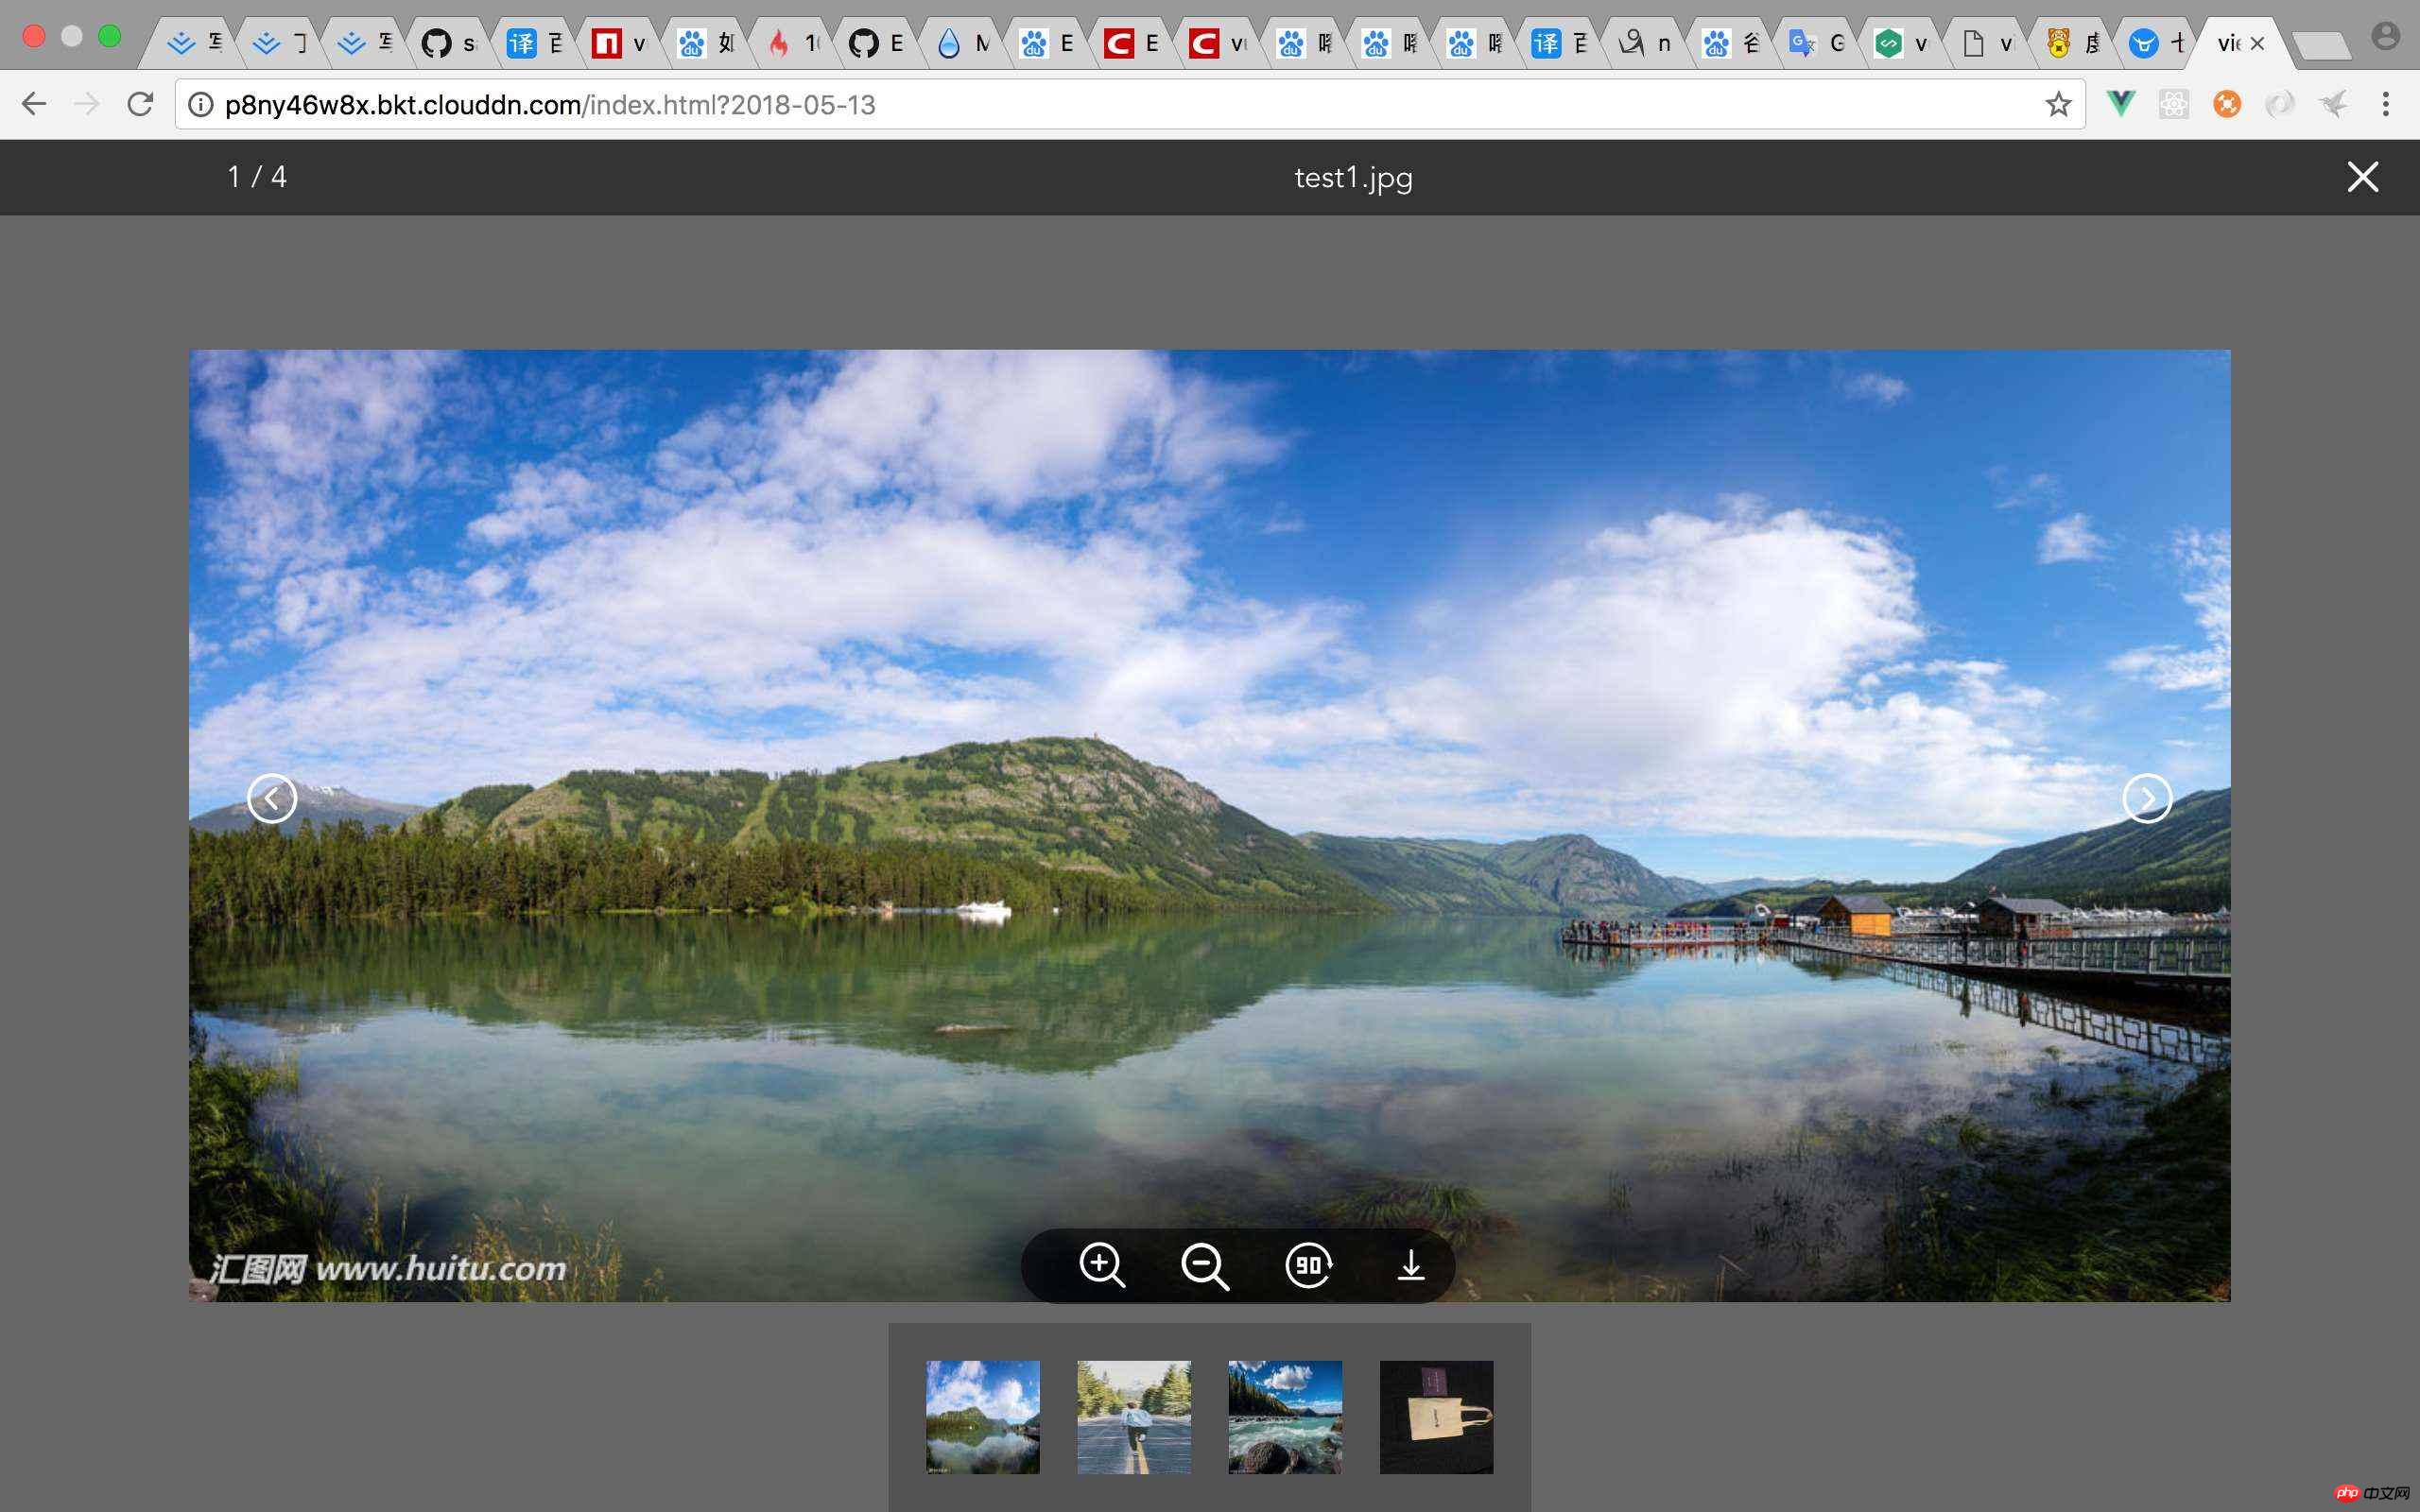
先来看下Demo
LiveDemo
关于开发Vue插件的几种方式 (具体请移步官网)Vue官网
MyPlugin.install = function (Vue, options) {
 // 1. 添加全局方法或属性
 Vue.myGlobalMethod = function () {
  // 逻辑...
 }
 // 2. 添加全局资源
 Vue.directive('my-directive', {
  bind (el, binding, vnode, oldVnode) {
   // 逻辑...
  }
  ...
 })
 // 3. 注入组件
 Vue.mixin({
  created: function () {
   // 逻辑...
  }
  ...
 })
 // 4. 添加实例方法
 Vue.prototype.$myMethod = function (methodOptions) {
  // 逻辑...
 }
}我采用第一种方式来编写这个插件
1.第一步创建项目
vue init webpack-simple youProjectName(你的项目名称)具体操作不在赘述

2.开始插件开发,编写index.js
import vuePictureViewer from './vue-picture-viewer'
const pictureviewer = {
 install (Vue, options) {
  Vue.component(vuePictureViewer.name, vuePictureViewer)
 }
}
if (typeof window !== 'undefined' && window.Vue) { // 这段代码很重要
 window.Vue.use(pictureviewer)
}
export default pictureviewer3.编写vue-picture-viewer.vue也挺简单(具体可以去看源码)
4.如何使用(main.js)
import vuePictureViewer from './lib/index.js'
Vue.use(vuePictureViewer)
App.vue
<template>
 <p id="app">
  <vue-picture-viewer :imgData="imgUrl" :switch="true" v-if="imgUrl"></vue-picture-viewer>
 </p>
</template>
<script>
export default {
 name: 'app',
 data () {
  return {
   imgUrl: [{
     url:'http://p8ny46w8x.bkt.clouddn.com/test1.jpg',
     name: 'test1.jpg'
    },
    {
     url: 'http://p8ny46w8x.bkt.clouddn.com/test2.jpg',
     name: 'test2.jpg'
    }, {
     url: 'http://p8ny46w8x.bkt.clouddn.com/test3.jpg',
     name: 'test3.jpg'
    },
    {
     url: 'http://p8ny46w8x.bkt.clouddn.com/test4.jpg',
     name: 'test4.jpg'
    }]
  }
 }
}
</script>
<style>
* {
 margin: 0;
 padding: 0;
}
html, body {
 width: 100%;
 height: 100%;
}
</style>5.打包前的配置webpack.config.js(很重要!!!)
module.exports = {
 entry: './src/lib/index.js',
 output: {
  path: path.resolve(dirname, './dist'),
  publicPath: '/dist/',
  // filename: 'build.js',
  filename: 'vue-picture-viewer.js',
  library: 'pictureViewer',
  libraryTarget: 'umd',
  umdNamedDefine: true
},6.打包成功,配置package.json
"license": "MIT", // 许可证
 "private": false, // 默认是true 私人的 需要改为false, 不然发布不成功!
 "main": "dist/vue-picture-viewer.js", 这个超级重要 决定了你 import xxx from “vue-picture-viewer” 它默认就会去找 dist下的vue-picture-viewer 文件
 "repository": {
  "type": "git",
  "url": "https://github.com/sangcz/vue-picture-viewer" // github项目地址
},7.一切Ok准备发布!
8.首先注册好npm后 添加用户
npm adduser
Username: your name
Password: your password
Email: yourmail
// 查看一下登录的是不是你自己
npm whoami
// 发布
npm publish
// 这里我遇到一个问题,发布失败了!
什么原因呢?
9.解决了上面的问题,发布成功了!开心
以上就是Vue2x图片预览插件使用步骤详解的详细内容,更多请关注php中文网其它相关文章!

每个人都需要一台速度更快、更稳定的 PC。随着时间的推移,垃圾文件、旧注册表数据和不必要的后台进程会占用资源并降低性能。幸运的是,许多工具可以让 Windows 保持平稳运行。

 广告
广告Copyright 2014-2025 https://www.php.cn/ All Rights Reserved | php.cn | 湘ICP备2023035733号


 813
813