
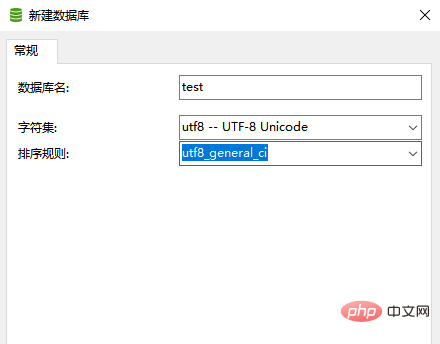
第一步,打开Navicat,新建数据库。
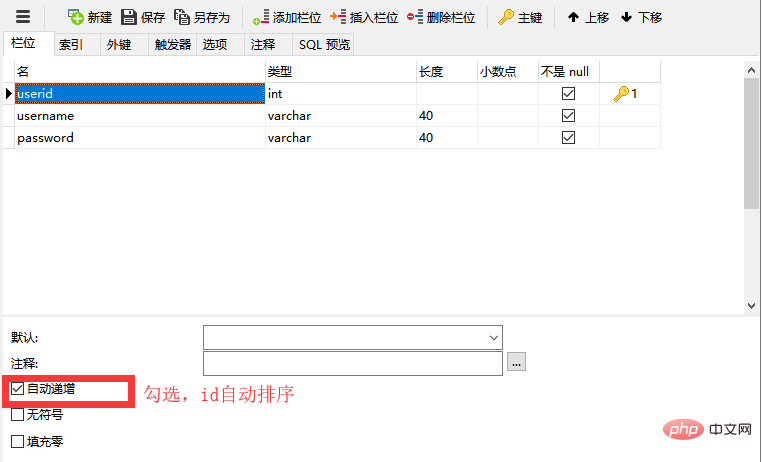
第二步,在数据库中新建表。
立即学习“PHP免费学习笔记(深入)”;
相关推荐:《Navicat for mysql使用图文教程》
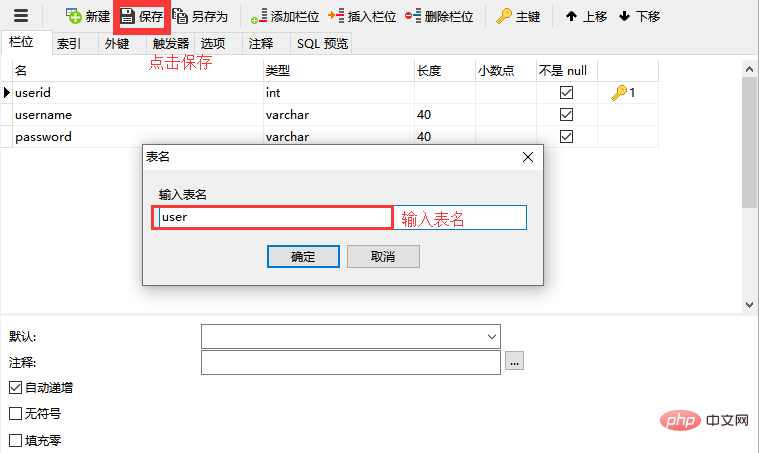
第三步,保存表。

Difeye是一款超轻量级PHP框架,主要特点有: Difeye是一款超轻量级PHP框架,主要特点有: ◆数据库连接做自动主从读写分离配置,适合单机和分布式站点部署; ◆支持Smarty模板机制,可灵活配置第三方缓存组件; ◆完全分离页面和动作,仿C#页面加载自动执行Page_Load入口函数; ◆支持mysql,mongodb等第三方数据库模块,支持读写分离,分布式部署; ◆增加后台管理开发示例
 0
0

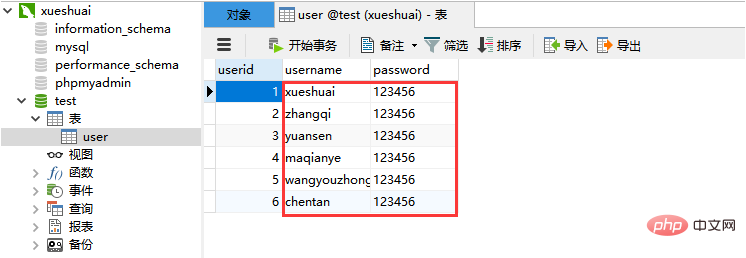
第四步,表中添加数据。
第五步,打开ide,输入以下php代码,使用localhost打开该php文件。
<?php

    // ip地址、用户名、密码
    $con=mysql_connect("localhost","root","123456");

    // 判断是否连接成功
    if(!$con){
        die('数据库连接失败'.mysql_error());
    }else{
        // 设置编码格式
        mysql_query("set name utf8");

        // 选择数据库
        mysql_select_db("test",$con);

        // 选择数据表
        $result=mysql_query("select * from user");

        // 输出表格及th
        echo "<table border='2' width='300'>
                <tr>
                <th>id</th><th>name</th>
                <th>password</th>
                </tr>";

        // 遍历数据表中的内容
        while($row=mysql_fetch_array($result)){
            echo "<tr>";
            // userid === 用户id 与数据表中的id名称对应
            echo "<td>".$row['userid']."</td>";
            // username === 用户名称 与数据表中的username名称对应
            echo "<td>".$row['username']."</td>";
            // password === 用户密码 与数据表中的密码对应
            echo "<td>".$row['password']."</td>";
            echo "</tr>";
        }
        echo "</table>";
    }
    // 关闭数据库
    mysql_close($con);

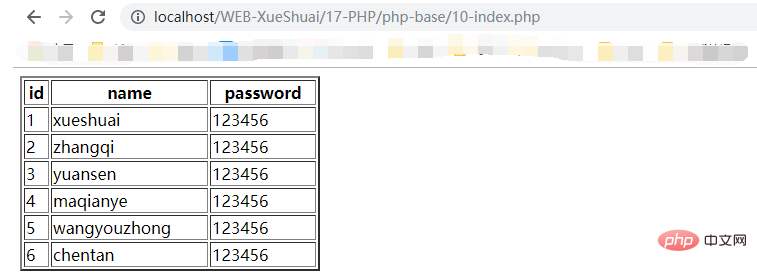
?>浏览器中显示的页面:

PHP怎么学习?PHP怎么入门?PHP在哪学?PHP怎么学才快?不用担心,这里为大家提供了PHP速学教程(入门到精通),有需要的小伙伴保存下载就能学习啦!

Copyright 2014-2025 https://www.php.cn/ All Rights Reserved | php.cn | 湘ICP备2023035733号