css选择器可以插入图片,如CSS选择器“:before”和“:after”,其插入方法就是使用content属性来插入图片,使用语法如“.p_beforeImg:before {content: ''; background...”}。

本教程操作环境:Windows7系统、HTML5&&CSS3版本,该方法适用于所有品牌电脑。
推荐:《css视频教程》
CSS选择器:before、:after可以使用content属性来插入图片。
content 属性与 :before 及 :after 伪元素配合使用,在元素头或尾部来插入生成内容。
立即学习“前端免费学习笔记(深入)”;
说明: 该属性用于定义元素之前或之后放置的生成内容。默认地,这往往是行内内容,不过该内容创建的盒子类型可以用属性 display 控制。
认识 :before 和 :after
默认 display: inline;
必须设置 content 属性,否则一切都是无用功, content 属性也只能应用在 :before 和 :after 伪元素上;
默认user-select: none,就是 :before 和 :after 的内容无法被用户选中;
伪元素可以和伪类结合使用形如:.target:hover:after。
:before 和 :after 是在CSS2中提出来的,所以兼容IE8;

1.网站主干为 蓝木新闻系统 + 蓝木产品发布系统 + 站点信息管理 + 蓝木留言系统 + 蓝木投票系统。2.后台采用了在线编辑器,可以上传图片,文件等,相信用过在线编辑器的用户都知道其强大的功能。3.可发布产品图片,设置产品类别,4.可以选择数据库中栏目显示在菜单中。5.咨询页面的栏目顺序可以在后台进行顺序设置。6.产品分类页面的栏目顺序也可以在后台进行顺序设置。7.企业介绍等页面顺序也可以在
::before 和 ::after 是CSS3中的写法,为了将伪类和伪元素区分开;
CSS 中其他的伪元素有:::before、::after、::first-letter、::first-line、::selection 等;
不可通过DOM使用,它只是纯粹的表象。在特殊情况下,从一个访问的角度来看,当前屏幕阅读不支持生成的内容。
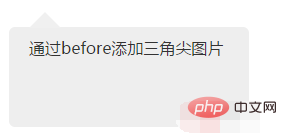
示例1:通过before添加三角尖图片
css3
通过before添加三角尖图片
效果图:

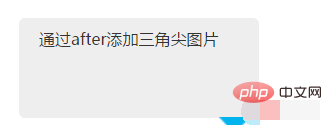
示例2:
把before的地方换成after,插入图片样式用一下的就行
.p_afterImg {
        background: #eeeeee;
        width: 200px;
        height: 80px;
        border-radius: 6px;
        padding: 10px 20px;
        position: relative;
    }
    .p_afterImg:after {
        content: '';
        background: url('../img/triangle_down.png') no-repeat bottom right /32px 16px;/*兼容没测*/
        position: absolute;
        bottom: -15px;
        z-index: 2;
        width: 32px;
        height: 16px;
    }
效果图:


