
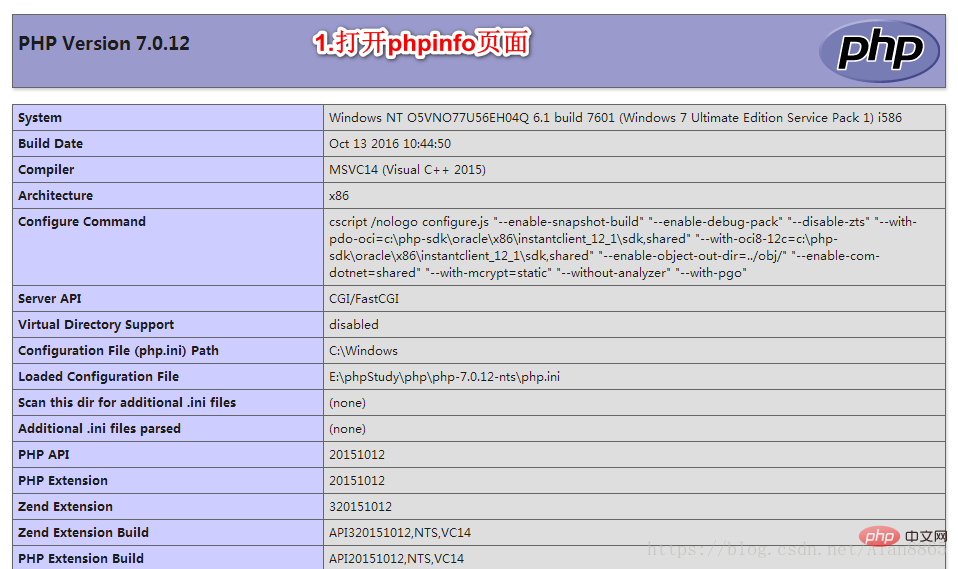
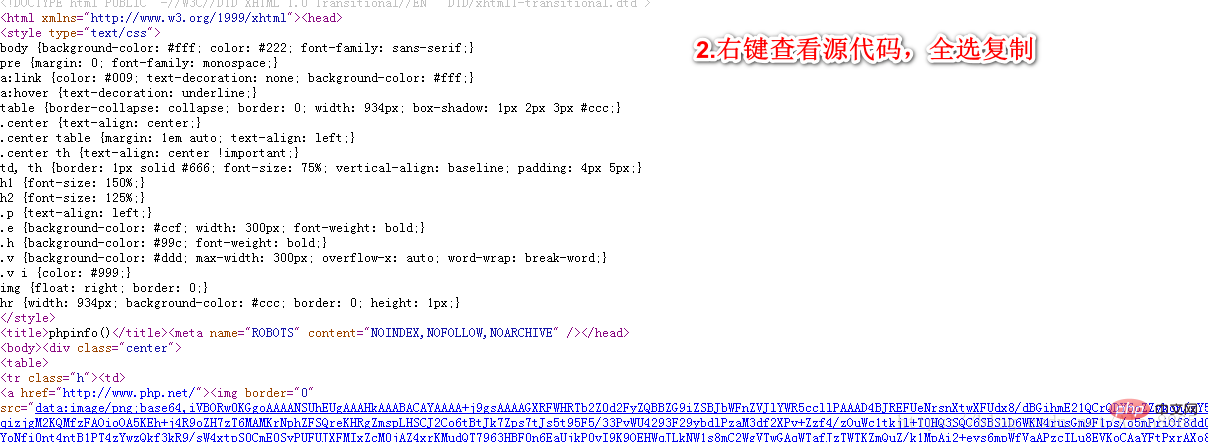
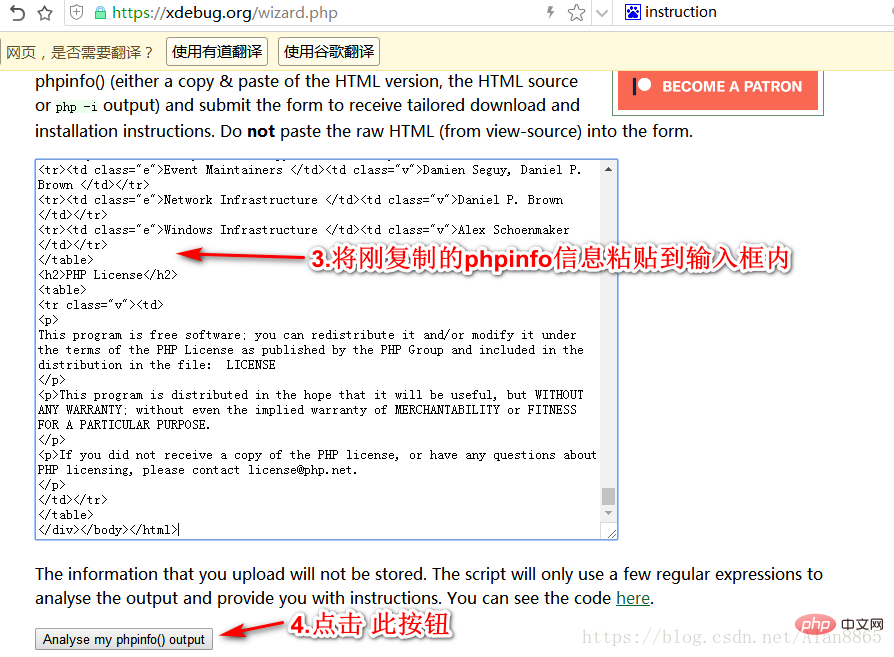
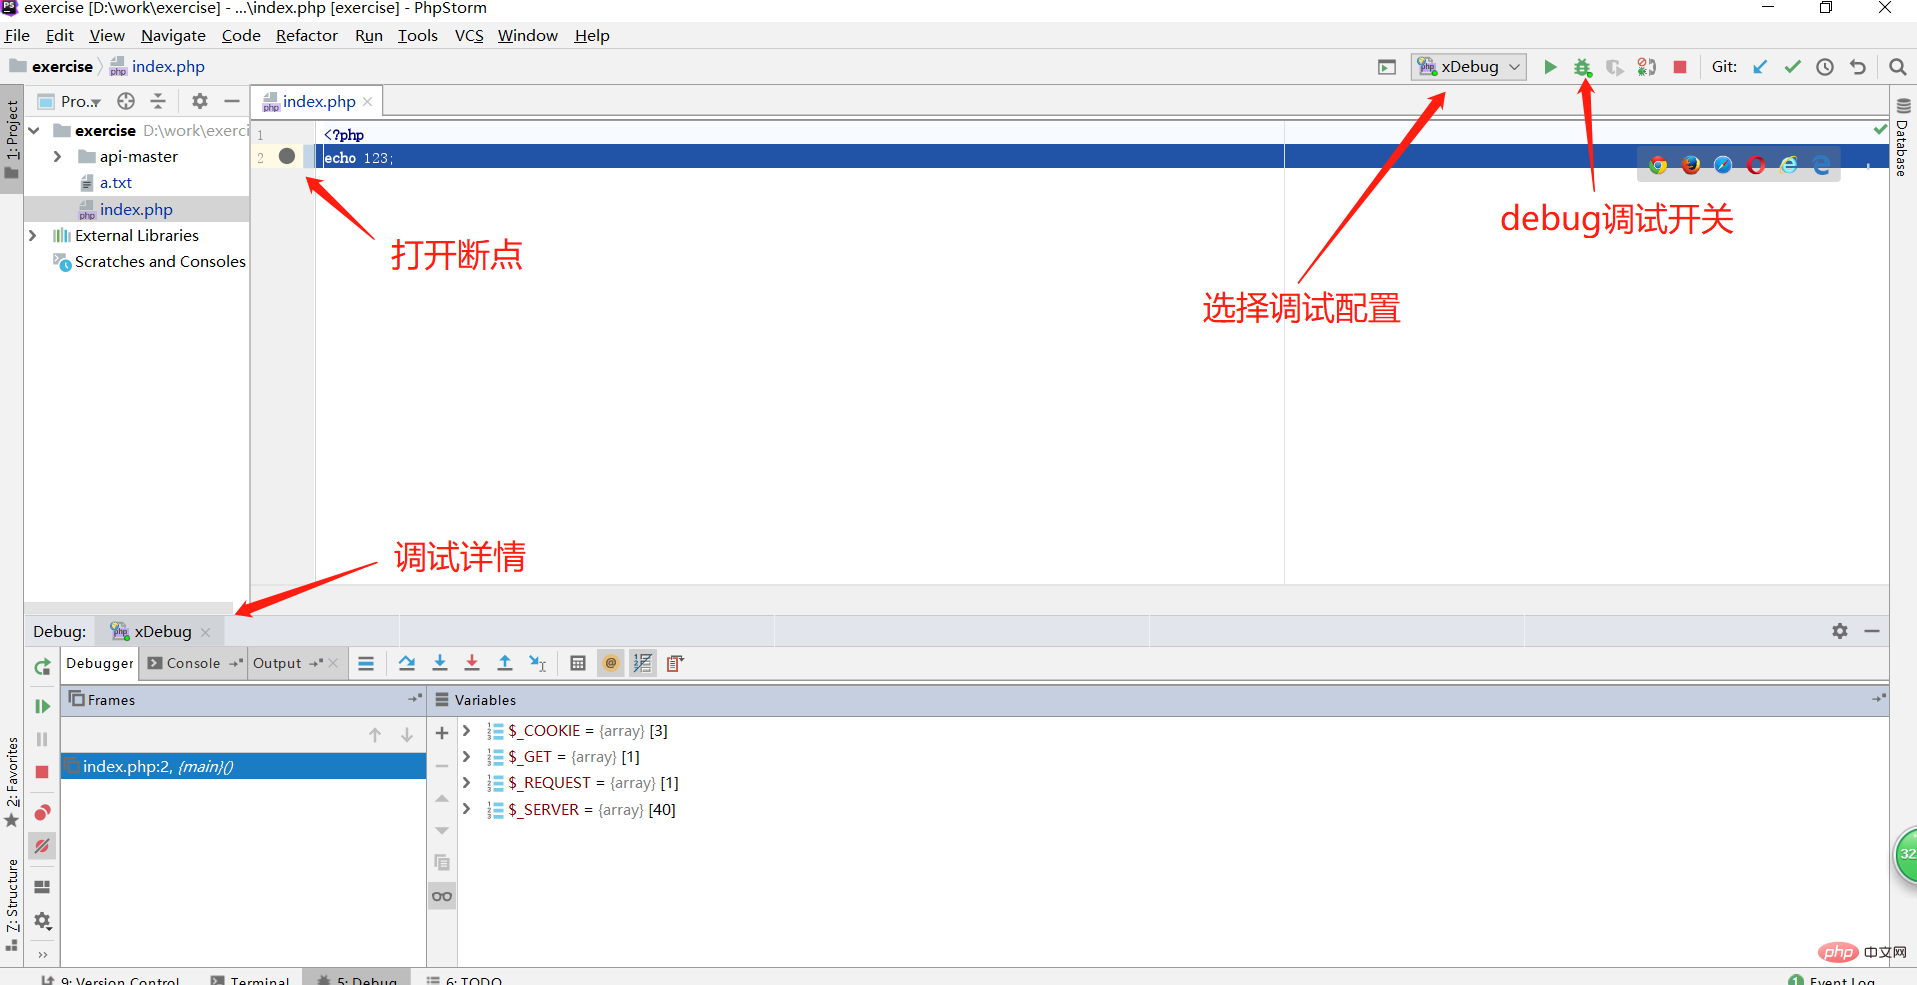
php安装xdebug扩展的方法:1、进入xdebug官网;2、在用户下载引导页面粘贴当前phpinfo信息;3、下载插件,并将插件放于指定目录;4、加入xdebug设置;5、查看插件是否安装成功;6、配置phpstorm即可。

本文操作环境:windows7系统、phpstorm 2020版,DELL G3电脑
php安装xdebug扩展,PHPStorm+XDebug单步调试
场景
在使用phpstorm等IDE编辑器编写php代码时,为了更方便的调试,我们需要安装一款php的扩展插件 xdebug。本实例当前运行环境为phpstudy集成环境。
立即学习“PHP免费学习笔记(深入)”;
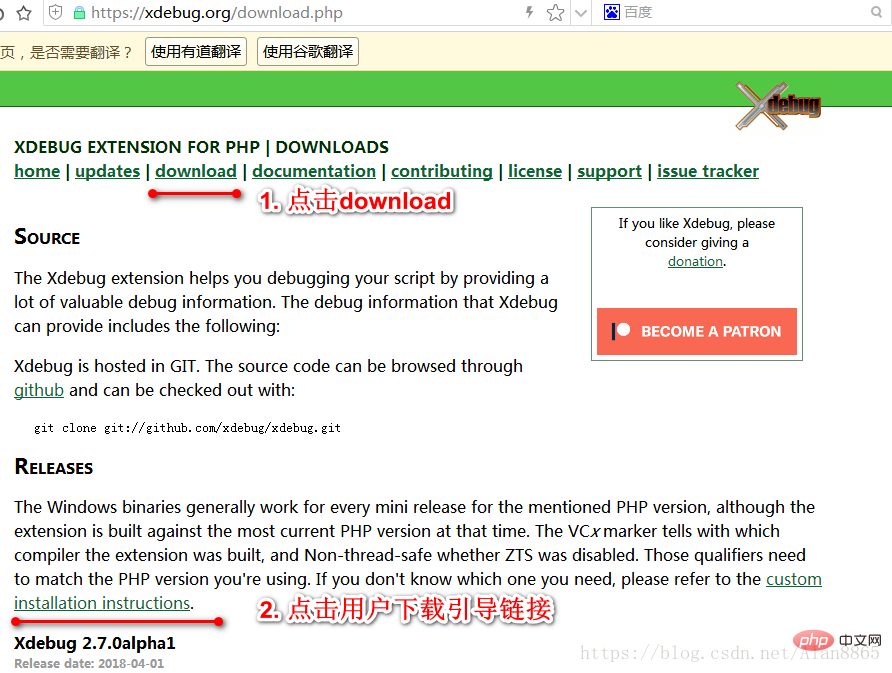
游览器输入网址:https://xdebug.org或者直接搜索xdebug进入网站。
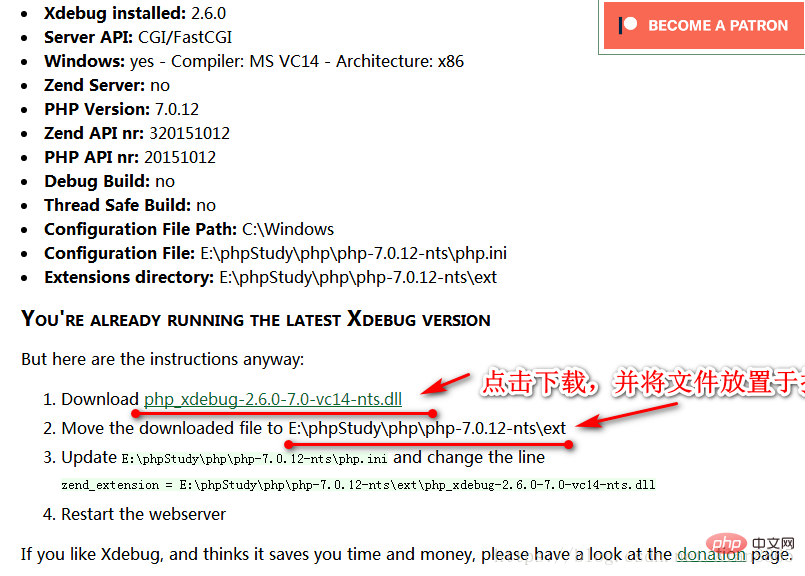
点击下方download进入下载页面。点击 custom installation instructions链接。

好买卖商城开源商城 是基于Opencart网店系统,针对中文用户而改进的本地化分支,是真正的开源PHP中文网店系统,兼容Opencart的插件。该系统具有易于操作的可视化安装界面、完善的前台商品展示和户在线购物车功能、强大的后台管理和维护功能模块简单易用,灵活的插件机制,更易于扩展。另外,好买卖商城开源商城 还集成集成了支付宝等支付和物流插件,更适合中文用户使用。 好买卖商城2.0开源商城流程进行
 0
0

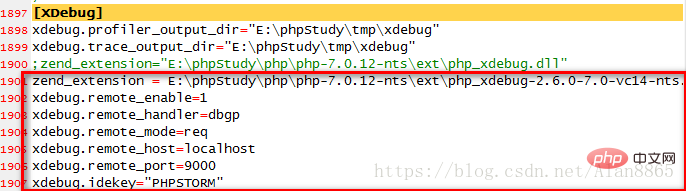
zend_extension = "D:\phpStudy2018\PHPTutorial\php\php-7.1.13-nts\ext\php_xdebug-2.7.2-7.1-vc14-nts.dll"xdebug.remote_enable=1xdebug.remote_handler=dbgp
xdebug.remote_mode=req
xdebug.remote_host=localhost
xdebug.remote_port=9000xdebug.idekey="PHPSTORM"

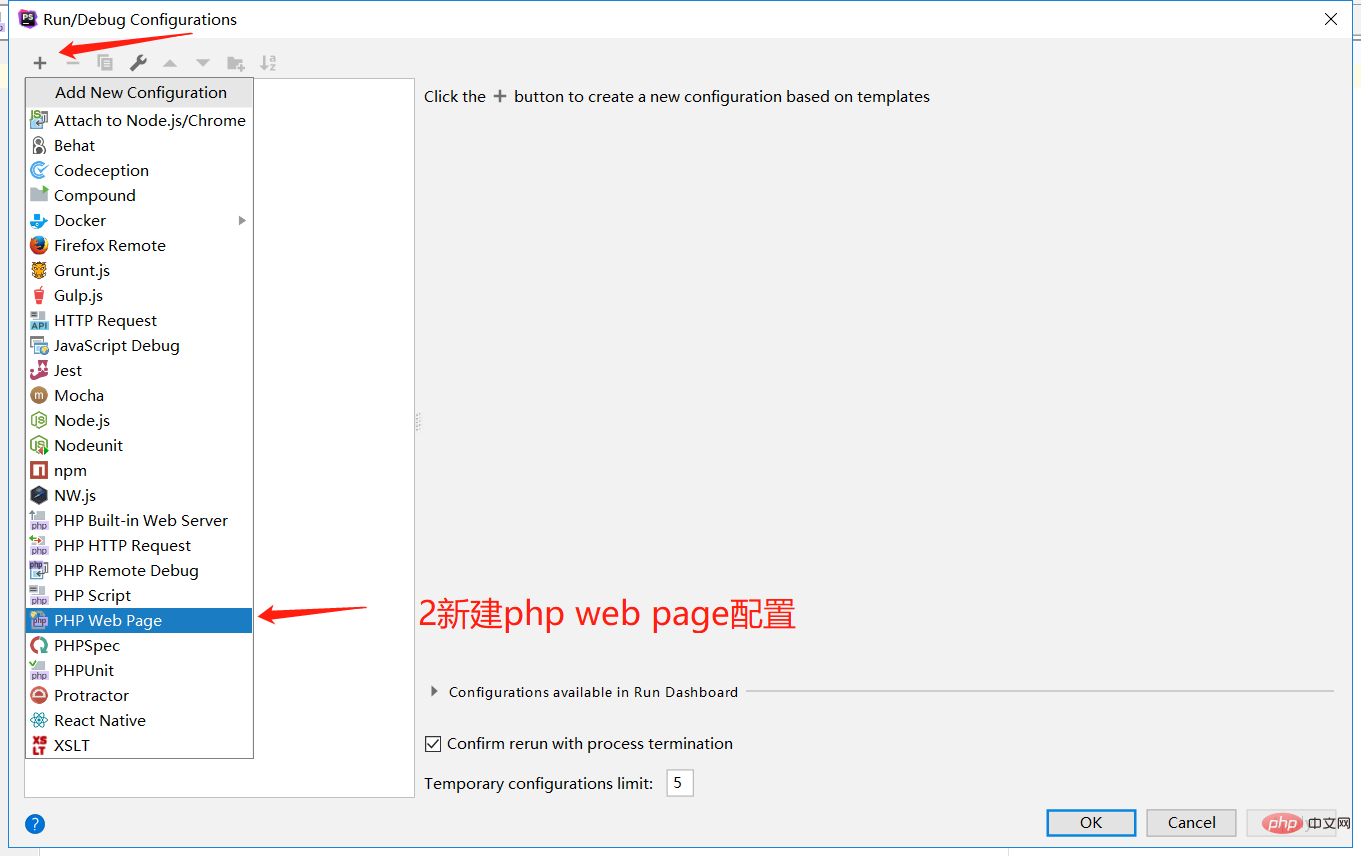
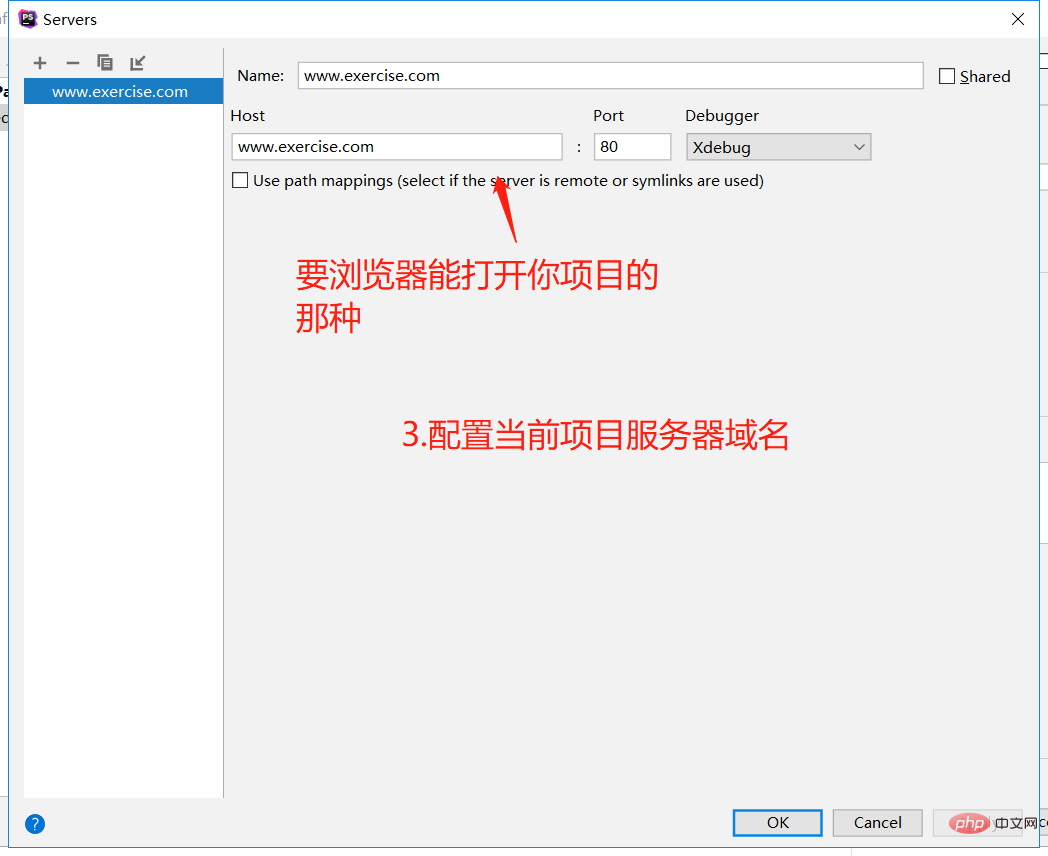
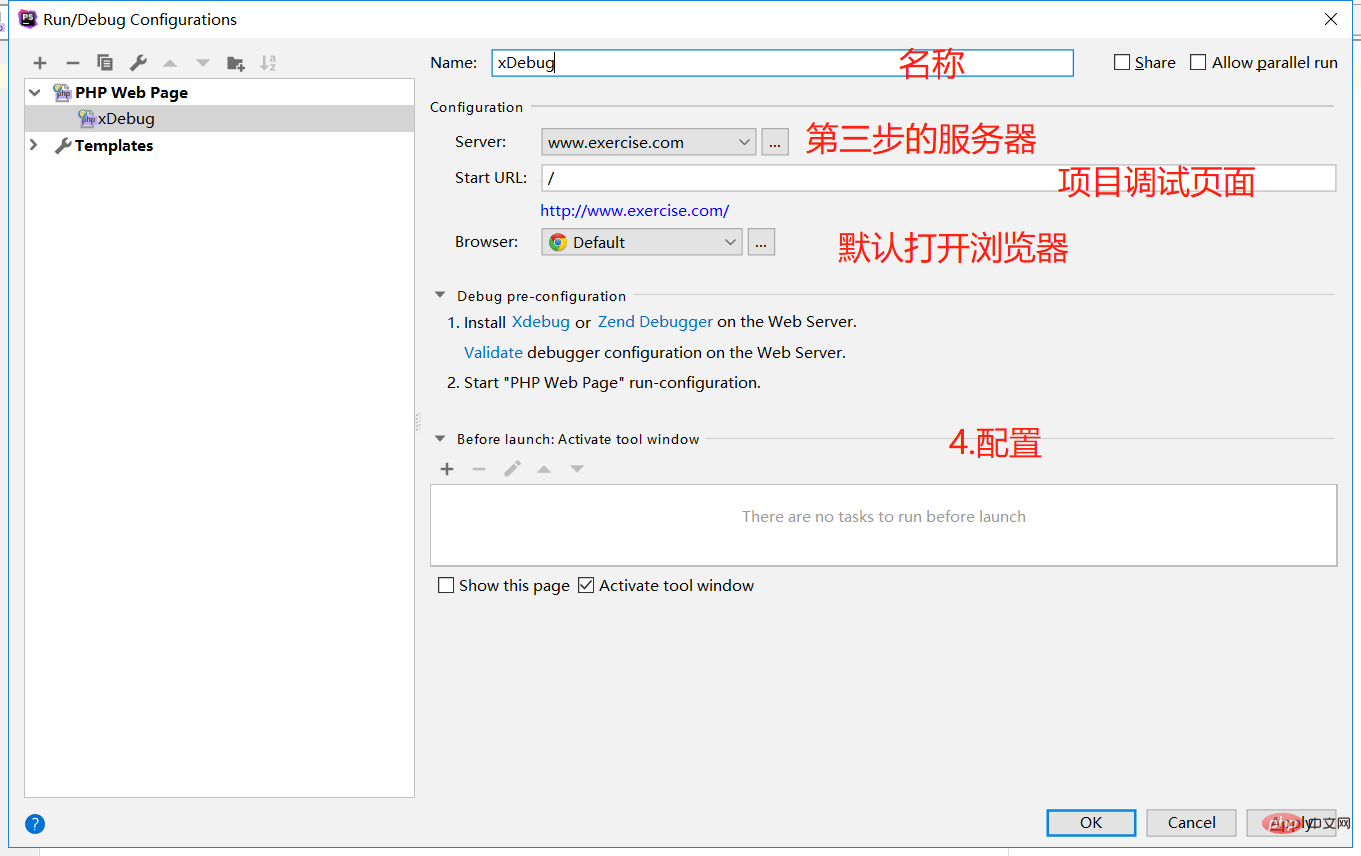
经过上面几个步骤,我们就安装好了php的xdebug扩展,并且配置好了phpstorm中的相关配置,下面就可以使用phpstorm的xdebug功能进行调试工作啦。
以上就是php怎么安装xdebug扩展的详细内容,更多请关注php中文网其它相关文章!

PHP怎么学习?PHP怎么入门?PHP在哪学?PHP怎么学才快?不用担心,这里为大家提供了PHP速学教程(入门到精通),有需要的小伙伴保存下载就能学习啦!

Copyright 2014-2025 https://www.php.cn/ All Rights Reserved | php.cn | 湘ICP备2023035733号


 1652
1652


