react跳转传值的实现方法:1、通过“history.push”或“NavLink”实现页面跳转;2、通过“this.props.history.push({pathname: 'login',query: {id: ...,name: ...}})this.props.history.push('modify')”实现传值即可。

本教程操作环境:Windows10系统、react18.0.0版、Dell G3电脑。
react跳转传值怎么实现?
react项目页面跳转/传值
一、跳转
1、history.push 跳转
- 引用 withRouter
- 导出组件时使用
import { withRouter } from 'react-router-dom';

class Header extends React.Component {

}
export default withRouter(Header);
2、NavLink跳转
import { NavLink } from "react-router-dom";
修改密码
二、传值
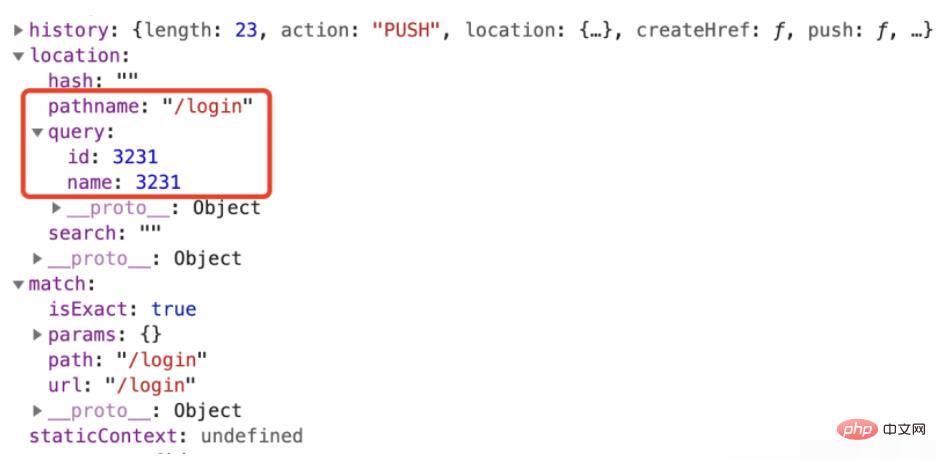
1、路由传值 query/params
this.props.history.push({
    pathname: 'login',
    query: {
        id: 3231,
        name: 3231
    }})this.props.history.push('modify')
2、路由传值获取参数
this.props.match.query.id // 3231
this.props.match.params.name // 3231
3、props传值
父组件:
state = {
    collapsed: false,};render() {
    const { collapsed } = this.state;
    return (

    )}
子组件:
componentDidMount(){
    // console.log(this.props)
    const { pathname } = this.props.location    if( pathname ) {
        this.setState({
            selectedKeys:this.props.location.pathname        })
    }}
console.log(this.props)
推荐学习:《react视频教程》


