


1.分页功能的作用
分页功能作为各类网站和系统不可或缺的部分(例如百度搜索结果的分页等),当一个页面数据量大的时候分页作用就体现出来的,其作用有以下5个。
(1)减少系统资源的消耗
(2)提高数据库的查询性能
(3)提升页面的访问速度
(4)符合用户的浏览习惯
(5)适配页面的排版
2.建立测试数据库
由于需要实现分页功能,所需的数据较多
DROP TABLE IF EXISTS tb_user;

CREATE TABLE tb_user (
    id int(11) NOT NULL AUTO_INCREMENT COMMENT '主键id',
    name varchar(100) NOT NULL DEFAULT '' COMMENT '登录名',
    password varchar(100) NOT NULL DEFAULT '' COMMENT '密码',
    PRIMARY KEY (id) USING BTREE
) ENGINE = InnoDB CHARACTER SET = utf8;

insert into tb_user (id,name,password)
value (1,'C','123456'),
(2,'C++','123456'),
(3,'Java','123456'),
(4,'Python','123456'),
(5,'R','123456'),
(6,'C#','123456');

insert into tb_user (id,name,password) value (7,'test1','123456');
insert into tb_user (id,name,password) value (8,'test2','123456');
insert into tb_user (id,name,password) value (9,'test3','123456');
insert into tb_user (id,name,password) value (10,'test4','123456');
insert into tb_user (id,name,password) value (11,'test5','123456');
insert into tb_user (id,name,password) value (12,'test6','123456');
insert into tb_user (id,name,password) value (13,'test7','123456');
insert into tb_user (id,name,password) value (14,'test8','123456');
insert into tb_user (id,name,password) value (15,'test9','123456');
insert into tb_user (id,name,password) value (16,'test10','123456');
insert into tb_user (id,name,password) value (17,'test11','123456');
insert into tb_user (id,name,password) value (18,'test12','123456');
insert into tb_user (id,name,password) value (19,'test13','123456');
insert into tb_user (id,name,password) value (20,'test14','123456');
insert into tb_user (id,name,password) value (21,'test15','123456');
insert into tb_user (id,name,password) value (22,'test16','123456');
insert into tb_user (id,name,password) value (23,'test17','123456');
insert into tb_user (id,name,password) value (24,'test18','123456');
insert into tb_user (id,name,password) value (25,'test19','123456');
insert into tb_user (id,name,password) value (26,'test20','123456');
insert into tb_user (id,name,password) value (27,'test21','123456');
insert into tb_user (id,name,password) value (28,'test22','123456');
insert into tb_user (id,name,password) value (29,'test23','123456');
insert into tb_user (id,name,password) value (30,'test24','123456');
insert into tb_user (id,name,password) value (31,'test25','123456');
insert into tb_user (id,name,password) value (32,'test26','123456');
insert into tb_user (id,name,password) value (33,'test27','123456');
insert into tb_user (id,name,password) value (34,'test28','123456');
insert into tb_user (id,name,password) value (35,'test29','123456');
insert into tb_user (id,name,password) value (36,'test30','123456');
insert into tb_user (id,name,password) value (37,'test31','123456');
insert into tb_user (id,name,password) value (38,'test32','123456');
insert into tb_user (id,name,password) value (39,'test33','123456');
insert into tb_user (id,name,password) value (40,'test34','123456');
insert into tb_user (id,name,password) value (41,'test35','123456');
insert into tb_user (id,name,password) value (42,'test36','123456');
insert into tb_user (id,name,password) value (43,'test37','123456');
insert into tb_user (id,name,password) value (44,'test38','123456');
insert into tb_user (id,name,password) value (45,'test39','123456');
insert into tb_user (id,name,password) value (46,'test40','123456');
insert into tb_user (id,name,password) value (47,'test41','123456');
insert into tb_user (id,name,password) value (48,'test42','123456');
insert into tb_user (id,name,password) value (49,'test43','123456');
insert into tb_user (id,name,password) value (50,'test44','123456');
insert into tb_user (id,name,password) value (51,'test45','123456');
3.分页功能返回的结果封装
新建一个util包并在包中新建Result通用结果类,代码如下:
package ltd.newbee.mall.entity;

public class User {
    private Integer id;
    private String name;
    private String password;

    public Integer getId() {
        return id;
    }

    public void setId(Integer id) {
        this.id = id;
    }

    public String getName() {
        return name;
    }

    public void setName(String name) {
        this.name = name;
    }

    public String getPassword() {
        return password;
    }

    public void setPassword(String password) {
        this.password = password;
    }
}
后端接口返回的数据会根据以上格式进行数据封装,包括业务码、返回信息、实际的数据结果。这个格式是开发人员自行设置的,如果有其他更好的方案也可以进行适当的调整。
在util包中新建PageResult通用结果类,代码如下:
package ltd.newbee.mall.util;

import java.util.List;

/**
 * 分页工具类
 */
public class PageResult {
    //总记录数
    private int totalCount;
    //每页记录数
    private int pageSize;
    //总页数
    private int totalPage;
    //当前页数
    private int currPage;
    //列表数据
    private List list;

    /**
     *
     * @param totalCount 总记录数
     * @param pageSize 每页记录数
     * @param currPage 当前页数
     * @param list 列表数据
     */
    public PageResult(int totalCount, int pageSize, int currPage, List list) {
        this.totalCount = totalCount;
        this.pageSize = pageSize;
        this.currPage = currPage;
        this.list = list;
        this.totalPage = (int) Math.ceil((double) totalCount / pageSize);
    }

    public int getTotalCount() {
        return totalCount;
    }

    public void setTotalCount(int totalCount) {
        this.totalCount = totalCount;
    }

    public int getPageSize() {
        return pageSize;
    }

    public void setPageSize(int pageSize) {
        this.pageSize = pageSize;
    }

    public int getTotalPage() {
        return totalPage;
    }

    public void setTotalPage(int totalPage) {
        this.totalPage = totalPage;
    }

    public int getCurrPage() {
        return currPage;
    }

    public void setCurrPage(int currPage) {
        this.currPage = currPage;
    }

    public List getList() {
        return list;
    }

    public void setList(List list) {
        this.list = list;
    }
}
4.分页功能代码具体实现
4.1数据层
在UserDao接口中新增两个方法findUsers()和getTotalUser(),代码如下所示:
/**
     * 返回分页数据列表
     *
     * @param pageUtil
     * @return
     */
    List findUsers(PageQueryUtil pageUtil);

    /**
     * 返回数据总数
     *
     * @param pageUtil
     * @return
     */
    int getTotalUser(PageQueryUtil pageUtil);
在UserMapper.xml文件中新增这两个方法的映射语句,代码如下所示:
4.2业务层
新建service包,并新增业务类UserService,代码如下所示:
import ltd.newbee.mall.dao.UserDao;
import ltd.newbee.mall.entity.User;
import ltd.newbee.mall.util.PageResult;
import ltd.newbee.mall.util.PageQueryUtil;
import org.springframework.beans.factory.annotation.Autowired;
import org.springframework.stereotype.Service;

import java.util.List;

@Service
public class UserService {

    @Autowired
    private UserDao userDao;

    public PageResult getUserPage(PageQueryUtil pageUtil){
        //当前页面中的数据列表
        List users = userDao.findUsers(pageUtil);
        //数据总条数,用于计算分页数据
        int total = userDao.getTotalUser(pageUtil);
        //分页信息封装
        PageResult pageResult = new PageResult(users,total,pageUtil.getLimit(),pageUtil.getPage());
        return pageResult;
    }
}
首先根据当前页面和每页条数查询当前页的数据集合,然后调用select count(*)语句查询数据的总条数用于计算分页数据,最后将获取的数据封装到PageResult对象中并返回给控制层。
4.3控制层
在controller包中新建PageTestController类,用于实现分页请求的处理并返回查询结果,代码如下所示:
@RestController
@RequestMapping("users")
public class PageTestController {

    @Autowired
    private UserService userService;

    //分页功能测试
    @RequestMapping(value = "/list",method = RequestMethod.GET)
    public Result list(@RequestParam Map params){
        Result result = new Result();
        if (StringUtils.isEmpty(params.get("page"))||StringUtils.isEmpty(params.get("limit"))){
            //返回错误码
            result.setResultCode(500);
            //错误信息
            result.setMessage("参数异常!");
            return result;
        }
        //封装查询参数
        PageQueryUtil queryParamList = new PageQueryUtil(params);
        //查询并封装分页结果集
        PageResult userPage = userService.getUserPage(queryParamList);
        //返回成功码
        result.setResultCode(200);
        result.setMessage("查询成功");
        //返回分页数据
        result.setData(userPage);
        return result;
    }
}
分页功能的交互流程:前端将所需页码和条数参数传输给后端,后端在接收分页请求后对分页参数进行计算,并利用MySQL的limit关键字查询对应的记录,在查询结果被封装后返回给前端。在TestUserControler类上使用的是@RestController注解,该注解相当于@ResponseBody+@Controller的组合注解。
5.jqGrid分页插件
jqGrid是一个用来显示网格数据的jQuery插件。开发人员通过使用jqGrid可以轻松实现前端页面与后台数据的Ajax异步通信并实现分页功能。同时,jqGrid是一款代码开源的分页插件,源码也一直处于迭代更新的状态中。

部分功能简介:商品收藏夹功能热门商品最新商品分级价格功能自选风格打印结算页面内部短信箱商品评论增加上一商品,下一商品功能增强商家提示功能友情链接用户在线统计用户来访统计用户来访信息用户积分功能广告设置用户组分类邮件系统后台实现更新用户数据系统图片设置模板管理CSS风格管理申诉内容过滤功能用户注册过滤特征字符IP库管理及来访限制及管理压缩,恢复,备份数据库功能上传文件管理商品类别管理商品添加/修改/
下载地址:jqGrid
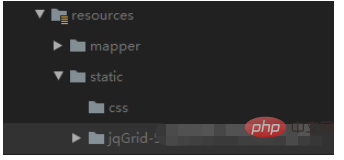
下载jqGrid后解压文件,将解压的文件直接拖进项目的static目录下
以下是jqGrid实现分页的步骤:
首先,在前端页面代码中引入jqGrid分页插件所需的源文件,代码如下所示:
其次,在页面中需要展示分页数据的区域添加用于jqGrid初始化的代码:
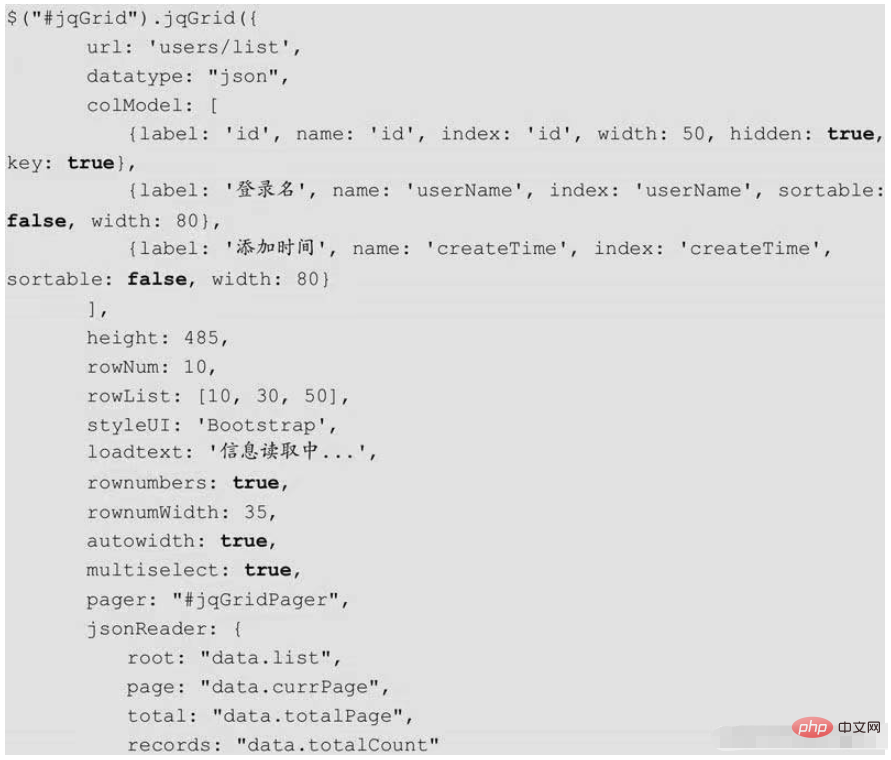
最后,调用jqGrid分页插件的jqGrid()方法渲染分页展示区域,代码如下所示:
jqGrid()方法中的参数及含义如图所示。

jqGrid前端页面测试:
在resources/static目中新建jqgrid-page-test.html文件,代码如下所示:
jqGrid分页测试
jqGrid初始化
在resources/static目录下新建jqgrid-page-test.js文件,代码如下所示:
$(function () {
$("#jqGrid").jqGrid({
url: 'users/list',
datatype: "json",
colModel: [
{label: 'id',name: 'id', index: 'id', width: 50, hidden: true,key:true},
{label: '登录名',name: 'name',index: 'name', sortable: false, width: 80},
{label: '密码字段',name: 'password',index: 'password', sortable: false, width: 80}
],
height: 485,
rowNum: 10,
rowList: [10,30,50],
styleUI: 'Bootstrap',
loadtext: '信息读取中...',
rownumbers: true,
rownumWidth: 35,
autowidth: true,
multiselect: true,
pager: "#jqGridPager",
jsonReader:{
root: "data.list",
page: "data.currPage",
total: "data.totalCount"
},
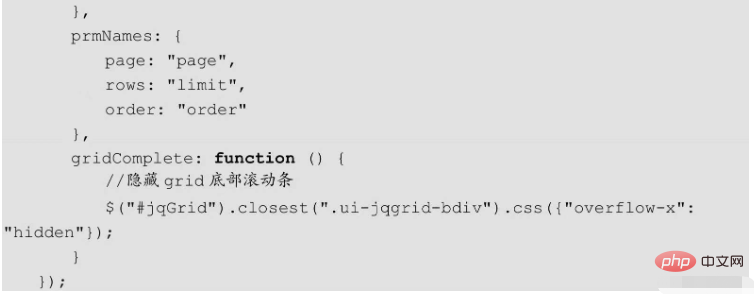
prmNames:{
page: "page",
rows: "limit",
order: "order"
},
gridComplete: function () {
//隐藏grid底部滚动条
$("#jqGrid").closest(".ui-jqgrid-bdiv").css({"overflow-x": "hidden"});
}
});
$(window).resize(function () {
$("jqGrid").setGridWidth($(".card-body").width());
});
}); 


