


下面举个小实例说明下:
centos7系统库中默认是没有nginx的rpm包的,所以我们自己需要先更新下rpm依赖库
1)使用yum安装nginx需要包括nginx的库,安装nginx的库
[root@localhost ~]# rpm -uvh http://nginx.org/packages/centos/7/noarch/rpms/nginx-release-centos-7-0.el7.ngx.noarch.rpm
2)使用下面命令安装nginx
[root@localhost ~]# yum install nginx
3)nginx配置
[root@localhost ~]# cd /etc/nginx/conf.d/
[root@localhost conf.d]# cat test.conf
server {
listen 80;
server_name localhost;
location / {
root /var/www/html;
index index.html;
}
}

[root@localhost conf.d]# cat /var/www/html/index.html
this is page of test!!!!
4)启动nginx
[root@localhost ~]# service nginx start //或者使用 systemctl start nginx.service
5)测试访问(103.110.186.23是192.168.1.23机器的外网ip)
[root@localhost conf.d]# curl http://192.168.1.23
this is page of test!!!!
看看下面几种情况:分别用http://192.168.1.23/proxy/index.html进行访问测试
为了方便测试,先在另一台机器192.168.1.5上部署一个8090端口的nginx,配置如下:
[root@bastion-idc ~]# cat /usr/local/nginx/conf/vhosts/haha.conf
server {
listen 8090;
server_name localhost;
location / {
root /var/www/html;
index index.html;
}
}
[root@bastion-idc ~]# cat /var/www/html/index.html
this is 192.168.1.5
[root@bastion-idc ~]# /usr/local/nginx/sbin/nginx -s reload
测试访问(103.110.186.5是192.168.1.5的外网ip):
[root@bastion-idc ~]# curl http://192.168.1.5:8090
this is 192.168.1.5

192.168.1.23作为nginx反向代理机器,nginx配置如下:
1)第一种情况:
[root@localhost conf.d]# cat test.conf
server {
listen 80;
server_name localhost;
location / {
root /var/www/html;
index index.html;
}
location /proxy/ {
proxy_pass http://192.168.1.5:8090/;
}
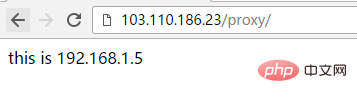
}这样,访问http://192.168.1.23/proxy/就会被代理到http://192.168.1.5:8090/。p匹配的proxy目录不需要存在根目录/var/www/html里面
注意,终端里如果访问http://192.168.1.23/proxy(即后面不带"/"),则会访问失败!因为proxy_pass配置的url后面加了"/"
[root@localhost conf.d]# curl http://192.168.1.23/proxy/ this is 192.168.1.5 [root@localhost conf.d]# curl http://192.168.1.23/proxy301 moved permanently 301 moved permanently
nginx/1.10.3
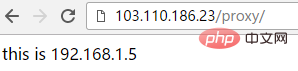
页面访问http://103.110.186.23/proxy的时候,会自动加上"/”(同理是由于proxy_pass配置的url后面加了"/"),并反代到http://103.110.186.5:8090的结果
2)第二种情况,proxy_pass配置的url后面不加"/"
[root@localhost conf.d]# cat test.conf
server {
listen 80;
server_name localhost;
location / {
root /var/www/html;
index index.html;
}
location /proxy/ {
proxy_pass http://192.168.1.5:8090;
}
}
[root@localhost conf.d]# service nginx restart
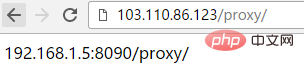
redirecting to /bin/systemctl restart nginx.service那么访问http://192.168.1.23/proxy或http://192.168.1.23/proxy/,都会失败!
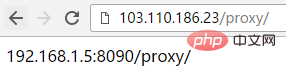
这样配置后,访问http://192.168.1.23/proxy/就会被反向代理到http://192.168.1.5:8090/proxy/
3)第三种情况

[root@localhost conf.d]# cat test.conf
server {
listen 80;
server_name localhost;
location / {
root /var/www/html;
index index.html;
}
location /proxy/ {
proxy_pass http://192.168.1.5:8090/haha/;
}
}
[root@localhost conf.d]# service nginx restart
redirecting to /bin/systemctl restart nginx.service
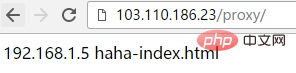
[root@localhost conf.d]# curl http://192.168.1.23/proxy/
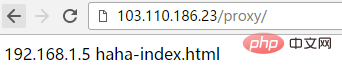
192.168.1.5 haha-index.html这样配置的话,访问http://103.110.186.23/proxy代理到http://192.168.1.5:8090/haha/
4)第四种情况:相对于第三种配置的url不加"/"
[root@localhost conf.d]# cat test.conf
server {
listen 80;
server_name localhost;
location / {
root /var/www/html;
index index.html;
}

location /proxy/ {
 proxy_pass http://192.168.1.5:8090/haha;
}
}
[root@localhost conf.d]# service nginx restart
redirecting to /bin/systemctl restart nginx.service
[root@localhost conf.d]# curl http://192.168.1.23/proxy/index.html
192.168.1.5 hahaindex.html
上面配置后,访问http://192.168.1.23/proxy/index.html就会被代理到http://192.168.1.5:8090/hahaindex.html
同理,访问http://192.168.1.23/proxy/test.html就会被代理到http://192.168.1.5:8090/hahatest.html
[root@localhost conf.d]# curl http://192.168.1.23/proxy/index.html
192.168.1.5 hahaindex.html
注意,这种情况下,不能直接访问http://192.168.1.23/proxy/,后面就算是默认的index.html文件也要跟上,否则访问失败!

-------------------------------------------------------------------------------------
上面四种方式都是匹配的path路径后面加"/",下面说下path路径后面不带"/"的情况:
1)第一种情况,proxy_pass后面url带"/":
[root@localhost conf.d]# cat test.conf
server {
listen 80;
server_name localhost;
location / {
root /var/www/html;
index index.html;
}

location /proxy {
 proxy_pass http://192.168.1.5:8090/;
}
}
[root@localhost conf.d]# service nginx restart
redirecting to /bin/systemctl restart nginx.service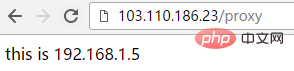
2)第二种情况,proxy_pass后面url不带"/"
[root@localhost conf.d]# cat test.conf
server {
listen 80;
server_name localhost;
location / {
root /var/www/html;
index index.html;
}

location /proxy {
 proxy_pass http://192.168.1.5:8090;
}
}
[root@localhost conf.d]# service nginx restart
redirecting to /bin/systemctl restart nginx.service
[root@localhost conf.d]#
这样配置的话,访问http://103.110.186.23/proxy会自动加上"/”(即变成http://103.110.186.23/proxy/),代理到192.168.1.5:8090/proxy/
3)第三种情况
[root@localhost conf.d]# cat test.conf
server {
listen 80;
server_name localhost;
location / {
root /var/www/html;
index index.html;
}

location /proxy {
 proxy_pass http://192.168.1.5:8090/haha/;
}
}
[root@localhost conf.d]# service nginx restart
redirecting to /bin/systemctl restart nginx.service
这样配置的话,访问http://103.110.186.23/proxy会自动加上"/”(即变成http://103.110.186.23/proxy/),代理到http://192.168.1.5:8090/haha/
4)第四种情况:相对于第三种配置的url不加"/"
[root@localhost conf.d]# cat test.conf
server {
listen 80;
server_name localhost;
location / {
root /var/www/html;
index index.html;
}

location /proxy {
 proxy_pass http://192.168.1.5:8090/haha;
}
}
[root@localhost conf.d]# service nginx restart
redirecting to /bin/systemctl restart nginx.service
这样配置的话,访问http://103.110.186.23/proxy,和第三种结果一样,同样被代理到http://192.168.1.5:8090/haha/


