


SpringDataRedis调用Redis底层解读
在springboot2.x之前还是直接使用的官方推荐的jedis连接的redis
在2.X之后换为了lettuce
Jedis:采用直接连接,多线程操作不安全,如果想要避免不安全,使用Jedis pool连接池;BIO
lettuce:底层采用Netty,实例可以在多个线程之间共享,不存在线程不安全的情况,可以减少线程数量;NIO
SpringBoot整合Redis(源码分析)
SpringBoot所有的配置类,都有一个自动配置类
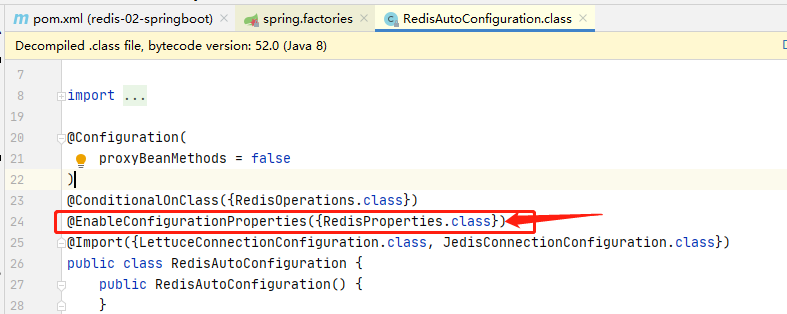
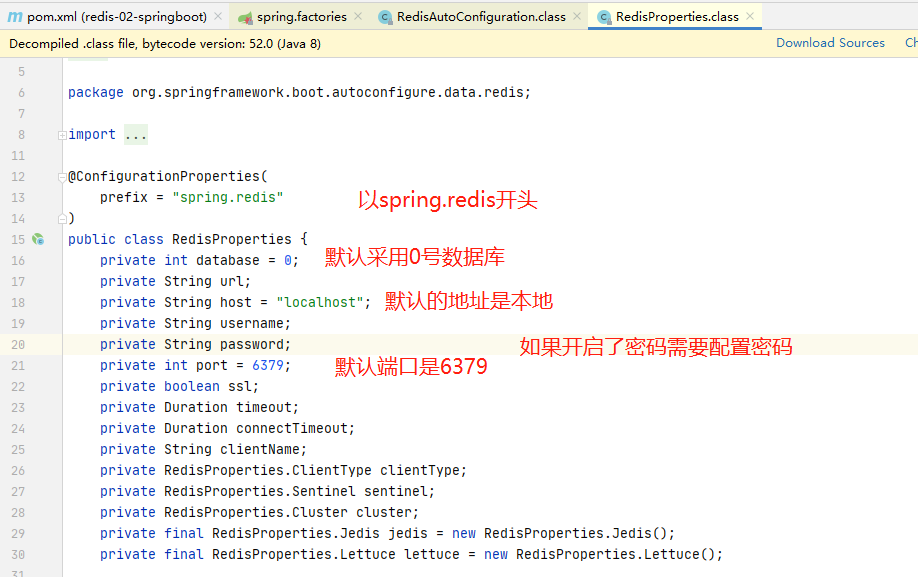
自动配置类都会绑定一个properties文件
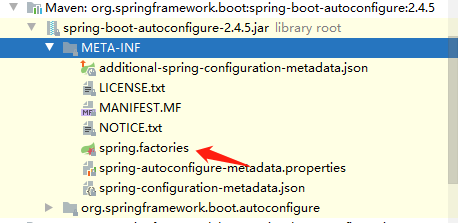
在源码中找到Spring.factories
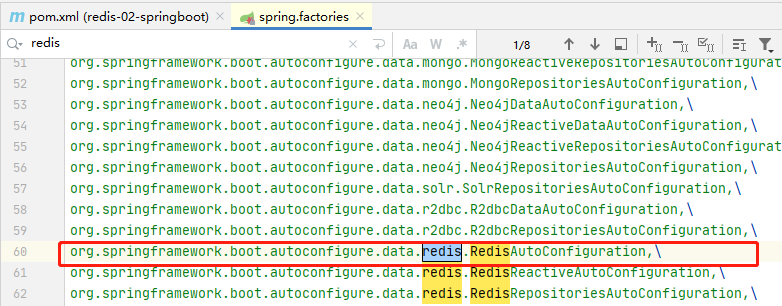
在里面搜索redis,找到AutoConfiguration
按ctrl+点击进入类

找到redisproperties.class
ctrl+点击进入

里面就是全部的redis相关配置了,先简单看一下,其他的后面再说
默认注入的Bean
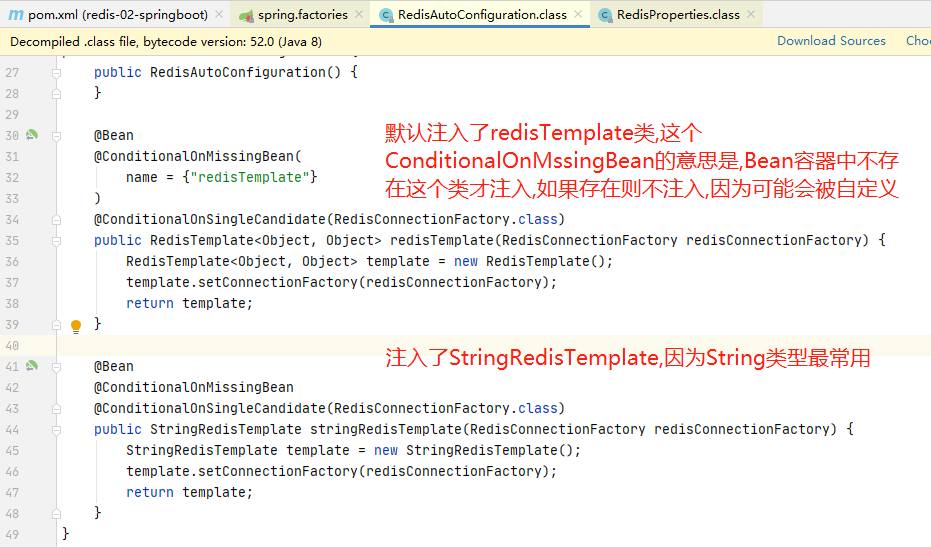
但是默认的redisTemplate是存在一些问题的,他的key是Object类型的,但是我们期望的一般key都是String类型的这就需要强制类型转换了,所以上面提出了,可以自己定义RedisTemplate
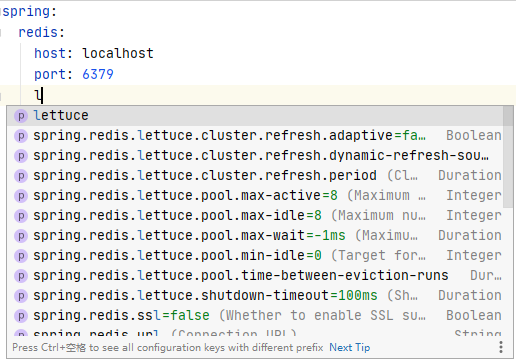
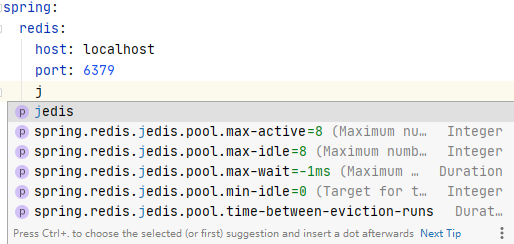
在配置配置文件时,如果需要配置连接池,就采用lettuce的,不要直接配置Redis的,配置了也不生效
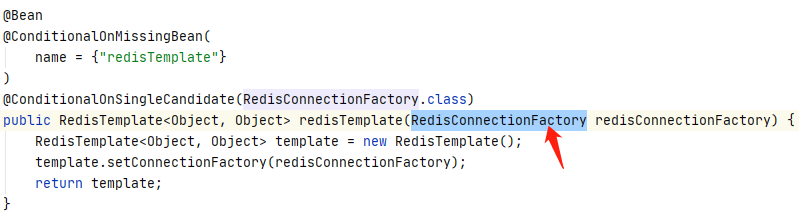
查看注入时的RedisConnectionFactory
他是存在两个子类的,分别是JedisConnectionFactory和LettuceConnectionFactory

因为JedisConnectionFactory类所依赖的很多类都不存在,所以不能直接使用它
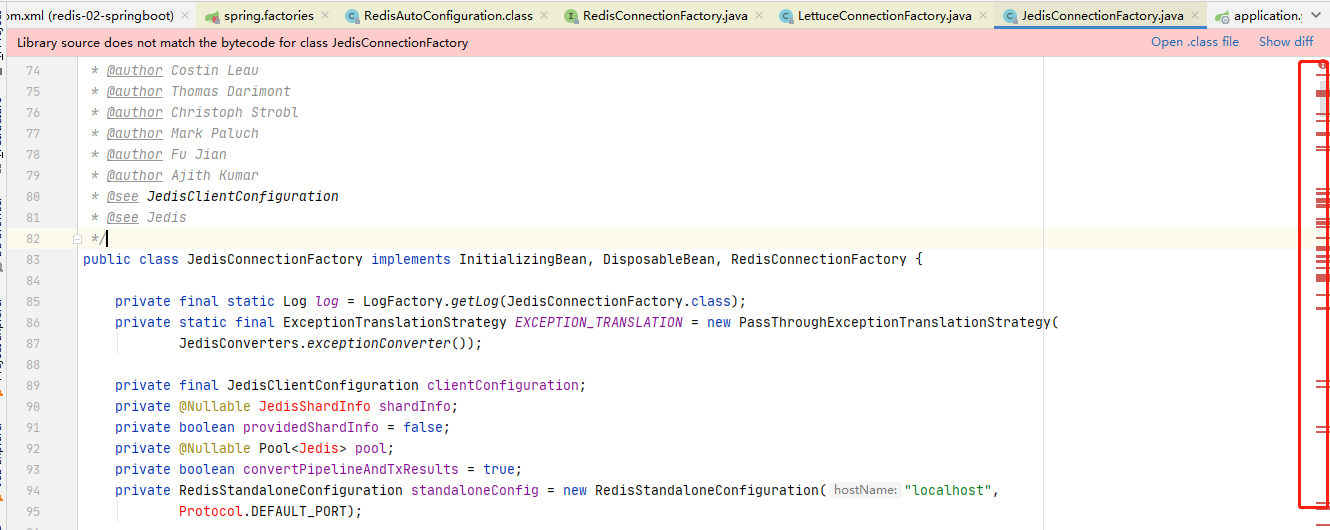
全都是爆红线的,而lettuceConnectionFactory中的依赖就是全部存在的
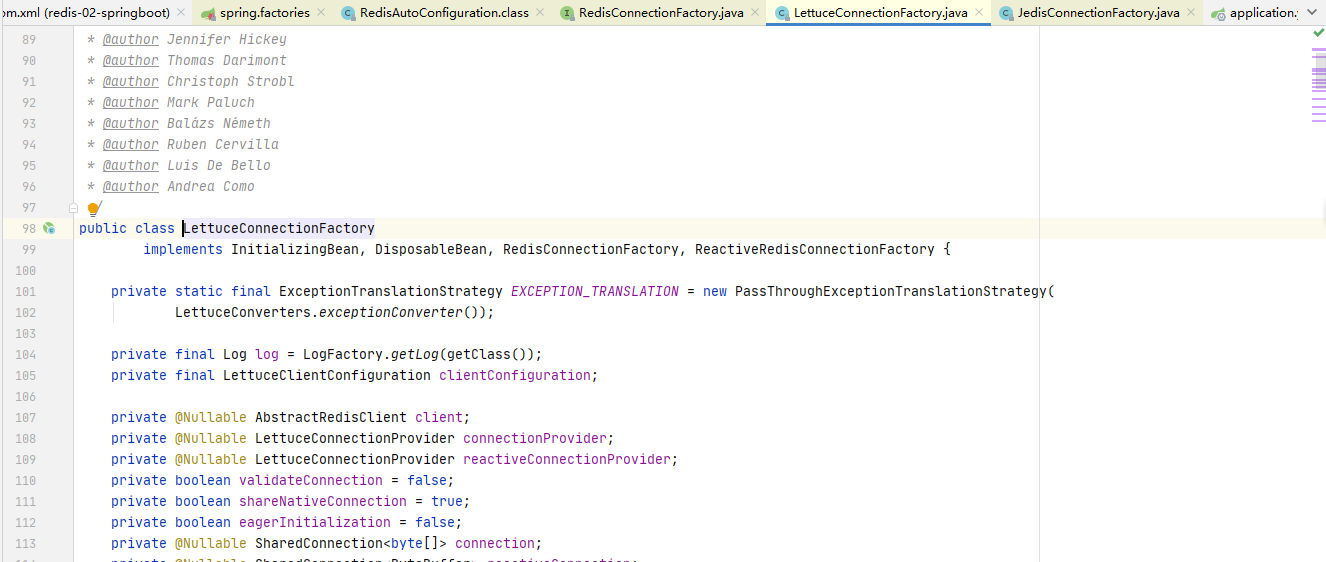
所以配置时,采用lettuce的
不要直接配置jedis的

SpringBoot整合Redis(配置)
yml
拷贝properties创建一个yml格式的配置文件, 我还是很喜欢yml的

spring:
  redis:
    host: localhost
    port: 6379
Maven
在项目创建的时候选择,如果没有选择就添加
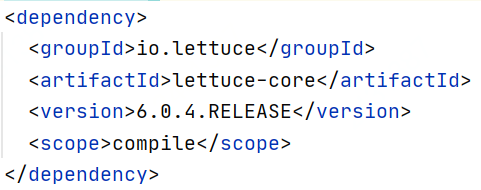
  org.springframework.boot
    spring-boot-starter-data-redis
编写测试
打开SpringBoot默认创建的测试类
redisTemp操作数据类型的方法都是以opsFor开头,后面是类型

比如opsForValue就是操作字符串的
然后后面的应用就和前面写的API一样了
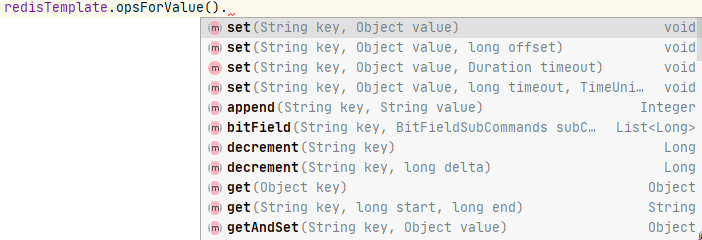
常用的操作可以直接点就可以了
关于事物的
redisTemplate.unwatch();
redisTemplate.watch("key");
redisTemplate.multi();
redisTemplate.discard();
redisTemplate.exec();
关于数据库的操作需要获取链接后使用连接对象操作
RedisConnection connection = redisTemplate.getConnectionFactory().getConnection();connection.flushAll();connection.flushDb();connection.close();
测试代码及其执行结果
package co.flower.redis02springboot;import org.junit.jupiter.api.Test;import org.springframework.beans.factory.annotation.Autowired;import org.springframework.boot.test.context.SpringBootTest;import org.springframework.data.redis.connection.RedisConnection;import org.springframework.data.redis.core.RedisTemplate;

@SpringBootTestclass Redis02SpringbootApplicationTests {/** * 我居然直接就指定了泛型 RedisTemplate结果就直接报错了,删除泛型后成功     */@Autowiredprivate RedisTemplate redisTemplate;

    @Testvoid contextLoads() {// 英文测试redisTemplate.opsForValue().set("name","xiaojiejie");
        System.out.println(redisTemplate.opsForValue().get("name"));// 中文测试redisTemplate.opsForValue().set("name","小姐姐");
        System.out.println(redisTemplate.opsForValue().get("name"));
    }

}

执行结果,SpringBoot的启动加载和结束销毁没有粘贴/***SpringBootStart****/xiaojiejie
小姐姐/***SpringBootStop*****/ 


