准备篇
一、防火墙配置
centos 7.x默认使用的是firewall作为防火墙,这里改为iptables防火墙。
1、关闭firewall:
systemctl stop firewalld.service #停止firewall
systemctl disable firewalld.service #禁止firewall开机启动
2、安装iptables防火墙
yum install iptables-services #安装
vi /etc/sysconfig/iptables #编辑防火墙配置文件
# sample configuration for iptables service
# you can edit this manually or use system-config-firewall
# please do not ask us to add additional ports/services to this default configuration
*filter
:input accept [0:0]
:forward accept [0:0]
:output accept [0:0]
-a input -m state --state related,established -j accept
-a input -p icmp -j accept
-a input -i lo -j accept
-a input -p tcp -m state --state new -m tcp --dport 22 -j accept
-a input -p tcp -m state --state new -m tcp --dport 80 -j accept
-a input -p tcp -m state --state new -m tcp --dport 3306 -j accept
-a input -j reject --reject-with icmp-host-prohibited
-a forward -j reject --reject-with icmp-host-prohibited
commit
:wq! #保存退出
systemctl restart iptables.service #最后重启防火墙使配置生效
systemctl enable iptables.service #设置防火墙开机启动
/usr/libexec/iptables/iptables.init restart #重启防火墙
二、关闭selinux
vi /etc/selinux/config
#selinux=enforcing #注释掉
#selinuxtype=targeted #注释掉
selinux=disabled #增加
:wq! #保存退出
setenforce 0 #使配置立即生效
三 、系统约定
软件源代码包存放位置:/usr/local/src
源码包编译安装位置:/usr/local/软件名字
四、下载软件包
1、下载nginx
http://nginx.org/download/nginx-1.10.3.tar.gz
2、下载mysql
https://cdn.mysql.com/archives/mysql-5.7/mysql-5.7.16.tar.gz
3、下载php
http://cn2.php.net/distributions/php-7.1.2.tar.gz
4、下载cmake(mysql编译工具)
https://cmake.org/files/v3.7/cmake-3.7.2.tar.gz
5、下载pcre (支持nginx伪静态)
ftp://ftp.csx.cam.ac.uk/pub/software/programming/pcre/pcre-8.40.tar.gz
6、下载openssl(nginx扩展)
https://www.openssl.org/source/openssl-1.1.0e.tar.gz
7、下载zlib(nginx扩展)
http://www.zlib.net/zlib-1.2.11.tar.gz
8、下载libmcrypt(php扩展)
https://nchc.dl.sourceforge.net/project/mcrypt/libmcrypt/2.5.8/libmcrypt-2.5.8.tar.gz
9、下载yasm(php扩展)
http://www.tortall.net/projects/yasm/releases/yasm-1.3.0.tar.gz
10、t1lib(php扩展)
http://download.freenas.org/distfiles/t1lib-5.1.2.tar.gz
11、下载gd库安装包
https://github.com/libgd/libgd/releases/download/gd-2.1.1/libgd-2.1.1.tar.gz
12、libvpx(gd库需要)
https://codeload.github.com/webmproject/libvpx/tar.gz/v1.3.0
13、tiff(gd库需要)
http://download.osgeo.org/libtiff/tiff-4.0.7.tar.gz
14、libpng(gd库需要)
ftp://ftp.simplesystems.org/pub/libpng/png/src/libpng16/libpng-1.6.28.tar.gz
15、freetype(gd库需要)
http://download.savannah.gnu.org/releases/freetype/freetype-2.7.1.tar.gz
16、jpegsrc(gd库需要)
http://www.ijg.org/files/jpegsrc.v9b.tar.gz
17、boost(编译mysql需要)
https://ufpr.dl.sourceforge.net/project/boost/boost/1.59.0/boost_1_59_0.tar.gz
以上软件包上传到/usr/local/src目录
五、安装编译工具及库文件(使用yum命令安装)
yum install -y apr* autoconf automake bison bzip2 bzip2* cloog-ppl compat* cpp curl curl-devel fontconfig fontconfig-devel freetype freetype* freetype-devel gcc gcc-c++ gtk+-devel gd gettext gettext-devel glibc kernel kernel-headers keyutils keyutils-libs-devel krb5-devel libcom_err-devel libpng libpng-devel libjpeg* libsepol-devel libselinux-devel libstdc++-devel libtool* libgomp libxml2 libxml2-devel libxpm* libxml* libxaw-devel libxmu-devel libtiff libtiff* make mpfr ncurses* ntp openssl openssl-devel patch pcre-devel perl php-common php-gd policycoreutils telnet t1lib t1lib* nasm nasm* wget zlib-devel
安装篇
以下是用putty工具远程登录到服务器,在命令行下面操作的
一、安装mysql
1、安装cmake
cd /usr/local/src

tar zxvf cmake-3.7.2.tar.gz
cd cmake-3.7.2
./configure
make
make install
2、安装mysql
cd /usr/local/src
mkdir -p /usr/local/boost
cp boost_1_59_0.tar.gz /usr/local/boost
groupadd mysql #添加mysql组
useradd -g mysql mysql -s /bin/false #创建用户mysql并加入到mysql组,不允许mysql用户直接登录系统
mkdir -p /data/mysql #创建mysql数据库存放目录
chown -r mysql:mysql /data/mysql #设置mysql数据库存放目录权限
mkdir -p /usr/local/mysql #创建mysql安装目录
cd /usr/local/src #进入软件包存放目录
tar zxvf mysql-5.7.16.tar.gz #解压
cd mysql-5.7.16 #进入目录
cmake . -dcmake_install_prefix=/usr/local/mysql -dmysql_datadir=/data/mysql -dwith_innobase_storage_engine=1 -ddefault_charset=utf8 -ddefault_collation=utf8_general_ci -dwith_embedded_server=off -dwith_boost=/usr/local/boost
注意:可以使用-ddownload_boost=1 -dwith_boost=/usr/local/boost参数在线安装boost软件包,需要服务器联网,容易下载失败。
cmake . -dcmake_install_prefix=/usr/local/mysql -dmysql_datadir=/data/mysql -dmysql_unix_addr=/tmp/mysql.sock -dmysql_user=mysql -ddefault_charset=utf8 -ddefault_collation=utf8_general_ci -denabled_local_infile=on -dwith_innobase_storage_engine=1 -dwith_federated_storage_engine=1 -dwith_blackhole_storage_engine=1 -dwithout_example_storage_engine=1 -dwith_embedded_server=off -ddownload_boost=1 -dwith_boost=/usr/local/boost
make #编译
make install #安装
编译出错, 重新编译前要删除编译失败的文件,重新编译时,需要清除旧的对象文件和缓存信息。
make clean
rm -f cmakecache.txt
rm -rf /etc/my.cnf #删除系统默认的配置文件(如果默认没有就不用删除)
cd /usr/local/mysql #进入mysql安装目录
./bin/mysqld --user=mysql --initialize --basedir=/usr/local/mysql --datadir=/data/mysql #生成mysql系统数据库
--initialize表示默认生成密码, --initialize-insecure 表示不生成密码, 密码为空。
看到这一行[note] a temporary password is generated for root@localhost: i>x18*=rav=7
cp /usr/local/mysql/support-files/my-default.cnf /usr/local/mysql/my.cnf
ln -s /usr/local/mysql/my.cnf /etc/my.cnf #添加到/etc目录的软连接
cp /usr/local/mysql/support-files/mysql.server /etc/rc.d/init.d/mysqld #把mysql加入系统启动
chmod 755 /etc/init.d/mysqld #增加执行权限
chkconfig mysqld on #加入开机启动
vi /etc/rc.d/init.d/mysqld #编辑
basedir=/usr/local/mysql #mysql程序安装路径
datadir=/data/mysql #mysql数据库存放目录
:wq! #保存退出
service mysqld start #启动
vi /etc/profile #把mysql服务加入系统环境变量:在最后添加下面这一行
export path=$path:/usr/local/mysql/bin
:wq! #保存退出
source /etc/profile #使配置立刻生效
下面这两行把myslq的库文件链接到系统默认的位置,这样你在编译类似php等软件时可以不用指定mysql的库文件地址。
ln -s /usr/local/mysql/lib/mysql /usr/lib/mysql
ln -s /usr/local/mysql/include/mysql /usr/include/mysql
mkdir /var/lib/mysql #创建目录
ln -s /tmp/mysql.sock /var/lib/mysql/mysql.sock #添加软链接
mysql_secure_installation #修改mysql密码,输入之前生成的密csjlm3dytg.d回车,根据提示操作。
press y|y for yes, any other key for no: y #是否安装密码安全插件?选择y
there are three levels of password validation policy: #有以下几种密码强度选择
low length >= 8
medium length >= 8, numeric, mixed case, and special characters
strong length >= 8, numeric, mixed case, special characters and dictionary file
please enter 0 = low, 1 = medium and 2 = strong: 0 #选择0,只要8位数字即可,选1要有大写,小写,特殊字符等
uninstall plugin validate_password ; #卸载密码强度插件
use mysql;
update mysql.user set authentication_string=password('123456') where user='root' ; #登录mysql控制台修改
alter user 'root'@'localhost' identified with mysql_native_password as '123456'; #修改密码
二、安装nginx
1、安装pcre
cd /usr/local/src
mkdir /usr/local/pcre
tar zxvf pcre-8.40.tar.gz
cd pcre-8.40
./configure --prefix=/usr/local/pcre
make
make install
2、安装openssl
cd /usr/local/src
mkdir /usr/local/openssl
tar zxvf openssl-1.1.0e.tar.gz
cd openssl-1.1.0e
./config --prefix=/usr/local/openssl
make
make install
vi /etc/profile
export path=$path:/usr/local/openssl/bin
:wq!
source /etc/profile
3、安装zlib
cd /usr/local/src
mkdir /usr/local/zlib
tar zxvf zlib-1.2.11.tar.gz
cd zlib-1.2.11
./configure --prefix=/usr/local/zlib
make
make install
4、安装nginx
groupadd www
useradd -g www www -s /bin/false
cd /usr/local/src
tar zxvf nginx-1.10.3.tar.gz
cd nginx-1.10.3
./configure --prefix=/usr/local/nginx --without-http_memcached_module --user=www --group=www --with-http_stub_status_module --with-http_ssl_module --with-http_gzip_static_module --with-openssl=/usr/local/src/openssl-1.1.0e --with-zlib=/usr/local/src/zlib-1.2.11 --with-pcre=/usr/local/src/pcre-8.40
注意:--with-openssl=/usr/local/src/openssl-1.1.0e --with-zlib=/usr/local/src/zlib-1.2.11 --with-pcre=/usr/local/src/pcre-8.40指向的是源码包解压的路径,而不是安装的路径,否则会报错
make
make install
/usr/local/nginx/sbin/nginx #启动nginx
设置nginx开机启动
vi /etc/rc.d/init.d/nginx #编辑启动文件添加下面内容
############################################################

#!/bin/sh

#

# nginx - this script starts and stops the nginx daemon

#

# chkconfig: - 85 15

# description: nginx is an http(s) server, http(s) reverse \

# proxy and imap/pop3 proxy server

# processname: nginx

# config: /etc/nginx/nginx.conf

# config: /usr/local/nginx/conf/nginx.conf

# pidfile: /usr/local/nginx/logs/nginx.pid

# source function library.

. /etc/rc.d/init.d/functions

# source networking configuration.

. /etc/sysconfig/network

# check that networking is up.

[ "$networking" = "no" ] && exit 0

nginx="/usr/local/nginx/sbin/nginx"

prog=$(basename $nginx)

nginx_conf_file="/usr/local/nginx/conf/nginx.conf"

[ -f /etc/sysconfig/nginx ] && . /etc/sysconfig/nginx

lockfile=/var/lock/subsys/nginx

make_dirs() {

# make required directories

user=`$nginx -v 2>&1 | grep "configure arguments:" | sed 's/[^*]*--user=\([^ ]*\).*/\1/g' -`

if [ -z "`grep $user /etc/passwd`" ]; then

useradd -m -s /bin/nologin $user

fi

options=`$nginx -v 2>&1 | grep 'configure arguments:'`

for opt in $options; do

if [ `echo $opt | grep '.*-temp-path'` ]; then

value=`echo $opt | cut -d "=" -f 2`

if [ ! -d "$value" ]; then

# echo "creating" $value

mkdir -p $value && chown -r $user $value

fi

fi

done

}

start() {

[ -x $nginx ] || exit 5

[ -f $nginx_conf_file ] || exit 6

make_dirs

echo -n $"starting $prog: "

daemon $nginx -c $nginx_conf_file

retval=$?

echo

[ $retval -eq 0 ] && touch $lockfile

return $retval

}

stop() {

echo -n $"stopping $prog: "

killproc $prog -quit

retval=$?

echo

[ $retval -eq 0 ] && rm -f $lockfile

return $retval

}

restart() {

#configtest || return $?

stop

sleep 1

start

}

reload() {

#configtest || return $?

echo -n $"reloading $prog: "

killproc $nginx -hup

retval=$?

echo

}

force_reload() {

restart

}

configtest() {

$nginx -t -c $nginx_conf_file

}

rh_status() {

status $prog

}

rh_status_q() {

rh_status >/dev/null 2>&1

}

case "$1" in

start)

rh_status_q && exit 0

$1

;;

stop)

rh_status_q || exit 0

$1

;;

restart|configtest)

$1

;;

reload)

rh_status_q || exit 7

$1

;;

force-reload)

force_reload

;;

status)

rh_status

;;

condrestart|try-restart)

rh_status_q || exit 0

;;

*)

echo $"usage: $0 {start|stop|status|restart|condrestart|try-restart|reload|force-reload|configtest}"

exit 2

esac

############################################################
:wq! #保存退出
chmod 775 /etc/rc.d/init.d/nginx #赋予文件执行权限
chkconfig nginx on #设置开机启动
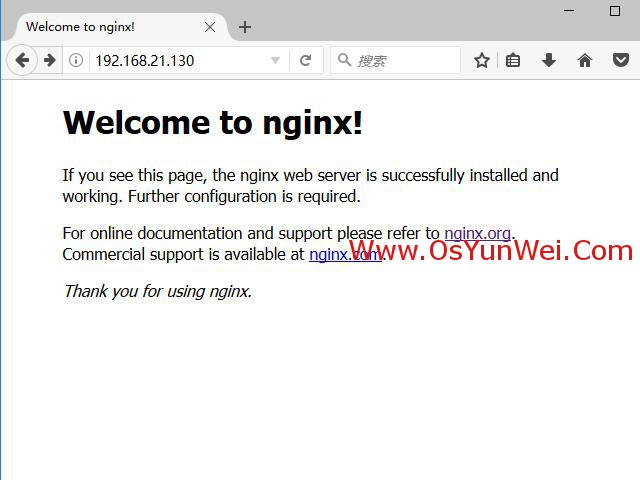
/etc/rc.d/init.d/nginx restart #重启
在浏览器中打开服务器ip地址,会看到下面的界面,说明nginx安装成功。
三、安装php
1、安装yasm
cd /usr/local/src
tar zxvf yasm-1.3.0.tar.gz
cd yasm-1.3.0
./configure
make
make install
2、安装libmcrypt
cd /usr/local/src
tar zxvf libmcrypt-2.5.8.tar.gz
cd libmcrypt-2.5.8
./configure
make
make install
3、安装libvpx
cd /usr/local/src
tar zxvf libvpx-1.3.0.tar.gz
cd libvpx-1.3.0
./configure --prefix=/usr/local/libvpx --enable-shared --enable-vp9
make
make install
4、安装tiff
cd /usr/local/src
tar zxvf tiff-4.0.7.tar.gz
cd tiff-4.0.7
./configure --prefix=/usr/local/tiff --enable-shared
make
make install
5、安装libpng
cd /usr/local/src
tar zxvf libpng-1.6.28.tar.gz
cd libpng-1.6.28
./configure --prefix=/usr/local/libpng --enable-shared
make
make install
6、安装freetype
cd /usr/local/src
tar zxvf freetype-2.7.1.tar.gz
cd freetype-2.7.1
./configure --prefix=/usr/local/freetype --enable-shared
make
make install
7、安装jpeg
cd /usr/local/src
tar zxvf jpegsrc.v9b.tar.gz
cd jpeg-9b
./configure --prefix=/usr/local/jpeg --enable-shared
make
make install
8、安装libgd
cd /usr/local/src
tar zxvf libgd-2.1.1.tar.gz
cd libgd-2.1.1
./configure --prefix=/usr/local/libgd --enable-shared --with-jpeg=/usr/local/jpeg --with-png=/usr/local/libpng --with-freetype=/usr/local/freetype --with-fontconfig=/usr/local/freetype --with-xpm=/usr/lib64 --with-tiff=/usr/local/tiff --with-vpx=/usr/local/libvpx
make
make install
说明:如果libgd编译失败,可以先跳过,直接使用系统默认的2.1.0版本,在编译php的时候把参数--with-gd=/usr/local/libgd修改为--with-gd即可。
9、安装t1lib
cd /usr/local/src
tar zxvf t1lib-5.1.2.tar.gz
cd t1lib-5.1.2
./configure --prefix=/usr/local/t1lib --enable-shared
make without_doc
make install
10、安装php
注意:如果系统是64位,请执行以下两条命令,否则安装php会出错。
\cp -frp /usr/lib64/libltdl.so* /usr/lib/
\cp -frp /usr/lib64/libxpm.so* /usr/lib/
cd /usr/local/src
tar -zvxf php-7.1.2.tar.gz
cd php-7.1.2
export ld_library_path=/usr/local/libgd/lib
./configure --prefix=/usr/local/php --with-config-file-path=/usr/local/php/etc --with-mysqli=/usr/local/mysql/bin/mysql_config --with-mysql-sock=/tmp/mysql.sock --with-pdo-mysql=/usr/local/mysql --with-gd=/usr/local/libgd --with-png-dir=/usr/local/libpng --with-jpeg-dir=/usr/local/jpeg --with-freetype-dir=/usr/local/freetype --with-xpm-dir=/usr/lib64 --with-zlib-dir=/usr/local/zlib --with-iconv --enable-libxml --enable-xml --enable-bcmath --enable-shmop --enable-sysvsem --enable-inline-optimization --enable-opcache --enable-mbregex --enable-fpm --enable-mbstring --enable-ftp --enable-gd-native-ttf --with-openssl --enable-pcntl --enable-sockets --with-xmlrpc --enable-zip --enable-soap --without-pear --with-gettext --enable-session --with-mcrypt --with-curl --enable-ctype --enable-mysqlnd
make #编译
make install #安装
说明:如果提示libgd版本错误,把php编译参数--with-gd=/usr/local/libgd修改为--with-gd即可。
cp php.ini-production /usr/local/php/etc/php.ini #复制php配置文件到安装目录
rm -rf /etc/php.ini #删除系统自带配置文件
ln -s /usr/local/php/etc/php.ini /etc/php.ini #添加软链接到 /etc目录
cp /usr/local/php/etc/php-fpm.conf.default /usr/local/php/etc/php-fpm.conf #拷贝模板文件为php-fpm配置文件
ln -s /usr/local/php/etc/php-fpm.conf /etc/php-fpm.conf #添加软连接到 /etc目录
vi /usr/local/php/etc/php-fpm.conf #编辑
pid = run/php-fpm.pid #取消前面的分号
:wq! #保存退出
cp /usr/local/php/etc/php-fpm.d/www.conf.default /usr/local/php/etc/php-fpm.d/www.conf
vi /usr/local/php/etc/php-fpm.d/www.conf #编辑
user = www #设置php-fpm运行账号为www
group = www #设置php-fpm运行组为www
设置 php-fpm开机启动
cp /usr/local/src/php-7.1.2/sapi/fpm/init.d.php-fpm /etc/rc.d/init.d/php-fpm #拷贝php-fpm到启动目录
chmod +x /etc/rc.d/init.d/php-fpm #添加执行权限
chkconfig php-fpm on #设置开机启动
vi /usr/local/php/etc/php.ini #编辑配置文件
找到:disable_functions =
修改为:disable_functions = passthru,exec,system,chroot,scandir,chgrp,chown,shell_exec,proc_open,proc_get_status,ini_alter,ini_alter,ini_restore,dl,openlog,syslog,readlink,symlink,popepassthru,stream_socket_server,escapeshellcmd,dll,popen,disk_free_space,checkdnsrr,checkdnsrr,getservbyname,getservbyport,disk_total_space,posix_ctermid,posix_get_last_error,posix_getcwd, posix_getegid,posix_geteuid,posix_getgid, posix_getgrgid,posix_getgrnam,posix_getgroups,posix_getlogin,posix_getpgid,posix_getpgrp,posix_getpid, posix_getppid,posix_getpwnam,posix_getpwuid, posix_getrlimit, posix_getsid,posix_getuid,posix_isatty, posix_kill,posix_mkfifo,posix_setegid,posix_seteuid,posix_setgid, posix_setpgid,posix_setsid,posix_setuid,posix_strerror,posix_times,posix_ttyname,posix_uname
#列出php可以禁用的函数,如果某些程序需要用到这个函数,可以删除,取消禁用。
找到:;date.timezone =
修改为:date.timezone = prc #设置时区
找到:expose_php = on
修改为:expose_php = off #禁止显示php版本的信息
找到:short_open_tag = off
修改为:short_open_tag = on #支持php短标签
找到opcache.enable=0
修改为opcache.enable=1 #php支持opcode缓存
找到:;opcache.enable_cli=1 #php支持opcode缓存
修改为:opcache.enable_cli=0
在最后一行添加:zend_extension=opcache.so #开启opcode缓存功能
:wq! #保存退出
配置nginx支持php
vi /usr/local/nginx/conf/nginx.conf
修改/usr/local/nginx/conf/nginx.conf 配置文件,需做如下修改
user www www; #首行user去掉注释,修改nginx运行组为www www;必须与/usr/local/php/etc/php-fpm.conf中的user,group配置相同,否则php运行出错
index index.html index.htm index.php; #添加index.php
# pass the php scripts to fastcgi server listening on 127.0.0.1:9000
#
location ~ \.php$ {
root html;
fastcgi_pass 127.0.0.1:9000;
fastcgi_index index.php;
fastcgi_param script_filename $document_root$fastcgi_script_name;
include fastcgi_params;
}
#取消fastcgi server部分location的注释,注意fastcgi_param行的参数,改为$document_root$fastcgi_script_name,或者使用绝对路径
/etc/init.d/nginx restart #重启nginx
service php-fpm start #启动php-fpm
测试篇
cd /usr/local/nginx/html/ #进入nginx默认网站根目录
rm -rf /usr/local/nginx/html/* #删除默认测试页
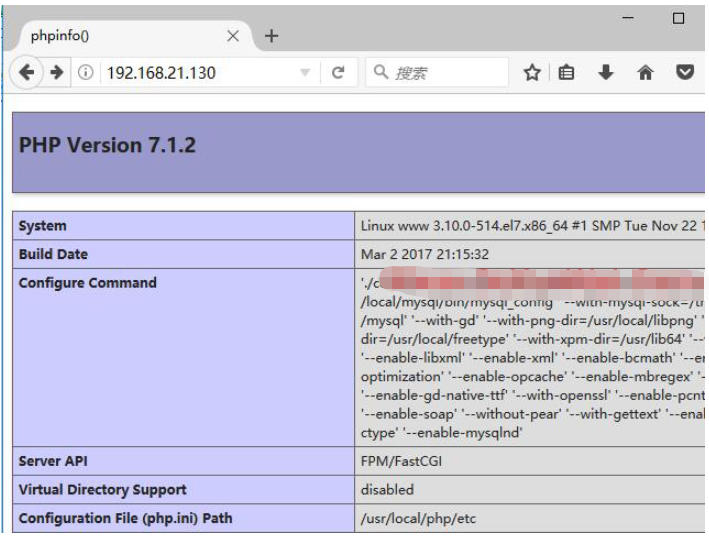
vi index.php #新建index.php文件
phpinfo();
?>
:wq! #保存退出
chown www.www /usr/local/nginx/html/ -r #设置目录所有者
chmod 700 /usr/local/nginx/html/ -r #设置目录权限
在浏览器中打开服务器ip地址,会看到下面的界面