
html5 引入了一系列出色的新功能和简单的选项。很快它将得到当今使用的大多数浏览器的全面支持。最终每个人都必须将 wordpress 主题从 xhtml 转换为 html5。在 google 的熊猫更新之后,您的网站需要更清晰、更易于阅读的代码才能在 google 上获得更好的排名。我将教您如何将主题从 xhtml 转换为 html5。我们还将照顾禁用 javascript 的 2% 的互联网用户(为了向后兼容)。
在本教程中,我们将集中精力将 WordPress 主题从 XHTML 转换为 HTML5。我们将逐步通过下面列出的文件了解更改(这些文件位于您的主题文件夹中,即wp-content/themes/yourtheme/here!)
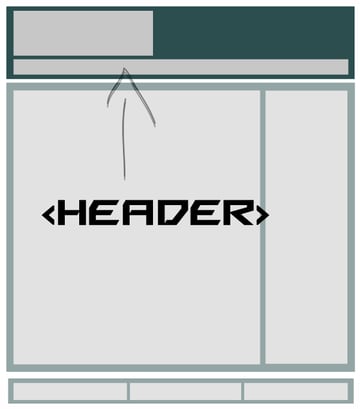
让我们看一下我们将要构建的基本 HTML5 布局。 HTML5 不仅仅是代码开头的文档类型。几个新引入的元素帮助我们以更少的标记以有效的方式设计样式和编码(这就是 HTML5 更好的原因之一)。
<!DOCTYPE html>
<html lang="en">
<head>
	<title>TITLE | Slogan!</title>
</head>
<body>
	<nav role="navigation"></nav>
<!--Ending header.php-->
<!--Begin  index.php-->
	<section id="content">
		<article role="main">
			<h1>Title of the Article</h1>
			<time datetime="YYYY-MM-DD"></time>
			<p>Some lorem ispum text of your post goes here.</p>
			<p>The article's text ends.</p>
		</article>

		<aside role="sidebar">
			<h2>Some Widget in The Sidebar</h2>
		</aside>
	</section>
<!--Ending index.php-->
<!--begin  footer.php-->
	<footer role="foottext">
		<small>Some Copyright info</small>
	</footer>
</body>
</html>
现在我们只需要知道 header、footer、nav、section 和 article 的新 HTML5 标签放在哪里即可。与 div 结构化 XHTML 相比,新引入的标签的名称是不言自明的。
现在我将向您展示XHTML WordPress主题的header.php中常用的代码。
立即学习“前端免费学习笔记(深入)”;
<!DOCTYPE html PUBLIC "-//W3C//DTD XHTML 1.0 Transitional//EN" "https://www.w3.org/TR/xhtml1/DTD/xhtml1-transitional.dtd">
<html xmlns="http://www.w3.org/1999/xhtml">
<head>
<title>My  Blog</title>
<?php wp_head(); ?>
</head>
<body>
<!-- Header  -->
<div class="header">
	<div class="container">
		<h1><a href="<?php bloginfo('url');?>">My Blog is Working Great.</a></h1>
	</div><!-- End  Container -->
</div><!-- End  Header -->


<!-- Navigation Bar Starts -->
<div class="navbar">
	<div class="container">
		<ul class="grid nav_bar">
			<?php wp_list_categories('navs_li='); ?>
	     </ul>
	</div>
</div>
<!-- Navigation Bar Ends -->
<div class="container">
有人必须问我们为什么要做这一切?答案很简单,就是 HTML5 的语义标记。它减少了标记,使其非常易于理解和管理。
阅读代码,然后按照以下说明将主题的 header.php 转换为 HTML5。
<!doctype html>
<html>
<head>
<title>My Blog</title>
<?php wp_head(); ?>
</head>
<body>
<!-- Header -->
<header>
    <div class="container">
        <h1 class="grid"><a href="<?php bloginfo('url');?>">My Blog is Working Great.</a></h1>
    </div>
</header>
<!-- End Header  -->

<!-- Navigation Bar Starts-->
<nav>
    <div class="navbar">
        <ul class="grid nav_bar">
            <?php wp_list_categories('title_li='); ?>
         </ul>
    </div>
</nav>
<!-- Navigation Bar Ends -->
<section class="container">
正如您所看到的,转换后的代码与 XHTML 代码非常相似。让我们讨论一下这些变化。
<!doctype html> – HTML5 有一个非常简单的 doctype,但它包含许多新的语义标签<header> – 标头部分的语义标记<nav> – 我们用一个新的语义标签替换了导航栏的 div 代码,用于控制 HTML5 中的导航栏。注意: 有些人在标头中包含 section 标记。关于这一点有很多争论。我个人反对在标头中包含 section 标签,因为它会破坏 HTML5 的美感。当然,您可以在那里使用旧的 div 。
将 WordPress 主题转换为 HTML5 时,标头中包含的脚本和样式表确实非常简单。在 HTML5 中,我们只使用 <script> 和 <link> 标签。因此,删除 type="text/javascript" - 所有浏览器都会将 <script> 标记视为 JavaScript,除非您明确写入其类型。同样,从样式表的 <link> 标记中删除 type="text/css"。
包含 HTML shiv 以支持旧版浏览器。这是一个简单的 JavaScript 文件。 shiv 的一些示例是 Remy Sharp 的 HTML5 脚本或 Modernizr 脚本。让我们使用 Modernizr。
我们需要将脚本从我们的functions.php 文件中排入队列,如下所示:
function html5_scripts()
{
	// Register the Modernizr script
	wp_register_script( 'modernizr', get_template_directory_uri() . '/js/Modernizr-1.6.min.js' );

	// Enqueue Modernizr
	wp_enqueue_script( 'modernizr' );
}
add_action( 'wp_enqueue_scripts', 'html5_scripts', 1 );
提示: 将连续出现的标题标签放入 <hgroup>
注意: 此脚本需要放置在 <?php wp_head(); 内部的最顶部?> 标签,这就是为什么我们给 add_action 优先级为 1。


常见的 XHTML index.php 由以下标签组成。我将逐一进行转换,解释转换后的整个过程。
注意: 我不会在此处添加整个代码,因为它会无缘无故地使帖子变得更长。
<div id="container">
<div id="content">
<div id="entries">
<div id="post">...</div>

</div><!--Ending Entries-->
<?php get_sidebar(); ?>
</div><!--Ending content-->
</div><!--Ending container-->
<?php get_footer(); ?>
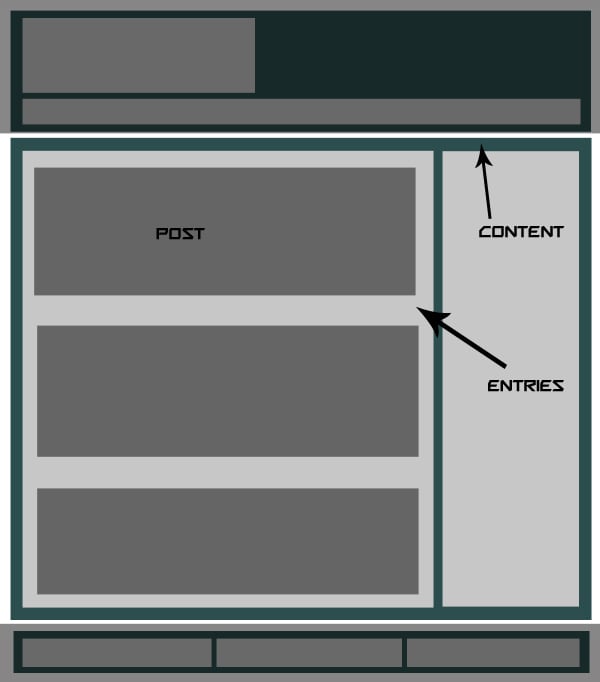


<div id="container">
	<div id="content">
		<section id="entries">
			<article id="post">...</article>
		</section><!--end entries-->
		<?php get_sidebar(); ?>
	</div><!--end content-->
</div><!--end wrap-->
<?php get_footer(); ?>
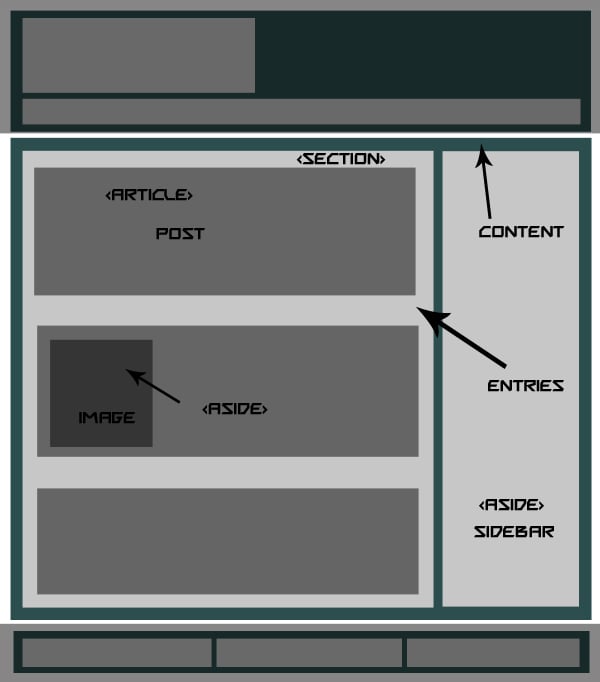
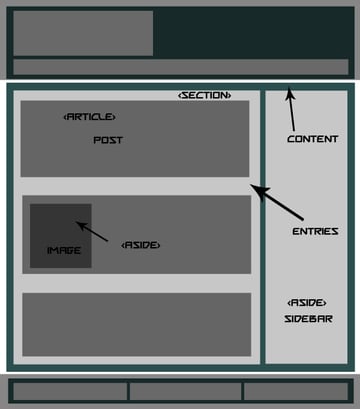
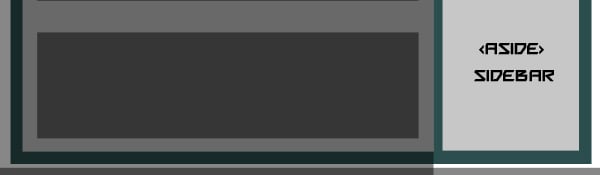
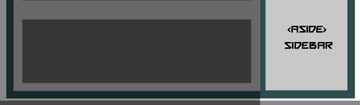
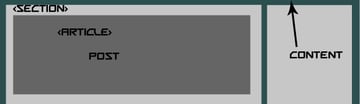
在看我们所做的更改之前,我们必须知道HTML5为我们提供了三个基本的布局建模标签:Section、article和aside。 Section 将替换条目的 div,article 将替换帖子的 div,稍后 aside 将用于我们的侧边栏。
<section> – HTML5 有一个名为 section 的布局标签,用于分隔其中使用的代码块<article> – 帖子部分的语义标签,类似于 section
<aside> – 帖子图像的语义标记,用于将其放在一边和侧边栏面包屑和页面导航 – 如果我们的主题有面包屑,那么它们将在 div 中使用,例如 <div class="breadcrumbs">...</div> ,对于页面导航,我们将使用 <nav id="pgnav"php cngtphpcn...< /nav>

注意: 我粘贴了一个通用的index.php,如下所示,下面是一些转换为 HTML5 的完整代码。
<section class="entries">
  <?php if (have_posts()) : while (have_posts()) : the_post();

<article class="post" id="post-<?php the_ID(); ?>">
    <aside class="post_image">
        <?php
        if ( has_post_thumbnail() ) {
            the_post_thumbnail();
        } else { ?>
            <a href="<?php the_permalink() ?>"><img src="<?php bloginfo('template_directory');?>/images/noImage.gif" title="<?php the_title(); ?>" /></a>
        <?php }?>
    </aside>
    <section class="post_content">
        <h1><a href="<?php the_permalink() ?>" rel="bookmark" title="<?php the_title(); ?>"><?php the_title(); ?></a></h1>
        <p><?php echo get_the_excerpt(); ?></p>
        <a href="<?php the_permalink() ?>" rel="bookmark" title="<?php the_title(); ?>" class="read_more ">Read More</a>
    </section>
    <section class="meta">

    <p> <?php the_category(',') ?></p>

    <p><?php the_tags(""); ?></p>

    </section>
</article>
  <?php endwhile; else: ?>
  <p>
    <?php _e('Sorry, no posts matched your criteria.'); ?>
  </p>
  <?php endif; ?>

  <?php posts_nav_link(' ⏼ ', __('« Newer Posts'), __('Older Posts »')); ?>
</section>
我们将在侧边栏中使用 <aside> 而不是 div,例如:
<div id="sidebar">...</div>
使用<aside>后变成如下。
<aside id="sidebar">...</aside<
这很简单!

我们将在 footer.php 中使用 <footer> 语义标签而不是简单的 div,例如:
<div id="footer">
<div id="foot_widgets">...</div>
<div id="copyright">...</div>
</div>
<?php wp_footer(); ?>
</body>
</html>


<footer id="footer">
<section id="foot_widgets">...</section>
<section id="foot_widgets">...</section>
<section id="foot_widgets">...</section>
<div id="copyright">...</div>
</footer>
<?php wp_footer(); ?>
</body>
</html>
single.php 没有什么特别的变化,所以我只是粘贴更改后的代码,这可能对一些初学者有帮助。我在其中使用了 section 和 article 标签。如果您愿意,您还可以使用 <time> 标签。
<?php get_header(); ?>
<?php if (have_posts()) : while (have_posts()) : the_post(); ?>

<div class="container">
<div class="breadcrumbs"><?php the_breadcrumb(''); ?></div>
    <div class="content">
        <h1><a href="<?php the_permalink() ?>" rel="bookmark" title="<?php the_title(); ?>"><?php the_title(); ?></a></h1>

        <div id="entry-content-single">
          <?php the_content('<p >Read More</p>'); ?>
        </div>
        <div class="meta"> Posted by:
          <?php the_author() ?>
          <?php edit_post_link(__('Edit This')); ?>

          <p><?php the_tags(""); ?></p>
        </div>
        <div class="clearfix"></div>
    </div>

  <!-- End of post -->
</div></div>


<?php get_footer(); ?>


<?php get_header(); ?>
<?php if (have_posts()) : while (have_posts()) : the_post(); ?>

<section class="content">
<div class="breadcrumbs"><?php the_breadcrumb(''); ?></div>
    <article class="box">
        <h1><a href="<?php the_permalink() ?>" rel="bookmark" title="<?php the_title(); ?>"><?php the_title(); ?></a></h1>

        <section id="entry-content-single">
          <?php the_content('<p>Read More</p>'); ?>
        </section>
        <section class="meta"> Posted by:
          <?php the_author() ?>
          <?php edit_post_link(__('Edit This')); ?>

          <p><?php the_tags(""); ?></p>
        </section>
        <div class="clearfix"></div>
    </article>
  <!-- end post -->
</section></div>

<?php get_footer(); ?>
注意: 关于SEO,有些人在帖子标题之前使用 <header class="entry-header"> ,这也是一个很好的做法。
最终我们关心的是向后兼容性问题。出于对旧版浏览器的安全考虑,HTML5 元素应使用 display: block 样式显示为块。只需将以下代码放在 style.css 的顶部即可:
header, nav, section, article, aside, figure, footer { display: block; }
如果您使用嵌入到模板文件中的音频或视频,则必须使用 HTML5 音频和视频元素。可以在下面的备忘单中查看更多标签。每当您添加一些新功能时,请研究一下如何使用其语义标签将其添加到 HTML5 中。
您要使用 HTML5 吗?您是否已更改为 HTML5?这些更改是否会影响您的 SEO 排名?请在下面的评论中告诉我们!
以上就是将您的 WordPress 主题转换为 HTML5的详细内容,更多请关注php中文网其它相关文章!

全网最新最细最实用WPS零基础入门到精通全套教程!带你真正掌握WPS办公! 内含Excel基础操作、函数设计、数据透视表等

Copyright 2014-2025 https://www.php.cn/ All Rights Reserved | php.cn | 湘ICP备2023035733号


 140
140


