


java处理文件压缩与解压的核心是使用java.util.zip包,支持zip和gzip格式;1. 压缩文件或文件夹使用zipoutputstream,遍历文件并通过addtozip方法写入压缩流;2. 解压使用zipinputstream逐个读取zipentry并写入目标路径;3. gzip格式通过gzipoutputstream和gzipinputstream实现单个文件的压缩与解压;4. 处理大文件时优化缓冲区大小(如8kb-64kb)、使用buffered流、合理利用多线程和nio;5. tar格式需借助apache commons compress库,结合tar与gzip实现复杂归档;6. 异常处理方面应捕获ioexception和zipexception,使用try-with-resources确保资源释放,并提供用户友好提示与日志记录。

在Java里处理文件的压缩与解压,核心就是利用java.util.zip这个包。它提供了相当一套成熟且灵活的API来应对ZIP和GZIP格式。简单来说,无论是想把一堆文件打包成一个ZIP,还是把一个ZIP包里的东西解出来,亦或是处理单个GZIP压缩流,这些API都能搞定。理解了流的概念,这部分操作其实并不复杂,更多的是对文件路径和IO流的精细控制。

解决方案
Java实现文件压缩(以ZIP为例)和解压,通常会用到ZipOutputStream和ZipInputStream。下面我们分别来看具体怎么操作。
压缩文件或文件夹
立即学习“Java免费学习笔记(深入)”;
这块稍微复杂一点,因为ZIP格式允许包含多个文件甚至文件夹结构。我的做法是,先定义一个辅助方法来处理单个文件的压缩逻辑,然后主方法去遍历要压缩的源文件或文件夹。
import java.io.*;
import java.util.zip.*;
import java.nio.file.*;
import java.nio.file.attribute.BasicFileAttributes;

public class ZipUtils {

    // 压缩单个文件
    public static void zipFile(String sourceFilePath, String zipFilePath) throws IOException {
        File sourceFile = new File(sourceFilePath);
        if (!sourceFile.exists()) {
            System.err.println("源文件不存在: " + sourceFilePath);
            return;
        }

        try (FileOutputStream fos = new FileOutputStream(zipFilePath);
             ZipOutputStream zos = new ZipOutputStream(new BufferedOutputStream(fos))) {

            addToZip(sourceFile, sourceFile.getName(), zos);
            System.out.println("文件压缩成功: " + zipFilePath);

        } catch (IOException e) {
            System.err.println("压缩文件时发生错误: " + e.getMessage());
            throw e;
        }
    }

    // 压缩文件夹
    public static void zipFolder(String sourceFolderPath, String zipFilePath) throws IOException {
        Path sourcePath = Paths.get(sourceFolderPath);
        if (!Files.exists(sourcePath) || !Files.isDirectory(sourcePath)) {
            System.err.println("源文件夹不存在或不是目录: " + sourceFolderPath);
            return;
        }

        try (FileOutputStream fos = new FileOutputStream(zipFilePath);
             ZipOutputStream zos = new ZipOutputStream(new BufferedOutputStream(fos))) {

            Files.walkFileTree(sourcePath, new SimpleFileVisitor() {
                @Override
                public FileVisitResult visitFile(Path file, BasicFileAttributes attrs) throws IOException {
                    // 构建相对路径,这是ZIP文件内部的路径结构
                    String entryName = sourcePath.relativize(file).toString();
                    // 在Windows系统上,路径分隔符可能是反斜杠,需要统一为正斜杠
                    entryName = entryName.replace("\\", "/");
                    addToZip(file.toFile(), entryName, zos);
                    return FileVisitResult.CONTINUE;
                }

                @Override
                public FileVisitResult preVisitDirectory(Path dir, BasicFileAttributes attrs) throws IOException {
                    // 确保空文件夹也能被压缩进去,这很重要
                    String entryName = sourcePath.relativize(dir).toString();
                    if (!entryName.isEmpty()) { // 根目录本身不需要作为entry
                        entryName = entryName.replace("\\", "/") + "/"; // 文件夹名末尾加斜杠
                        ZipEntry entry = new ZipEntry(entryName);
                        zos.putNextEntry(entry);
                        zos.closeEntry();
                    }
                    return FileVisitResult.CONTINUE;
                }
            });
            System.out.println("文件夹压缩成功: " + zipFilePath);

        } catch (IOException e) {
            System.err.println("压缩文件夹时发生错误: " + e.getMessage());
            throw e;
        }
    }

    // 核心的添加文件到ZIP流的方法
    private static void addToZip(File fileToZip, String entryName, ZipOutputStream zos) throws IOException {
        if (!fileToZip.exists()) {
            return; // 避免压缩不存在的文件
        }

        ZipEntry zipEntry = new ZipEntry(entryName);
        zos.putNextEntry(zipEntry);

        try (FileInputStream fis = new FileInputStream(fileToZip);
             BufferedInputStream bis = new BufferedInputStream(fis)) {
            byte[] bytes = new byte[4096]; // 缓冲区大小
            int length;
            while ((length = bis.read(bytes)) >= 0) {
                zos.write(bytes, 0, length);
            }
        } finally {
            zos.closeEntry(); // 关闭当前entry,非常关键
        }
    }

    public static void main(String[] args) {
        // 示例用法
        try {
            // 压缩单个文件
            zipFile("path/to/your/sourceFile.txt", "path/to/your/output.zip");
            // 压缩文件夹
            zipFolder("path/to/your/sourceFolder", "path/to/your/outputFolder.zip");

            // 解压示例 (假设上面已经生成了output.zip)
            unzipFile("path/to/your/output.zip", "path/to/your/extractedFolder");

        } catch (IOException e) {
            e.printStackTrace();
        }
    }
}
解压文件

解压相对直接,就是从ZipInputStream里一个接一个地读取ZipEntry,然后把每个Entry的内容写入到指定位置。
import java.io.*;
import java.util.zip.*;
import java.nio.file.*;

// ... (接上面的ZipUtils类)

    // 解压ZIP文件
    public static void unzipFile(String zipFilePath, String destDirectory) throws IOException {
        File destDir = new File(destDirectory);
        if (!destDir.exists()) {
            destDir.mkdirs(); // 确保目标目录存在
        }

        try (ZipInputStream zipIn = new ZipInputStream(new BufferedInputStream(new FileInputStream(zipFilePath)))) {
            ZipEntry entry = zipIn.getNextEntry();
            // 遍历ZIP文件中的每个条目
            while (entry != null) {
                String filePath = destDirectory + File.separator + entry.getName();
                if (!entry.isDirectory()) {
                    // 如果是文件,则创建文件并写入内容
                    extractFile(zipIn, filePath);
                } else {
                    // 如果是目录,则创建目录
                    File dir = new File(filePath);
                    dir.mkdirs();
                }
                zipIn.closeEntry(); // 关闭当前条目
                entry = zipIn.getNextEntry(); // 获取下一个条目
            }
            System.out.println("文件解压成功到: " + destDirectory);
        } catch (IOException e) {
            System.err.println("解压文件时发生错误: " + e.getMessage());
            throw e;
        }
    }

    // 核心的解压单个文件的方法
    private static void extractFile(ZipInputStream zipIn, String filePath) throws IOException {
        // 确保父目录存在,这在解压嵌套目录时很重要
        File outputFile = new File(filePath);
        File parentDir = outputFile.getParentFile();
        if (parentDir != null && !parentDir.exists()) {
            parentDir.mkdirs();
        }

        try (BufferedOutputStream bos = new BufferedOutputStream(new FileOutputStream(filePath))) {
            byte[] bytesIn = new byte[4096]; // 缓冲区大小
            int read;
            while ((read = zipIn.read(bytesIn)) != -1) {
                bos.write(bytesIn, 0, read);
            }
        }
    }
这套代码涵盖了基本的压缩和解压逻辑。在实际应用中,你可能需要考虑更多错误处理和用户体验细节。
Java处理大文件压缩解压时有哪些性能考量与优化策略?
处理大文件时,性能问题立马就凸显出来了,这不仅仅是CPU的计算问题,更多的是IO的瓶颈。我个人在处理TB级数据时,遇到过不少坑。
一个很直接的优化点是缓冲区大小。在上面的代码里,我用了4096字节的缓冲区,这其实是个比较保守的数字。理论上,更大的缓冲区(比如64KB或128KB甚至更大)能减少IO操作的次数,从而提升吞吐量。当然,这也不是越大越好,过大的缓冲区会占用更多内存,而且当缓冲区大小超过底层文件系统或操作系统的块大小,收益就会递减。我的经验是,通常8KB到64KB是一个比较好的平衡点,具体还得看你的系统和文件特性。
使用BufferedInputStream和BufferedOutputStream是必须的。它们能将零散的字节读写操作聚合成更大的块操作,显著减少了对底层IO资源的请求,这是性能优化的基石。没有它们,每次读写一个字节都会触发一次系统调用,那效率简直是灾难。
对于超大文件(比如几个GB到几十GB的单个文件),java.util.zip库是基于流的,这意味着它会按顺序处理数据,不会一次性把整个文件加载到内存。这本身就是个优点。但如果你的任务是压缩或解压大量小文件,那每次创建ZipEntry和closeEntry()的开销,以及频繁的磁盘寻道,会成为主要瓶颈。在这种情况下,可以考虑:
- 多线程处理:如果你有多个独立的压缩/解压任务(比如同时压缩多个不相关的文件夹),可以为每个任务分配一个线程。但要注意,如果目标是同一个ZIP文件,多线程写入会非常复杂,容易导致数据损坏。解压时,如果ZIP内部文件是独立的,也可以考虑多线程解压到不同的目标路径。
-
NIO.2(新IO):虽然
java.util.zip是基于传统IO流的,但如果你在文件复制或路径操作上能利用java.nio.file.Files类提供的方法,它们通常会比手动实现更高效,因为它们可能利用了操作系统的优化。比如,创建目录时使用Files.createDirectories。 -
内存映射文件(Memory-Mapped Files):对于某些特定场景,如果文件大小在可控范围内且需要频繁随机访问,
MappedByteBuffer可能提供性能优势。但对于顺序的压缩解压,它可能不会带来颠覆性的提升,反而增加了复杂性。
总的来说,处理大文件,核心思路就是减少IO次数,增加每次IO的数据量,并合理利用并发。
如何在Java中实现特定格式(如GZIP、TAR)的压缩与解压?
java.util.zip包其实不仅限于ZIP格式,它也提供了对GZIP格式的原生支持。但如果你想处理更复杂的格式,比如TAR,或者需要更高级的ZIP特性(如加密、分卷),那可能就需要引入第三方库了。
GZIP格式
GZIP通常用于单个文件的压缩,或者作为数据流的压缩层。它不像ZIP那样是一个归档格式(不能包含多个文件或目录结构),更像是一个数据流的压缩算法。
-
压缩 (GZIPOutputStream):
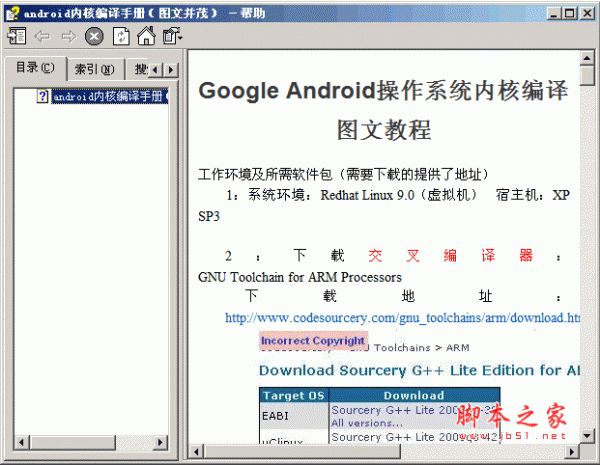 android 内核编译图文教程 chm版下载
android内核编译手册(图文并茂) chm,Google Android操作系统内核编译图文教程。 搭建交叉编译环境(安装Android SDK: 将android-sdk_m5-rc14_linux-x86.zip解压缩到适当路径下即可使用。本文将其释放至/usr/local/android_sdk_linux路径下,并将其tools路径添加到PATH中),获取内核编译配置文件(从android sdk 中的模拟器中得到。启动android模拟器,再通过adb得到模拟器中提供的内核配置文件),在
import java.io.*; import java.util.zip.GZIPOutputStream; public class GzipUtils { public static void gzipFile(String sourceFilePath, String gzipFilePath) throws IOException { try (FileInputStream fis = new FileInputStream(sourceFilePath); FileOutputStream fos = new FileOutputStream(gzipFilePath); GZIPOutputStream gzos = new GZIPOutputStream(new BufferedOutputStream(fos))) { byte[] buffer = new byte[4096]; int len; while ((len = fis.read(buffer)) != -1) { gzos.write(buffer, 0, len); } System.out.println("文件GZIP压缩成功: " + gzipFilePath); } catch (IOException e) { System.err.println("GZIP压缩文件时发生错误: " + e.getMessage()); throw e; } } } -
解压 (GZIPInputStream):
import java.io.*;
import java.util.zip.GZIPInputStream;

// ... (接上面的GzipUtils类)

    public static void ungzipFile(String gzipFilePath, String destFilePath) throws IOException {
        try (FileInputStream fis = new FileInputStream(gzipFilePath);
             GZIPInputStream gzis = new GZIPInputStream(new BufferedInputStream(fis));
             FileOutputStream fos = new FileOutputStream(destFilePath);
             BufferedOutputStream bos = new BufferedOutputStream(fos)) {

            byte[] buffer = new byte[4096];
            int len;
            while ((len = gzis.read(buffer)) != -1) {
                bos.write(buffer, 0, len);
            }
            System.out.println("文件GZIP解压成功到: " + destFilePath);
        } catch (IOException e) {
            System.err.println("GZIP解压文件时发生错误: " + e.getMessage());
            throw e;
        }
    }
TAR格式
Java标准库没有直接提供TAR格式的支持。TAR(Tape Archive)本身只是一个归档格式,它不进行压缩,但通常会与GZIP或BZIP2结合使用(比如.tar.gz或.tgz)。如果你的项目需要处理TAR文件,Apache Commons Compress库是业界标准的选择。它提供了对TAR、BZIP2、XZ、AR等多种压缩和归档格式的强大支持。
使用Apache Commons Compress,你需要将其添加到你的项目依赖中(比如Maven或Gradle)。
-
Maven依赖示例:
org.apache.commons commons-compress 1.21 TAR文件操作(以创建tar.gz为例): 创建
TarArchiveOutputStream,然后像操作ZipOutputStream一样添加TarArchiveEntry。之后,将这个TAR流通过GZIPOutputStream进行包装。解压时反过来操作。这个库的API设计得非常直观,一旦你理解了流的概念,上手会很快。我个人觉得它比手动写很多IO代码要优雅得多。
Java压缩解压过程中常见的错误与异常处理最佳实践?
在文件IO操作中,错误和异常简直是家常便饭。我的经验是,任何IO操作都应该被视为潜在的失败点,必须做好万全的准备。
1. IOException
这是最常见的,几乎所有文件和流操作都可能抛出。它涵盖了各种底层问题:
-
文件不存在或路径错误:
FileNotFoundException(是IOException的子类)。在尝试打开文件进行读写之前,最好先用File.exists()或Files.exists()检查一下。 - 权限问题: 尝试写入一个没有写入权限的目录,或者读取一个没有读取权限的文件。
- 磁盘空间不足: 尤其是在解压大文件时,目标磁盘空间不足会直接导致写入失败。
- 文件被占用: 另一个进程可能锁定了你尝试访问的文件。
- 网络问题: 如果是操作网络文件系统上的文件,网络中断或不稳定也会导致IO异常。
最佳实践:
-
try-with-resources: 这是Java 7引入的特性,强烈推荐使用。它能确保所有实现了AutoCloseable接口的资源(如各种InputStream、OutputStream、ZipFile等)在使用完毕后自动关闭,即使发生异常也能正确释放资源,极大地减少了资源泄露的风险。看看我上面给的示例代码,都用了这个结构。 -
细致的异常捕获: 虽然捕获
IOException很常见,但在某些情况下,如果能捕获更具体的子类(如FileNotFoundException),可以提供更精确的错误提示或恢复逻辑。 - 用户友好的错误消息: 不要直接把Java的堆栈信息抛给用户。捕获异常后,记录详细的日志(包括异常栈),然后向用户展示一个清晰、易懂的错误信息,告诉他们可能出了什么问题,或者建议他们怎么做。比如:“无法写入目标文件,请检查磁盘空间或文件夹权限。”
- 日志记录: 使用SLF4J/Logback或Log4j等日志框架,详细记录异常信息,包括异常类型、消息和完整的堆栈跟踪。这对于后期排查问题至关重要。
2. ZipException
这是java.util.zip包特有的异常,通常发生在处理ZIP文件本身的问题上:
-
ZIP文件损坏: 下载不完整、传输错误或创建时出错都可能导致ZIP文件结构损坏,
ZipInputStream在读取时会抛出此异常。 - 密码保护: 如果ZIP文件是加密的,而你没有提供密码或提供了错误的密码,标准库会抛出异常(或者根本无法识别内部条目),需要第三方库来处理加密ZIP。
最佳实践:
- 校验ZIP文件: 在尝试解压之前,如果可能,可以尝试对ZIP文件进行初步的完整性检查(虽然Java标准库没有直接提供这种API,但有些第三方库有)。
-
告知用户文件可能已损坏: 如果捕获到
ZipException,明确告诉用户压缩包可能已损坏,建议他们重新获取。
3. 资源泄露
虽然try-with-resources已经大大缓解了这个问题,但如果你的代码还在使用传统的try-catch-finally结构,并且忘记在finally块中关闭流,那么文件句柄就会一直被占用,直到程序退出或JVM垃圾回收。这不仅浪费系统资源,还可能导致后续对同一文件的操作失败(比如文件无法删除)。
最佳实践:
-
坚持使用
try-with-resources。如果实在无法使用(比如老旧JDK版本),确保在finally块中,对每个可能打开的资源都进行null检查并调用close()方法,并且close()本身也需要被try-catch包围,因为它也可能抛出IOException。
总之,在编写压缩解压代码时,把异常处理放在和核心业务逻辑同等重要的位置。一个健壮的IO程序,不仅仅是能完成任务,更重要的是能在各种意想不到的边缘情况和错误面前,依然保持优雅和稳定。


