


下面小编就为大家分享一篇angular自定义组件实现数据双向数据绑定的实例,具有很好的参考价值,希望对大家有所帮助。一起跟随小编过来看看吧
学过Angular的同学都知道,输入框通过[(ngModel)]实现双向数据绑定,那么自定义组件能不能实现双向数据绑定呢?答案是肯定的。
Angular中,我们常常需要通过方括号[]和圆括号()实现组件间的交互:
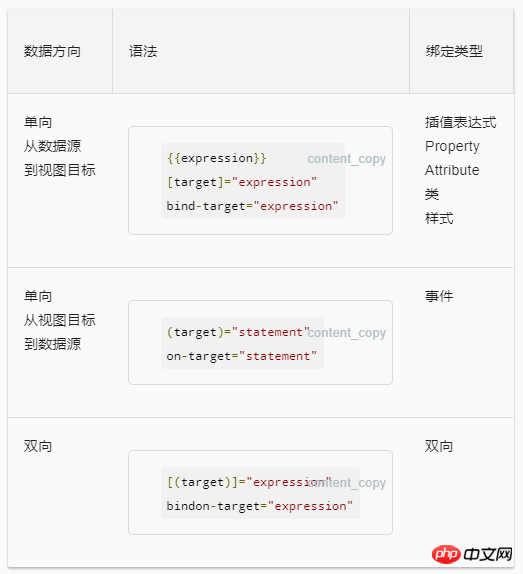
那么在[]和()的基础上,如何实现组件的双向数据绑定?
例子如下。
子组件:
childStatus: {{childStatus}}
//testDataBinding.component.ts

export class TestDataBindingComponent implements OnInit{
 @Input() childStatus;
 @Output() childStatusChange = new EventEmitter();
 ngOnInit(){
 setTimeout(()=>{
  this.childStatus = false;
  this.childStatusChange.emit(this.childStatus);
 },5000);
 }
}
注意这里的写法,这是关键所在,输出属性前半部分必须与输入属性相同,输入属性可以随意取名,输出属性需在输入属性基础上加上Change,比如你的输入属性是myData,那么输出属性就必须是myDataChange。
父组件:
parentStatus: {{parentStatus}}
//app.component.ts

import { Component,OnInit } from '@angular/core';
@Component({
 selector: 'my-app',
 templateUrl: './app.component.html',
 styleUrls: ['./app.component.css']
})
export class AppComponent implements OnInit{
 parentStatus: boolean = true;
 ngOnInit(){
 setTimeout(()=>{
  this.parentStatus = true;
 },10000);
 }
}在父组件我们初始化parentStatus为true,并把它传到子组件TestDataBindingComponent。
在子组件里,5秒后我们把childStatus设为false,看它能不能传到父组件。再过5秒,我们在父组件将parentStatus设为true,看它能不能传到子组件。

事实证明,子组件值变化后,父组件的值也跟着变化;父组件值变化后子组件的值也跟着变了!
我们实现了双向绑定!
上面是我整理给大家的,希望今后会对大家有帮助。
相关文章:


