事件其实就是我们要发送的消息体,这个一般要根据我们的实际业务进行封装,需要什么类型的数据,就是用什么类型,需要哪些字段就添加哪些字段。我们来给一个案例。
package com.lsqingfeng.springboot.applicationEvent;

import lombok.Getter;
import lombok.Setter;
import org.springframework.context.ApplicationEvent;

/**
 * @className: MyApplicationEvent
 * @description: 事件封装
 * @author: sh.Liu
 * @date: 2022-03-23 14:41
 */
@Getter
@Setter
@ToString
public class MyApplicationEvent extends ApplicationEvent {

    private Integer age;

    private String name;

    /**
     * 需要重写构造方法
     * @param source
     * @param name
     * @param age
     */
    public MyApplicationEvent(Object source, String name, Integer age) {
        super(source);
        this.name = name;
        this.age = age;
    }
}监听器就相当于我们的MQ的消费者,当有时间推送过来的时候,监听器的代码就可以执行。这里通过泛型来设置好我们的事件类型。
package com.lsqingfeng.springboot.applicationEvent;

import org.springframework.context.ApplicationListener;
import org.springframework.stereotype.Component;

/**
 * @className: MyApplicationEventListener
 * @description:事件监听器
 * @author: sh.Liu
 * @date: 2022-03-23 14:50
 */
@Component
public class MyApplicationEventListener implements ApplicationListener<MyApplicationEvent> {

    @Override
    public void onApplicationEvent(MyApplicationEvent event) {
        System.out.println("收到消息:" + event);
    }
}推送事件需要使用ApplicationEventPublisher。这个对象在Spring容器加载的时候就已经在容器中了。所以我们可以直接注入使用,也可以使用ApplicationContext,因为ApplicationContext本身就继承了ApplicationEventPublisher。 我们通过一个Controller来验证一下。
package com.lsqingfeng.springboot.controller;

import com.lsqingfeng.springboot.applicationEvent.MyApplicationEvent;
import com.lsqingfeng.springboot.base.Result;
import org.springframework.beans.factory.annotation.Autowired;
import org.springframework.context.ApplicationContext;
import org.springframework.web.bind.annotation.RequestMapping;
import org.springframework.web.bind.annotation.RestController;

/**
 * @className: ApplicationEventController
 * @description:
 * @author: sh.Liu
 * @date: 2022-03-23 15:21
 */
@RestController
@RequestMapping("event")
public class ApplicationEventController {

    @Autowired
    private ApplicationContext applicationContext;

    @RequestMapping("/push")
    public Result pushEvent(){
        MyApplicationEvent myApplicationEvent = new MyApplicationEvent(this,"zhangsan", 10);
        applicationContext.publishEvent(myApplicationEvent);
        return Result.success();
    }

    @RequestMapping("/push3")
    public Result pushEvent2(){
        applicationContext.publishEvent("大家好");
        return Result.success();
    }
}我们定义两个推送的方法。一个推送我们的MyApplicationEvent类型,还有一个方法推送一个字符串。
当我们调用第一个方法的时候,控制台可以打印出我们推送的数据信息。

调用推送字符串的时候,我们的监听器不会执行,原因是我们的拦截器里已经加了泛型MyApplicationEvent,也就是只会监听MyApplicationEvent类型的消息。其他类型的消息不会被监听到。
那如果我们把泛型去掉会有什么效果呢,我们来试试。

每次推送都会发送两条(可能有什么内部机制,不管了),但是两个都打印了,说明如果不加泛型,不管谁推,这边都能收到消息。
除了上面的通过实现接口的方式开发监听器,我们还可以通过注解的方式来实现,具体代码如下。
package com.lsqingfeng.springboot.applicationEvent;

import org.springframework.context.event.EventListener;
import org.springframework.stereotype.Component;

/**
 * @className: MyApplicationEventListener2
 * @description: 注解实现监听器
 * @author: sh.Liu
 * @date: 2022-03-23 15:56
 */
@Component
public class MyApplicationEventListener2 {

    @EventListener
    public void onEvent(MyApplicationEvent event){
        System.out.println("收到消息2:" + event);
    }
}这里加入了@EventListener 注解代表了这是一个监听器。方法名随意,方法里的参数代表监听的事件类型。
再次调用push方法:
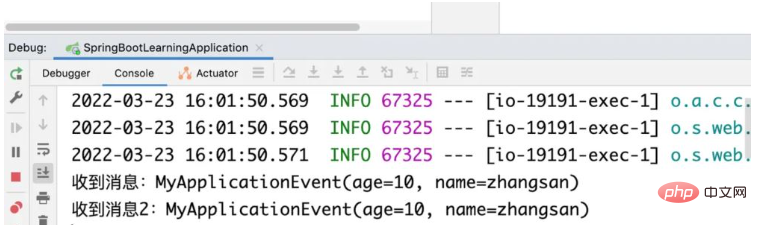
发现两个监听器的数据都会打印。这一特点大家要注意一下。
以上就是SpringBoot中ApplicationEvent和ApplicationListener怎么使用的详细内容,更多请关注php中文网其它相关文章!

每个人都需要一台速度更快、更稳定的 PC。随着时间的推移,垃圾文件、旧注册表数据和不必要的后台进程会占用资源并降低性能。幸运的是,许多工具可以让 Windows 保持平稳运行。

Copyright 2014-2025 https://www.php.cn/ All Rights Reserved | php.cn | 湘ICP备2023035733号


 332
332