
什么是 gpio
GPIO 是 General Purpose Input Output 的缩写,即“通用输入输出”。Raspberry Pi 有两列 GPIO 引脚, Raspberry Pi 通过这两行引脚进行一些硬件上的扩展,与传感器进行交互等等。

Raspberry Pi B+/2B/3B/3B+/Zero 引脚图
简单的讲,每一个 GPIO 引脚都有两种模式:输出模式(OUTPUT)和输入模式(INPUT)。输出模式类似于一个电源,Raspberry Pi 可以控制这个电源是否向外供电,比如打开外部的 LED 小灯,当然最有用的还是向外部设备发送信号。和输出模式相反,输入模式是接收外部设备发来的信号。其中还包含两种特殊的输入模式:上拉输入(INPUT_PULLUP)和下拉输入(INPUT_PULLDOWN)。上拉输入就是内部的上拉电阻接 VCC ,将该引脚设置为高电平,下拉输入则相反。
GPIO 通常采用标准逻辑电平,即高电平和低电平,用二进制 0 和 1 表示。在这两值中间还有阈值电平,即高电平和低电平之间的界限。Arduino 会将 -0.5 ~ 1.5 V 读取为低电平,3 ~ 5.5 V 读取为高电平, Raspberry Pi 未查到相关资料。GPIO 还可用于中断请求,即设置 GPIO 为输入模式,值达到相应的要求时进行中断。
相关类
GPIO 操作主要依赖于 GpioController 类 。这个类位于 System.Device.Gpio 名称空间下。
<code class="javascript">// GpioController 即 GPIO 控制器// GPIO 引脚依靠 GpioController 初始化public class GpioController : IGpioController, IDisposable{ // 构造函数 public GpioController(); // PinNumberingScheme 即引脚编号方案,是一个枚举类型,包含 Board 和 Logical 两个值。 // 可以看上方的 Raspberry Pi 引脚图,以 GPIO 17 为例,如果实例化时选 Logical ,那么打开引脚时需要填写 17。 // 如果实例化时选 Board ,那么打开引脚时需要填写右侧灰色方框内的值,即 11 。 public GpioController(PinNumberingScheme numbering); // GpioDriver 用于指定要使用的 GPIO 驱动,比如 libgpiod 或 sysfs public GpioController(PinNumberingScheme numberingScheme, GpioDriver driver); // 方法 // 打开 GPIO 引脚 // pinNumber 需要填写和 PinNumberingScheme 相对应的值。 // PinMode 是设置 GPIO 的模式,如输入、输出、上拉、下拉 public void OpenPin(int pinNumber, PinMode mode); // 关闭 GPIO 引脚 public void ClosePin(int pinNumber); // 判断某个引脚是否打开 // 注意:引脚连续打开会抛出异常 public bool IsPinOpen(int pinNumber); // 读取指定引脚的值 public PinValue Read(int pinNumber); // 向指定的引脚写入值 public void Write(int pinNumber, PinValue value); // 为指定引脚的值改变时注册回调(即上文中提到的 GPIO 中断) // PinEventTypes 是值改变的类型,包括上升沿(Rising,0->1)和下降沿(Falling,1->0),注意当设置为 None 时不会触发 // PinChangeEventHandler 为回调事件 public void RegisterCallbackForPinValueChangedEvent(int pinNumber, PinEventTypes eventTypes, PinChangeEventHandler callback); // 为指定引脚的值改变时注销回调 public void UnregisterCallbackForPinValueChangedEvent(int pinNumber, PinChangeEventHandler callback);}</code>人体红外传感器实验
人体红外传感器是基于周围区域的红外热来检测运动的,也称被动红外传感器(Passive Infra-Red, PIR)。这里使用的是 HC-SR501 。当传感器检测到人体时,LED 小灯亮,当传感器未检测到人体时,LED 小灯灭。
传感器图像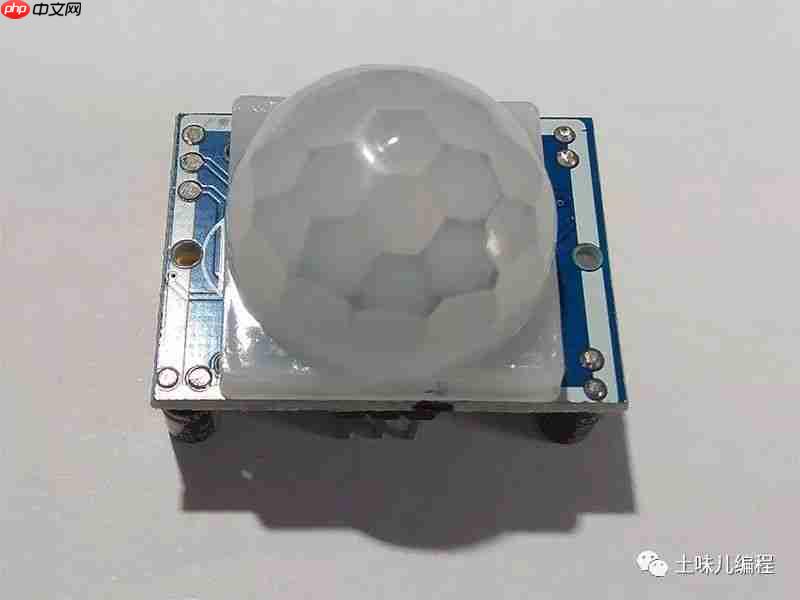
HC-SR501
硬件需求
名称
数量
HC-SR501
x1
LED 小灯
x1
220 Ω 电阻
x1
杜邦线
若干
电路
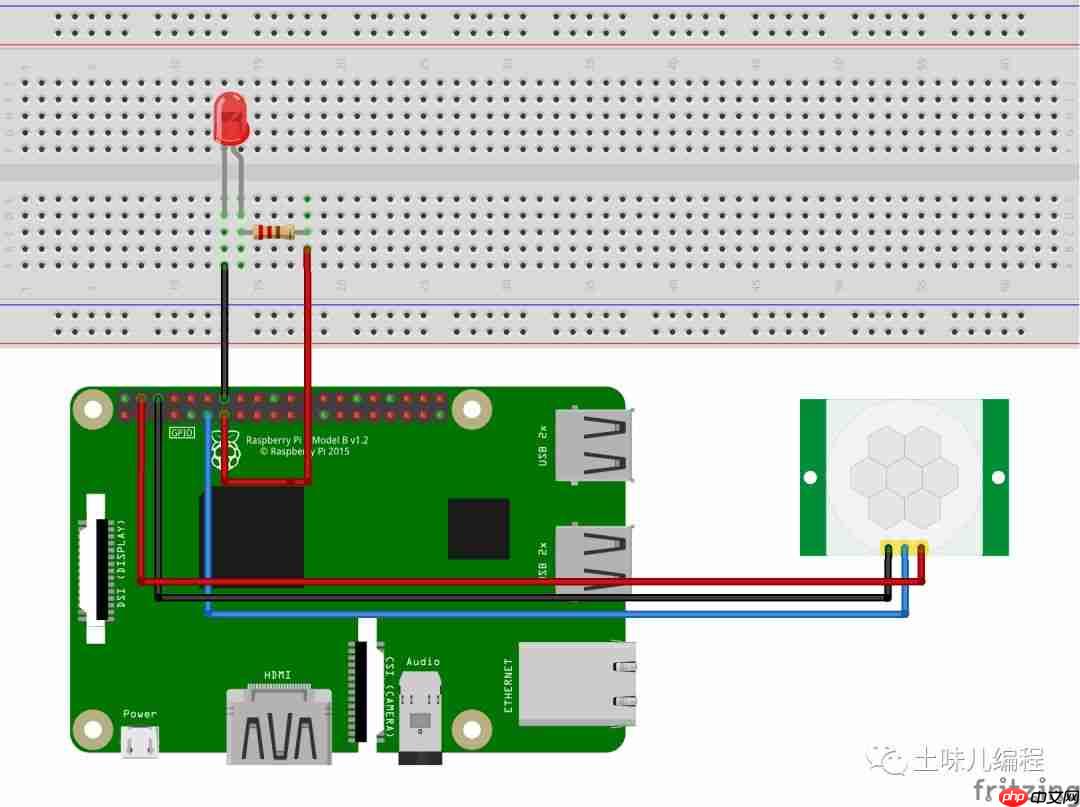
HC-SR501
VCC - 5VGND - GNDOUT - GPIO 17 (Pin 11)LED
VCC & 220 Ω resistor - GPIO 27 (Pin 14)GND - GND使用 Docker 运行示例
示例地址:https://github.com/ZhangGaoxing/dotnet-core-iot-demo/tree/master/src/Hcsr501
代码语言:javascript代码运行次数:0运行复制<code class="javascript">docker build -t pir-sample -f Dockerfile .docker run --rm -it --device /dev/gpiomem pir-sample</code>
代码
打开 Visual Studio ,新建一个 .NET Core 控制台应用程序,项目名称为“PIR”。
引入 System.Device.Gpio NuGet 包。
新建类 Hcsr501,替换如下代码:
代码语言:javascript代码运行次数:0运行复制<code class="javascript">public class Hcsr501 : IDisposable{ private GpioController _controller; private readonly int _outPin; /// <summary> /// 构造函数 /// </summary> /// <param name="pin">OUT Pin</param> public HCSR501(int outPin, PinNumberingScheme pinNumberingScheme = PinNumberingScheme.Logical) { _outPin = outPin; _controller = new GpioController(pinNumberingScheme); _controller.OpenPin(outPin, PinMode.Input); } /// <summary> /// 是否检测到人体 /// </summary> public bool IsMotionDetected => _controller.Read(_outPin) == PinValue.High; /// <summary> /// Cleanup /// </summary> public void Dispose() { _controller?.Dispose(); _controller = null; }}</code>在 Program.cs 中,将主函数代码替换如下:
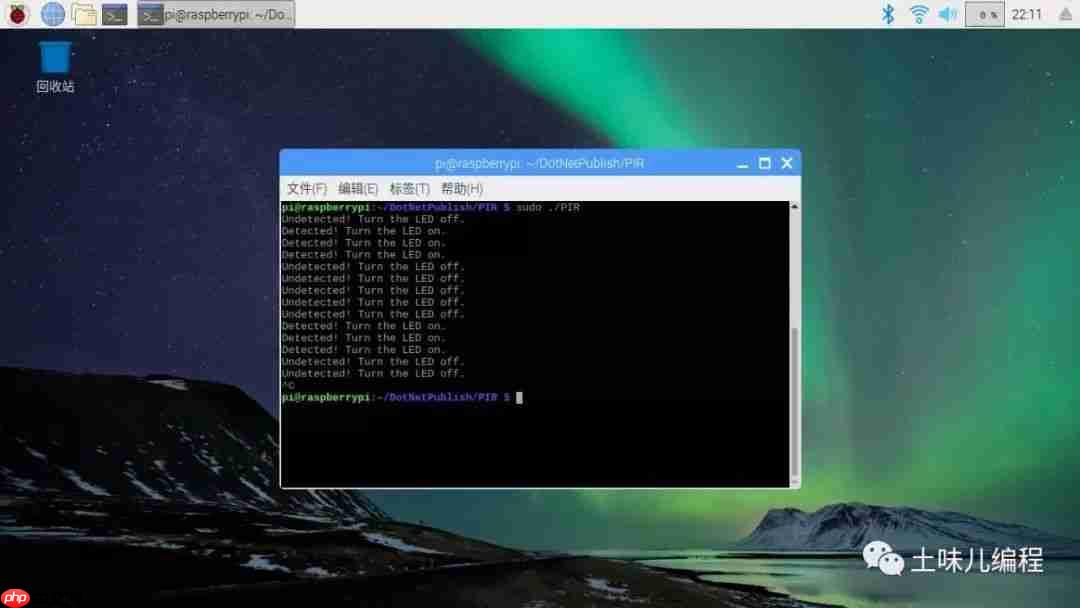
代码语言:javascript代码运行次数:0运行复制<code class="javascript">static void Main(string[] args){ // HC-SR501 OUT Pin int hcsr501Pin = 17; // LED Pin int ledPin = 27; // 获取 GPIO 控制器 using GpioController ledController = new GpioController(PinNumberingScheme.Logical); // 初始化 PIR 传感器 using Hcsr501 sensor = new Hcsr501(hcsr501Pin, PinNumberingScheme.Logical); // 打开 LED 引脚 ledController.OpenPin(ledPin, PinMode.Output); while (true) { // 检测到了人体 if (sensor.IsMotionDetected == true) { ledController.Write(ledPin, PinValue.High); Console.WriteLine("Detected! Turn the LED on."); } else { ledController.Write(ledPin, PinValue.Low); Console.WriteLine("Undetected! Turn the LED off."); } Thread.Sleep(1000); }}</code>发布、拷贝、更改权限、运行
效果图
? 如何改进?
剔除主函数循环,尝试使用 RegisterCallbackForPinValueChangedEvent() 注册一个回调进行检测。
参考General-purpose input/output - Wikipedia:https://en.wikipedia.org/wiki/General-purpose_input/outputGPIO - Raspberry Pi Documentation:https://www.raspberrypi.org/documentation/usage/gpio/GPIO source code:https://github.com/dotnet/iot/tree/master/src/System.Device.Gpio/System/Device/Gpio以上就是张高兴的 .NET IoT 入门指南:(二)GPIO 的使用的详细内容,更多请关注php中文网其它相关文章!

每个人都需要一台速度更快、更稳定的 PC。随着时间的推移,垃圾文件、旧注册表数据和不必要的后台进程会占用资源并降低性能。幸运的是,许多工具可以让 Windows 保持平稳运行。

 广告
广告Copyright 2014-2025 https://www.php.cn/ All Rights Reserved | php.cn | 湘ICP备2023035733号


 266
266