本文从新手视角介绍变分自编码器(VAE)及条件变分自编码器(CVAE),并用于生成MNIST手写数字。先讲解VAE原理,通过改造自编码器引入随机变量和KL散度损失,使潜空间连续。接着展示VAE网络结构、训练过程及结果,包括生成效果、潜空间分布等,还进行单样本训练实验。最后介绍CVAE,展示其生成效果和潜空间特点。
☞☞☞AI 智能聊天, 问答助手, AI 智能搜索, 免费无限量使用 DeepSeek R1 模型☜☜☜

使用VAE和CVAE生成MNIST手写数字
复现GAN论文屡次失败使我一蹶不振,终日买醉。今痛定思痛,决定洗心革面,重新做人。由于我的基础薄弱,所以今后会从相对基础、容易复现的东西开始学习。
---------------------------------------------------与往日分割----------------------------------------------------
生活还要继续,这几天,我开始学习变分自编码器。看到讲解中几乎每行都有“分布”两个字,这让连分布的概念都忘记的我再次产生了放弃的念头。。。
------------------------------------------------我来了,又走了--------------------------------------------------
“没想到吧,我双回来啦!”
不再沉沦。
麻瓜也有麻瓜的好处——学什么都是新的。今天,我就从一个麻瓜的视角,谈谈对变分自编码器的理解。首先从(压缩)自编码器说起,编码器从原始图像提取出具有代表性的信息,解码器再从这些压缩的信息恢复出原来的图像,即试图在学习潜向量的同时重构输入数据。然而,AE的潜空间不是连续的,解码器只能从潜空间中离散的点产生有意义的输出。与AE不同,VAE的潜空间是连续的,并且解码器本身可作为一个生成模型。那么,怎么改造AE使它有生成能力呢?VAE引入一个新的随机变量输入noise,编码器输出两个与随机变量同维的向量,名为mean和std,然后用乘加等操作让noise和mean、std结合起来作为潜变量 z = noise×std + mean。这样,潜向量既与输入图像有关,又有随机性。接着如果和AE一样只用重构损失来训练,会出现问题:输入同一张图像和不同的随机变量,网络倾向于生成一样的图像而不受噪声影响,也就是z中noise的系数会趋向于0,模型退化成AE。VAE为了防止噪声为零,让编码器输出向标准正态分布看齐,即以与标准正态分布的KL散度作为额外损失。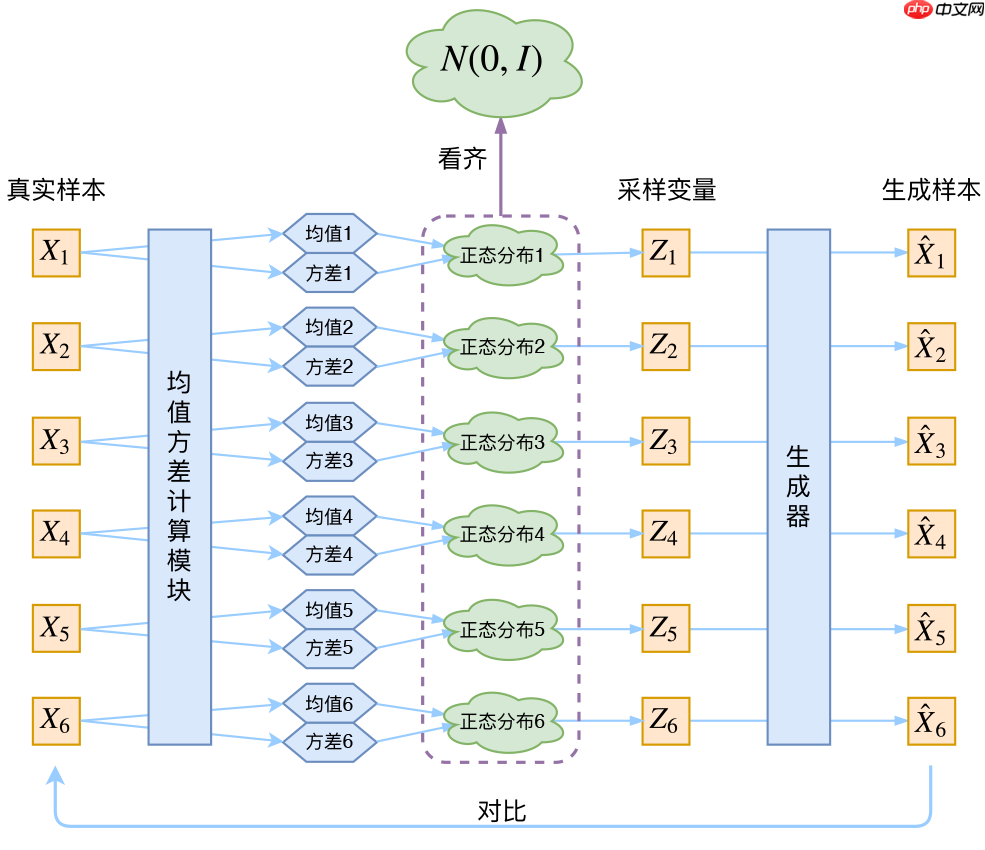
import h5pyimport numpy as npimport matplotlib.pyplot as pltimport paddle as P
import paddle.nn as nn
import paddle.nn.functional as F

place = P.CUDAPlace(0)
P.disable_static(place)
LATENT_DIM = 2model_path = './output/'
使用MNIST数据集
!unzip -qo /home/aistudio/data/data54048/mnist_mat.zip -d /home/aistudio/data
data = h5py.File('/home/aistudio/data/mnist_mat/train.mat')
image = np.array(data['image']).transpose([0,1,3,2]).astype('float32') * 2 - 1label = np.array(data['label']).reshape([60000,10,1,1]).astype('float32')使用卷积+全连接的结构,全连接习惯性用卷积代替。为了方便后续可视化,潜向量的维度设置为2。
class Encoder(nn.Layer):

    def __init__(self, channel=32, latent=LATENT_DIM):
        super(Encoder, self).__init__()
        self.conv1 = nn.Conv2D(1,channel,4,2,1)
        self.conv2 = nn.Conv2D(channel,channel*2,4,2,1)
        self.conv_mean = nn.Conv2D(7*7*channel*2,latent,1,1,0)
        self.conv_logvar = nn.Conv2D(7*7*channel*2,latent,1,1,0)
    def forward(self, x):
        x = self.conv1(x)
        x = F.leaky_relu(x)
        x = self.conv2(x)
        x = F.leaky_relu(x)
        x = P.reshape(x,[x.shape[0],-1,1,1])
        mean = self.conv_mean(x)
        logvar = self.conv_logvar(x)        return mean, logvarclass Decoder(nn.Layer):

    def __init__(self, channel=32, latent=LATENT_DIM):
        super(Decoder, self).__init__()
        self.conv1 = nn.Conv2D(latent,7*7*channel,1,1,0)
        self.conv2 = nn.Conv2DTranspose(channel,channel*2,4,2,1)
        self.conv3 = nn.Conv2DTranspose(channel*2,channel,4,2,1)
        self.conv4 = nn.Conv2D(channel,1,3,1,1)
    def forward(self, x):
        x = self.conv1(x)
        x = F.leaky_relu(x)
        x = P.reshape(x,[x.shape[0],-1,7,7])
        x = self.conv2(x)
        x = F.leaky_relu(x)
        x = self.conv3(x)
        x = F.leaky_relu(x)
        x = self.conv4(x)
x = F.tanh(x) return x用于训练时显示解码器随机生成的效果
def show_image(is_label, decoder=None):
    if decoder==None:
        decoder = Decoder()
    fig = plt.figure(figsize=(16, 8))
    gs = plt.GridSpec(10, 20)
    gs.update(wspace=0.05, hspace=0.05)
    n = 0
    for i in range(10):        if is_label == True:
            L = np.zeros([1,10,1,1]).astype('float32')
            L[:,i,:,:] = 1
            L = P.to_tensor(L)
        for j in range(20):
            ax = plt.subplot(gs[n])
            n += 1
            z = np.random.normal(0.0, 1.0, (1,LATENT_DIM, 1, 1)).astype('float32')
            z = P.to_tensor(z)
            if is_label == True:
                image = (decoder(z,L).numpy().reshape([28,28]) + 1) / 2
            else:
                image = (decoder(z).numpy().reshape([28,28]) + 1) / 2
            plt.axis('off')
            ax.set_xticklabels([])
            ax.set_yticklabels([])
            ax.set_aspect('equal')
            plt.imshow(image, cmap='gray')
plt.show()# show_image(False)前面说到,编码器要输出名为mean和std的向量,这当然不只是名字,而是真的均值和标准差。由于标准差是非负的,所以实际是取方差的对数logvar。于是潜向量z = noise × e0.5logvar + mean。
重构损失这里用L2损失,也可用其他。
KL项为LKL=−21∑i=1d(1+logσ(i)2−μ(i)2−σ(i)2), 其中d是隐变量z的维度,而μ(i)和σ(i)2分别代表一般正态分布的均值向量和方差向量的第i个分量。推导见变分自编码器(一):原来是这么一回事。By苏剑林
def trainer(x, z, label, encoder, decoder, encoder_optimizer, decoder_optimizer, is_label):
    if is_label == True:
        mean, logvar = encoder(x,label)    else:
        mean, logvar = encoder(x)
    z = z * P.exp(0.5*logvar) + mean    if is_label == True:
        y = decoder(z, label)    else:
        y = decoder(z)
    loss_rec = P.mean(P.sum((x-y)**2,[1,2,3]))
    loss_KL = P.mean(P.sum(-0.5*(1 + logvar - mean**2 - P.exp(logvar)),[1,2,3]))
    loss = loss_rec + loss_KL
    encoder.clear_gradients()
    decoder.clear_gradients()
    loss.backward()
    encoder_optimizer.minimize(loss)
    decoder_optimizer.minimize(loss)def train(epoch_num, batchsize, load_model, is_label, model_name):
    encoder = Encoder()
    decoder = Decoder()
    encoder_optimizer = P.optimizer.Adam(learning_rate=1e-4, beta1=0.5, parameters=encoder.parameters())
    decoder_optimizer = P.optimizer.Adam(learning_rate=1e-4, beta1=0.5, parameters=decoder.parameters())    if load_model==True:
        encoder.set_state_dict(P.load(model_path+model_name+'_encoder_'+str(is_label)+'.pdparams'))
        decoder.set_state_dict(P.load(model_path+model_name+'_decoder_'+str(is_label)+'.pdparams'))

    iteration_num = image.shape[0] // batchsize    for epoch in range(epoch_num):
        sequence = [i for i in range(image.shape[0])]
        np.random.shuffle(sequence)
        image998 = image[sequence,:,:,:]
        label998 = label[sequence,:]        for iteration in range(iteration_num):
            image_batch = image998[iteration*batchsize:(iteration+1)*batchsize,:,:,:]
            image_batch = P.to_tensor(image_batch)
            z = np.random.normal(0.0, 1.0, (batchsize,LATENT_DIM, 1, 1)).astype('float32')
            z = P.to_tensor(z)
            label_batch = label998[iteration*batchsize:(iteration+1)*batchsize,:,:,:]
            label_batch = P.to_tensor(label_batch)
            if is_label == True:
                trainer(image_batch, z, label_batch, encoder, decoder, encoder_optimizer, decoder_optimizer, True)            else:
                trainer(image_batch, z, label_batch, encoder, decoder, encoder_optimizer, decoder_optimizer, False)
            if(iteration % 900 == 0):                print('Epoch: ', epoch, ', Iteration: ', iteration)
                show_image(is_label, decoder)
                P.save(encoder.state_dict(), model_path+model_name+'_encoder_'+str(is_label)+'.pdparams')
P.save(decoder.state_dict(), model_path+model_name+'_decoder_'+str(is_label)+'.pdparams')# train(epoch_num=100, batchsize=64, load_model=False, is_label=False, model_name='A')
model_name = 'A'decoder = Decoder()
is_label = Falsedecoder.set_state_dict(P.load(model_path+model_name+'_decoder_'+str(is_label)+'.pdparams'))
show_image(is_label, decoder)
/opt/conda/envs/python35-paddle120-env/lib/python3.7/site-packages/matplotlib/cbook/__init__.py:2349: DeprecationWarning: Using or importing the ABCs from 'collections' instead of from 'collections.abc' is deprecated, and in 3.8 it will stop working
  if isinstance(obj, collections.Iterator):
/opt/conda/envs/python35-paddle120-env/lib/python3.7/site-packages/matplotlib/cbook/__init__.py:2366: DeprecationWarning: Using or importing the ABCs from 'collections' instead of from 'collections.abc' is deprecated, and in 3.8 it will stop working
  return list(data) if isinstance(data, collections.MappingView) else data
/opt/conda/envs/python35-paddle120-env/lib/python3.7/site-packages/numpy/lib/type_check.py:546: DeprecationWarning: np.asscalar(a) is deprecated since NumPy v1.16, use a.item() instead
  'a.item() instead', DeprecationWarning, stacklevel=1)
<Figure size 1152x576 with 200 Axes>
只看随机生成,并得不出什么结论。我们取一些样本,观察它们在编码器的输出有何规律。
可以看到,10种代表不同类别的点,相同类别的聚到了一起,不同类别只有些许重叠。
顺便,如果编码向量满足标准正态分布,在图中所有的点应该组成单位圆。
is_label = Falsesample = 1000encoder = Encoder()
encoder.set_state_dict(P.load(model_path+model_name+'_encoder_'+str(is_label)+'.pdparams'))
mean, logvar = encoder(P.to_tensor(image[:sample,:,:,:]))
d1min = np.squeeze(mean[:,0,:,:].min().numpy())
d1max = np.squeeze(mean[:,0,:,:].max().numpy())
d2min = np.squeeze(mean[:,1,:,:].min().numpy())
d2max = np.squeeze(mean[:,1,:,:].max().numpy())
colors = {        '0':'blue',        '1':'red',        '2':'green',        '3':'yellow',        '4':'pink',        '5':'cyan',        '6':'brown',        '7':'orange',        '8':'limegreen',        '9':'blueviolet'
        }for i in range(sample):
    x = mean[i,0,:,:]
    y = mean[i,1,:,:]
    plt.scatter(x,y,c=colors[str(np.argmax(label[i,:,:,:]))])
    plt.xlabel('Dimension 1')
    plt.ylabel('Dimension 2')
    plt.title('Mean')
plt.show()for i in range(sample):
    x = P.exp(0.5*logvar)[i,0,:,:]
    y = P.exp(0.5*logvar)[i,1,:,:]
    plt.scatter(x,y,c=colors[str(np.argmax(label[i,:,:,:]))])
    plt.xlabel('Dimension 1')
    plt.ylabel('Dimension 2')
    plt.title('Std')
plt.show()<Figure size 432x288 with 1 Axes>
<Figure size 432x288 with 1 Axes>
在均值范围内均匀采样一些潜向量,将它们输入解码器观察生成结果,发现生成的图像类别情况对应上面的均值图。
def interpolation2d(x1,x2,y1,y2,x_dim,y_dim):
    x = np.tile(np.linspace(x1,x2,x_dim),y_dim)
    y = np.linspace(y2,y1,y_dim).repeat(x_dim)
    z = np.concatenate((x[:,None],y[:,None]),axis=1)    return z[:,:,None,None].astype('float32')

row = 20col = 20z = interpolation2d(d1min,d1max,d2min,d2max,col,row)
decoder = Decoder()
is_label = Falsedecoder.set_state_dict(P.load(model_path+model_name+'_decoder_'+str(is_label)+'.pdparams'))
im = (decoder(P.to_tensor(z)).numpy().reshape([z.shape[0],28,28]) + 1) / 2fig = plt.figure(figsize=(25, 25))
gs = plt.GridSpec(row, col)
gs.update(wspace=0.05, hspace=0.05)
n = 0for i in range(row):
    for j in range(col):
        ax = plt.subplot(gs[n])
        plt.imshow(im[n,:,:], cmap='gray')
        plt.axis('off')
        ax.set_xticklabels([])
        ax.set_yticklabels([])
        ax.set_aspect('equal')
n += 1plt.show()<Figure size 1800x1800 with 400 Axes>
有一个疑问,训练时,随机向量与编码器的输出结合作为潜向量(下图第一行),而训练完成后,可以丢掉编码器,直接用随机向量作为潜向量输入解码器(下图第二行),这两种做法有何异同?
可以发现,二者没有对应关系(废话。。。);有时第二行会有比较模糊的结果,是因为均值编码并非标准正态分布,所以在标准正态分布中采样可能会遇到无意义的编码点。
sample = 10mean, logvar = encoder(P.to_tensor(image[:sample,:,:,:]))
noise = P.to_tensor(np.random.normal(0.0, 1.0, (sample,LATENT_DIM, 1, 1)).astype('float32'))
z1 = noise * P.exp(0.5*logvar) + mean
z2 = noise
im1 = (decoder(z1).numpy().reshape([noise.shape[0],28,28]) + 1) / 2im2 = (decoder(z2).numpy().reshape([noise.shape[0],28,28]) + 1) / 2fig = plt.figure(figsize=(20, 4))
gs = plt.GridSpec(2, 10)
gs.update(wspace=0.05, hspace=0.05)
n = 0for i in range(2):
    for j in range(10):
        ax = plt.subplot(gs[n])        if i == 0:
            plt.imshow(im1[n,:,:], cmap='gray')
        else:
            plt.imshow(im2[n-10,:,:], cmap='gray')
        plt.axis('off')
        ax.set_xticklabels([])
        ax.set_yticklabels([])
        ax.set_aspect('equal')
n += 1plt.show()<Figure size 1440x288 with 20 Axes>
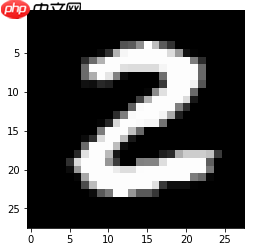
我还是不明白,VAE的生成能力到底是怎么来的。试想,如果只用一个样本训练,网络每次迭代输入相同的图像和不同的噪声,却期望重构出同一张图像,这样怎能生成不同的图像???
于是我做了个实验,只用一张“2”图像来训练,并观察此2周围的潜向量生成的图像。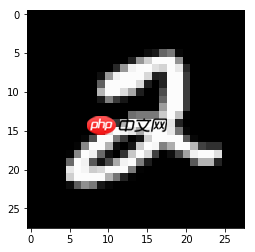
可以看到,中间的生成结果最清楚,越往外越模糊,但并非“各向同性”。另外,无论清楚与否,2骨子里始终是那一个2。
model_name = 'B'image = np.array(data['image']).transpose([0,1,3,2]).astype('float32') * 2 - 1image = image[5,:,:,:]
image = image[None,:,:,:]# train(epoch_num=100, batchsize=1, load_model=False, is_label=False, model_name=model_name)encoder = Encoder()
encoder.set_state_dict(P.load(model_path+model_name+'_encoder_'+str(is_label)+'.pdparams'))
mean, _ = encoder(P.to_tensor(image))
d1min = np.squeeze(mean[:,0,:,:].numpy()-1000)
d1max = np.squeeze(mean[:,0,:,:].numpy()+1000)
d2min = np.squeeze(mean[:,1,:,:].numpy()-1000)
d2max = np.squeeze(mean[:,1,:,:].numpy()+1000)
row = 20col = 20z = interpolation2d(d1min,d1max,d2min,d2max,col,row)
decoder = Decoder()
is_label = Falsedecoder.set_state_dict(P.load(model_path+model_name+'_decoder_'+str(is_label)+'.pdparams'))
im = (decoder(P.to_tensor(z)).numpy().reshape([z.shape[0],28,28]) + 1) / 2fig = plt.figure(figsize=(25, 25))
gs = plt.GridSpec(row, col)
gs.update(wspace=0.05, hspace=0.05)
n = 0for i in range(row):
    for j in range(col):
        ax = plt.subplot(gs[n])
        plt.imshow(im[n,:,:], cmap='gray')
        plt.axis('off')
        ax.set_xticklabels([])
        ax.set_yticklabels([])
        ax.set_aspect('equal')
n += 1plt.show()<Figure size 1800x1800 with 400 Axes>
进一步地,如果用以下两个不同的“2”训练,它们之间的潜变量会生成什么呢?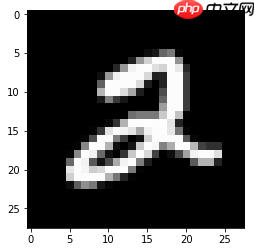
两个2平分了中原。
由此,我有了以下推测:VAE将一个编码点的影响扩大到周围的区域,当有足够多的样本,并对所有编码点作出限制令其密集,那么,在这些编码点影响的区域集合中任意采样,都能生成各种各样有意义的图像了。
model_name = 'C'image = np.array(data['image']).transpose([0,1,3,2]).astype('float32') * 2 - 1image = image[(5,25),:,:,:]
is_label = False# train(epoch_num=100, batchsize=2, load_model=False, is_label=False, model_name=model_name)encoder.set_state_dict(P.load(model_path+model_name+'_encoder_'+str(is_label)+'.pdparams'))
mean, _ = encoder(P.to_tensor(image))
d1min = np.squeeze(mean[:,0,:,:].min().numpy()-1000)
d1max = np.squeeze(mean[:,0,:,:].max().numpy()+1000)
d2min = np.squeeze(mean[:,1,:,:].min().numpy()-1000)
d2max = np.squeeze(mean[:,1,:,:].max().numpy()+1000)
row = 20col = 20z = interpolation2d(d1min,d1max,d2min,d2max,col,row)
decoder = Decoder()
decoder.set_state_dict(P.load(model_path+model_name+'_decoder_'+str(is_label)+'.pdparams'))
im = (decoder(P.to_tensor(z)).numpy().reshape([z.shape[0],28,28]) + 1) / 2fig = plt.figure(figsize=(25, 25))
gs = plt.GridSpec(row, col)
gs.update(wspace=0.05, hspace=0.05)
n = 0for i in range(row):
    for j in range(col):
        ax = plt.subplot(gs[n])
        plt.imshow(im[n,:,:], cmap='gray')
        plt.axis('off')
        ax.set_xticklabels([])
        ax.set_yticklabels([])
        ax.set_aspect('equal')
n += 1plt.show()<Figure size 1800x1800 with 400 Axes>
像CGAN之于GAN,给VAE加上标签条件,使它变为CVAE。
添加条件的方法有很多,这里是在编码器和解码器的输入中都拼接上标签。具体,编码器的标签用全连接变换为(图像高×宽)维,reshape后与图像拼接;解码器的标签直接与潜向量拼接。
class Encoder(nn.Layer):

    def __init__(self, channel=32, latent=LATENT_DIM):
        super(Encoder, self).__init__()
        self.conv_label = nn.Conv2D(10,28*28,1,1,0)
        self.conv1 = nn.Conv2D(2,channel,4,2,1)
        self.conv2 = nn.Conv2D(channel,channel*2,4,2,1)
        self.conv_mean = nn.Conv2D(7*7*channel*2,latent,1,1,0)
        self.conv_logvar = nn.Conv2D(7*7*channel*2,latent,1,1,0)
    def forward(self, x, label):
        label = self.conv_label(label)
        label = P.reshape(label, [label.shape[0],-1,28,28])
        x = P.concat([x,label],1)
        x = self.conv1(x)
        x = F.leaky_relu(x)
        x = self.conv2(x)
        x = F.leaky_relu(x)
        x = P.reshape(x,[x.shape[0],-1,1,1])
        mean = self.conv_mean(x)
        logvar = self.conv_logvar(x)        return mean, logvarclass Decoder(nn.Layer):

    def __init__(self, channel=32, latent=LATENT_DIM):
        super(Decoder, self).__init__()
        self.conv1 = nn.Conv2D(latent+10,7*7*channel,1,1,0)
        self.conv2 = nn.Conv2DTranspose(channel,channel*2,4,2,1)
        self.conv3 = nn.Conv2DTranspose(channel*2,channel,4,2,1)
        self.conv4 = nn.Conv2D(channel,1,3,1,1)
    def forward(self, x, label):
        x = P.concat([x,label],1)
        x = self.conv1(x)
        x = F.leaky_relu(x)
        x = P.reshape(x,[x.shape[0],-1,7,7])
        x = self.conv2(x)
        x = F.leaky_relu(x)
        x = self.conv3(x)
        x = F.leaky_relu(x)
        x = self.conv4(x)
x = F.tanh(x) return ximage = np.array(data['image']).transpose([0,1,3,2]).astype('float32') * 2 - 1# train(epoch_num=100, batchsize=64, load_model=False, is_label=True, model_name='D')首先是根据不同标签随机生成。
model_name = 'D'decoder = Decoder()
is_label = Truedecoder.set_state_dict(P.load(model_path+model_name+'_decoder_'+str(is_label)+'.pdparams'))
show_image(is_label, decoder)
<Figure size 1152x576 with 200 Axes>
接着观察CVAE的潜空间。与VAE不同,不同类别的点并没有泾渭分明,而是散布在整个图中。
is_label = Truesample = 1000encoder = Encoder()
encoder.set_state_dict(P.load(model_path+model_name+'_encoder_'+str(is_label)+'.pdparams'))
mean, logvar = encoder(P.to_tensor(image[:sample,:,:,:]),P.to_tensor(label[:sample,:,:,:]))
d1min = np.squeeze(mean[:,0,:,:].min().numpy())
d1max = np.squeeze(mean[:,0,:,:].max().numpy())
d2min = np.squeeze(mean[:,1,:,:].min().numpy())
d2max = np.squeeze(mean[:,1,:,:].max().numpy())for i in range(sample):
    x = mean[i,0,:,:]
    y = mean[i,1,:,:]
    plt.scatter(x,y,c=colors[str(np.argmax(label[i,:,:,:]))])
    plt.xlabel('Dimension 1')
    plt.ylabel('Dimension 2')
    plt.title('Mean')
plt.show()for i in range(sample):
    x = P.exp(0.5*logvar)[i,0,:,:]
    y = P.exp(0.5*logvar)[i,1,:,:]
    plt.scatter(x,y,c=colors[str(np.argmax(label[i,:,:,:]))])
    plt.xlabel('Dimension 1')
    plt.ylabel('Dimension 2')
    plt.title('Std')
plt.show()<Figure size 432x288 with 1 Axes>
<Figure size 432x288 with 1 Axes>
均匀采样潜空间,根据不同的标签生成图像。可以观察到,不同类别的数字有相似的变化规律。
row = 20col = 20z = interpolation2d(d1min,d1max,d2min,d2max,col,row)
decoder = Decoder()
is_label = Truedecoder.set_state_dict(P.load(model_path+model_name+'_decoder_'+str(is_label)+'.pdparams'))# im = (decoder(P.to_tensor(z)).numpy().reshape([z.shape[0],28,28]) + 1) / 2def show250(label):
    im = (decoder(P.to_tensor(z),P.to_tensor(label)).numpy().reshape([z.shape[0],28,28]) + 1) / 2
    fig = plt.figure(figsize=(25, 25))
    gs = plt.GridSpec(row, col)
    gs.update(wspace=0.05, hspace=0.05)
    n = 0
    for i in range(row):
        for j in range(col):
            ax = plt.subplot(gs[n])
            plt.imshow(im[n,:,:], cmap='gray')
            plt.axis('off')
            ax.set_xticklabels([])
            ax.set_yticklabels([])
            ax.set_aspect('equal')
            n += 1
    plt.show()

eye10 = np.eye(10)
label = np.ones([z.shape[0],10,1,1]) * eye10[2][None,:,None,None]
show250(label.astype('float32'))
label = np.ones([z.shape[0],10,1,1]) * eye10[5][None,:,None,None]
show250(label.astype('float32'))
label = np.ones([z.shape[0],10,1,1]) * eye10[0][None,:,None,None]
show250(label.astype('float32'))<Figure size 1800x1800 with 400 Axes>
<Figure size 1800x1800 with 400 Axes>
<Figure size 1800x1800 with 400 Axes>
以上就是从小白视角初识变分自编码器的详细内容,更多请关注php中文网其它相关文章!

每个人都需要一台速度更快、更稳定的 PC。随着时间的推移,垃圾文件、旧注册表数据和不必要的后台进程会占用资源并降低性能。幸运的是,许多工具可以让 Windows 保持平稳运行。

 C++高性能并发应用_C++如何开发性能关键应用
 Java AI集成Deep Java Library_Java怎么集成AI模型部署
 Golang后端API开发_Golang如何高效开发后端和API
 Python异步并发改进_Python异步编程有哪些新改进
 C++系统编程内存管理_C++系统编程怎么与Rust竞争内存安全
 Java GraalVM原生镜像构建_Java怎么用GraalVM构建高效原生镜像
 Python FastAPI异步API开发_Python怎么用FastAPI构建异步API
 C++现代C++20/23/26特性_现代C++有哪些新标准特性如modules和coroutines
 广告
广告Copyright 2014-2025 https://www.php.cn/ All Rights Reserved | php.cn | 湘ICP备2023035733号


 116
116


