☞☞☞AI 智能聊天, 问答助手, AI 智能搜索, 免费无限量使用 DeepSeek R1 模型☜☜☜

本文推荐英伟达开源的一个自底向上姿态模型,无需先进行人物检测,直接对姿态关键点进行估计,再进行多人匹配, 运行效率非常高。
TrtPose是一款轻量级,推理速度极快的姿态估计模型,作者在本地基于C++、Cuda和Tensorrt实现的TrtPose,单帧推理不足2ms, 在JetsonNano上也运行得非常快。
原代码基于PyTorch实现: https://github.com/NVIDIA-AI-IOT/trt_pose
在Python代码基础上,本文也基于TensorRT c++ API手撕网络层,创建更高效的TensorRT引擎文件,在C++ Demo项目中以平均1.6ms(只是enqueue不包含其他步骤)速度完成视频推理。
网络结构相对比较简单,以Resnet18作为BackBone, Head部分采用CmapPafHeadAttention, 包含了注意力模块和UpsampleCBR上采样模块。
Resnet18可以直接使用paddle.vision.models里的, 所以搭建起来非常方便。
class ResNetBackbone(nn.Layer):
    def __init__(self, resnet):
        super(ResNetBackbone, self).__init__()
        self.resnet = resnet
    def forward(self, x):
        x = self.resnet.conv1(x)
        x = self.resnet.bn1(x)
        x = self.resnet.relu(x)
        x = self.resnet.maxpool(x)
        x = self.resnet.layer1(x) # /4
        x = self.resnet.layer2(x) # /8
        x = self.resnet.layer3(x) # /16
        x = self.resnet.layer4(x) # /32
        return xclass UpsampleCBR(nn.Sequential):
    def __init__(self, input_channels, output_channels, count=1, num_flat=0):
        layers = []        for i in range(count):            if i == 0:
                inch = input_channels            else:
                inch = output_channels

            layers += [
                nn.Conv2DTranspose(inch, output_channels, kernel_size=4, stride=2, padding=1),
                nn.BatchNorm2D(output_channels),
                nn.ReLU()
            ]            for i in range(num_flat):
                layers += [
                    nn.Conv2D(output_channels, output_channels, kernel_size=3, stride=1, padding=1),
                    nn.BatchNorm2D(output_channels),
                    nn.ReLU()
                ]
        super(UpsampleCBR, self).__init__(*layers)class CmapPafHeadAttention(nn.Layer):
    def __init__(self, input_channels, cmap_channels, paf_channels, upsample_channels=256, num_upsample=0, num_flat=0):
        super(CmapPafHeadAttention, self).__init__()
        self.cmap_up = UpsampleCBR(input_channels, upsample_channels, num_upsample, num_flat)
        self.paf_up = UpsampleCBR(input_channels, upsample_channels, num_upsample, num_flat)
        self.cmap_att = nn.Conv2D(upsample_channels, upsample_channels, kernel_size=3, stride=1, padding=1)
        self.paf_att = nn.Conv2D(upsample_channels, upsample_channels, kernel_size=3, stride=1, padding=1)
        self.cmap_conv = nn.Conv2D(upsample_channels, cmap_channels, kernel_size=1, stride=1, padding=0)
        self.paf_conv = nn.Conv2D(upsample_channels, paf_channels, kernel_size=1, stride=1, padding=0)    def forward(self, x):
        xc = self.cmap_up(x)
        ac =  nn.functional.sigmoid(self.cmap_att(xc))
        xp = self.paf_up(x)
ap = nn.functional.tanh(self.paf_att(xp)) return self.cmap_conv(xc * ac), self.paf_conv(xp * ap)自底向上目前有两种主流的方式, 第一种直接回归坐标, 思路直接,可以直接获得关键点位置,往往有更快的预测速度。然而,由于人体姿态的自由度很大,直接预测坐标的建模方式对神经网络的预测并不友好,预测精度受到了一定制约。第二种思路基于热图的方法在每个位置预测一个分数,来表征该位置属于关键点的置信度。根据预测的热图,进一步提取关键点的坐标位置。
TrtPose也是基于热图的方式,采用OpenPose的解码原理。所以后处理相对比较复杂,而且源代码是c++插件的方式, 这里我将其改成了python代码并简单做了相应的输出对齐。 模型推理的大致流程如下:

更多详细的原理介绍可参考: https://docs.nvidia.com/isaac/isaac/packages/skeleton_pose_estimation/doc/2Dskeleton_pose_estimation.html
%cd /home/aistudio/work/human
!python infer.py /home/aistudio/tmp/10p.jpeg
推理结果图片:
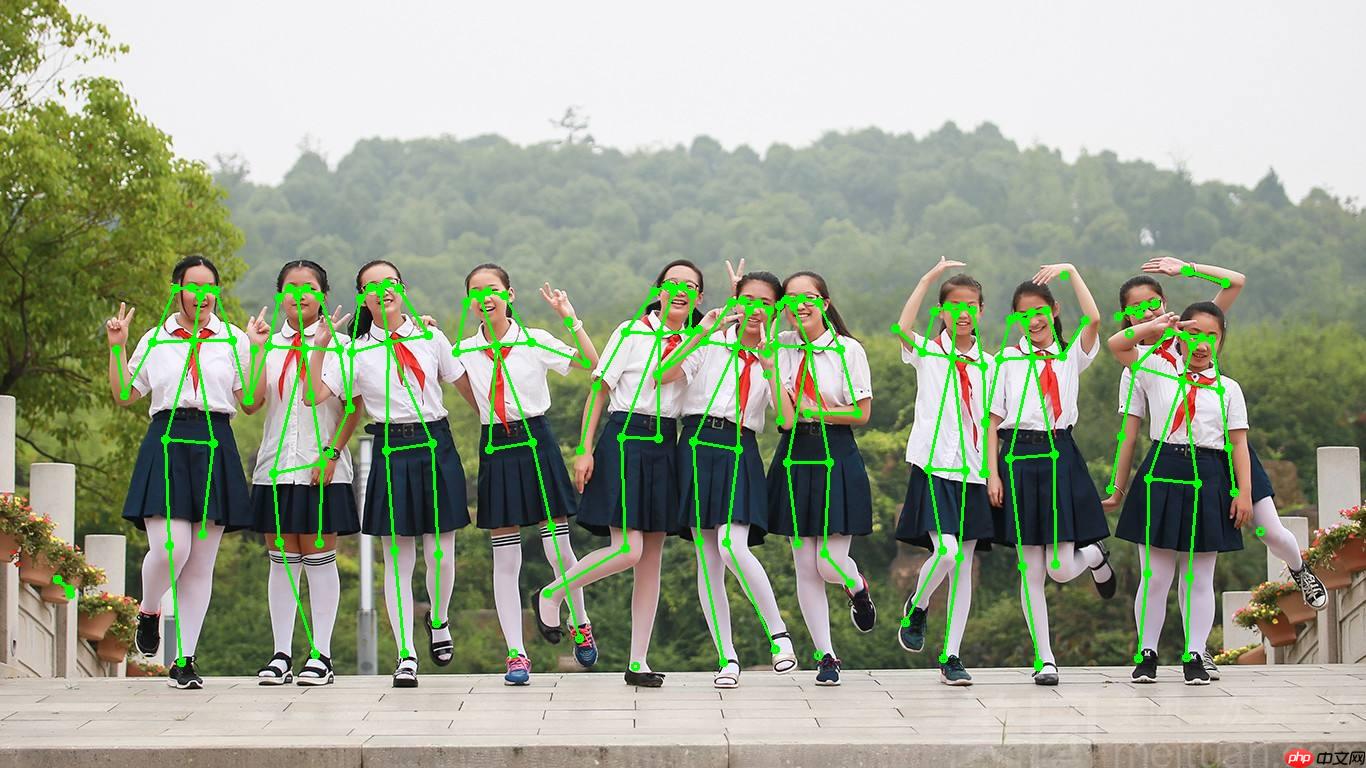
from work.human.trt_pose_model import get_modelimport paddleimport structinput = paddle.ones((1, 3, 224, 224))
model = get_model()# print(model) #查看网络结构wgts = paddle.load("/home/aistudio/data/data127829/trt_pose.pdparams")
f = open('trt_pose.wts', 'w')
f.write('{}\n'.format(len(wgts.keys())))for k, v in wgts.items():    # print("weight key: ", k, v.shape)
    vr = v.numpy().flatten()
    f.write('{} {} '.format(k, len(vr)))    for vv in vr:
        f.write(' ')
        f.write(struct.pack('>f',float(vv)).hex())
    f.write('\n')
f.close()print("weight file created!!!")weight file created!!!
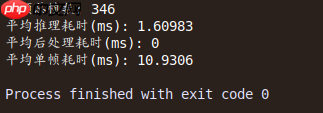
demo中支持图片和视频文件推理,运行命令:
./trt_pose -d
测试一段364帧的视频,耗时统计如下:
本数据集来源: https://github.com/noahcao/animal-pose-dataset
包含有5种类别(cow, sheep, horse, cat, dog), 数据标注按照COCO格式,对于每个实例标注有边界框[xmin, ymin, xmax, ymax], 以及关键点的二维坐标[x, y, visible]
20 关键点: Two eyes, Throat, Nose, Withers, Two Earbases, Tailbase, Four Elbows, Four Knees, Four Paws.
# 解压你所挂载的数据集在目录下!unzip -oq /home/aistudio/data/data127829/images.zip -d /home/aistudio/data
!cp /home/aistudio/data/data127829/keypoints.json /home/aistudio/data# 查看数据集的目录结构!ls /home/aistudio/data
!tree /home/aistudio/data -d
data127829  images  keypoints.json
/home/aistudio/data
├── data127829
└── images

2 directories
import cv2import matplotlib.pyplot as pltfrom work.animal.pre_visualize import visualize_img
plt.rcParams['font.sans-serif'] = ['SimHei']
plt.rcParams['axes.unicode_minus'] = False%matplotlib inline

img = visualize_img()
plt.figure("Image") # 图像窗口名称plt.imshow(img)
plt.axis('on') # 关掉坐标轴为 offplt.title('image') # 图像题目plt.show()/opt/conda/envs/python35-paddle120-env/lib/python3.7/site-packages/matplotlib/__init__.py:107: DeprecationWarning: Using or importing the ABCs from 'collections' instead of from 'collections.abc' is deprecated, and in 3.8 it will stop working from collections import MutableMapping /opt/conda/envs/python35-paddle120-env/lib/python3.7/site-packages/matplotlib/rcsetup.py:20: DeprecationWarning: Using or importing the ABCs from 'collections' instead of from 'collections.abc' is deprecated, and in 3.8 it will stop working from collections import Iterable, Mapping /opt/conda/envs/python35-paddle120-env/lib/python3.7/site-packages/matplotlib/colors.py:53: DeprecationWarning: Using or importing the ABCs from 'collections' instead of from 'collections.abc' is deprecated, and in 3.8 it will stop working from collections import Sized
6117
image_path===> /home/aistudio/data/images/2007_000063.jpg
/opt/conda/envs/python35-paddle120-env/lib/python3.7/site-packages/matplotlib/cbook/__init__.py:2349: DeprecationWarning: Using or importing the ABCs from 'collections' instead of from 'collections.abc' is deprecated, and in 3.8 it will stop working
  if isinstance(obj, collections.Iterator):
/opt/conda/envs/python35-paddle120-env/lib/python3.7/site-packages/matplotlib/cbook/__init__.py:2366: DeprecationWarning: Using or importing the ABCs from 'collections' instead of from 'collections.abc' is deprecated, and in 3.8 it will stop working
  return list(data) if isinstance(data, collections.MappingView) else data
/opt/conda/envs/python35-paddle120-env/lib/python3.7/site-packages/matplotlib/font_manager.py:1331: UserWarning: findfont: Font family ['sans-serif'] not found. Falling back to DejaVu Sans
  (prop.get_family(), self.defaultFamily[fontext]))
<Figure size 432x288 with 1 Axes>
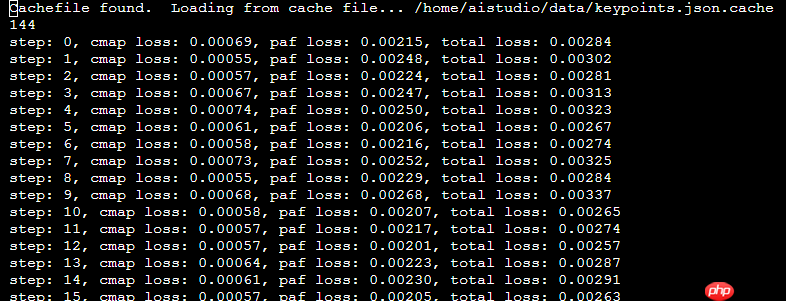
模型训练时间耗时太长, 可能原因是数据加载部分从C++插件方式转换成了python, 运行效率大幅降低。 目前训练的loss只能到0.001123及 0.001038
%cd /home/aistudio/work/animal/trt_pose_model.py
!python train.py
基于训练好的模型,可直接推理图片. 下面两条命令推理结果如下:
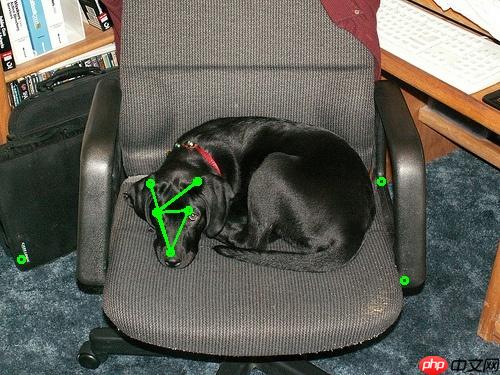
%cd /home/aistudio/work/animal/
!python infer.py /home/aistudio/data/images/2007_000063.jpg
/home/aistudio/work/animal
W0324 16:15:02.460222  2386 device_context.cc:447] Please NOTE: device: 0, GPU Compute Capability: 7.0, Driver API Version: 10.1, Runtime API Version: 10.1
W0324 16:15:02.465003  2386 device_context.cc:465] device: 0, cuDNN Version: 7.6.
(1, 21, 2, 100)
infer done
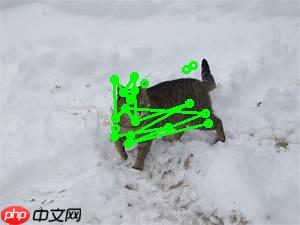
%cd /home/aistudio/work/animal/
!python infer.py /home/aistudio/data/images/ca80.jpeg
/home/aistudio/work/animal
W0324 16:15:13.134407  2478 device_context.cc:447] Please NOTE: device: 0, GPU Compute Capability: 7.0, Driver API Version: 10.1, Runtime API Version: 10.1
W0324 16:15:13.139220  2478 device_context.cc:465] device: 0, cuDNN Version: 7.6.
(1, 21, 2, 100)
infer done
以上就是【AI达人创造营第二期】TrtPose复现、手动转TRT并训练动物姿态的详细内容,更多请关注php中文网其它相关文章!

每个人都需要一台速度更快、更稳定的 PC。随着时间的推移,垃圾文件、旧注册表数据和不必要的后台进程会占用资源并降低性能。幸运的是,许多工具可以让 Windows 保持平稳运行。

 广告
广告Copyright 2014-2025 https://www.php.cn/ All Rights Reserved | php.cn | 湘ICP备2023035733号


 317
317


